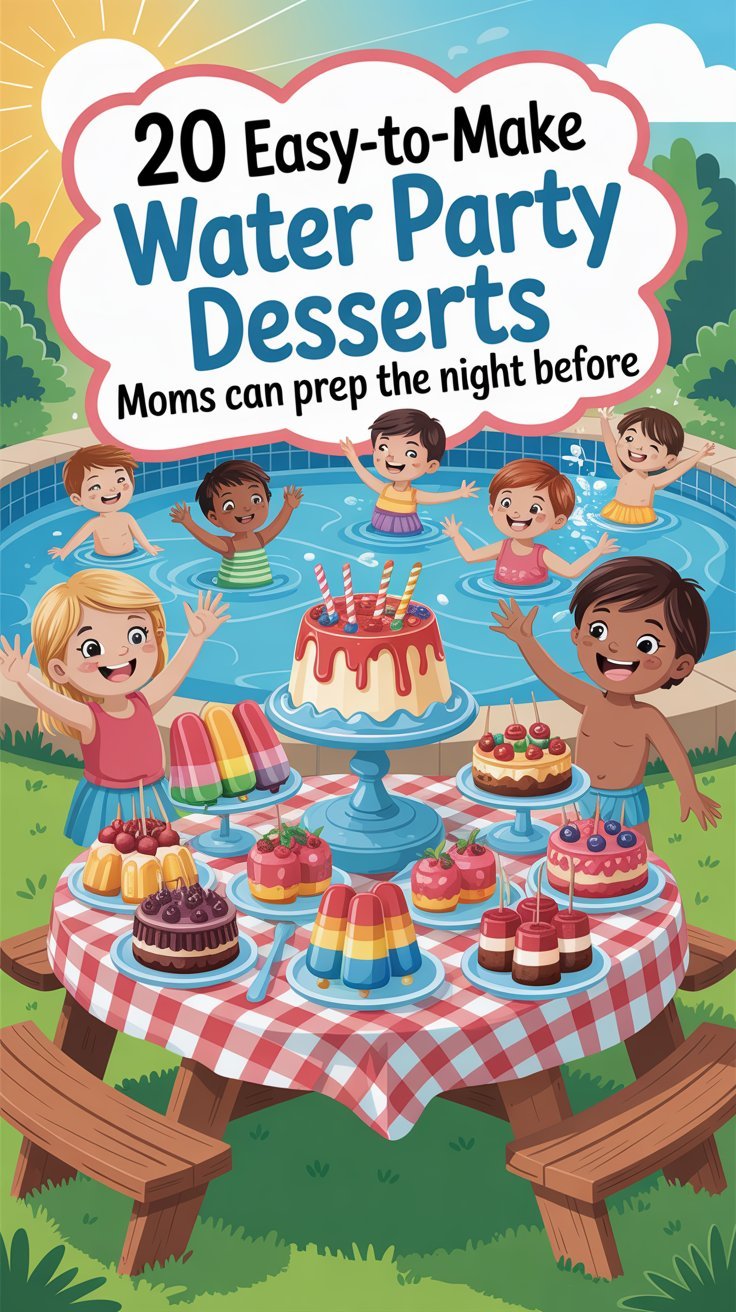
Ready to whip up some fun and refreshing desserts for your next water party? We’ve got 20 easy recipes that you can prep the night before, making your day stress-free and delicious. From fruity popsicles to delightful cakes, these treats will keep everyone cool and satisfied while you enjoy the sun. Plus, don’t forget to check out our “Tools and Supplies Needed” section for everything you’ll need to get started!
Watermelon Jello Cups

Watermelon Jello Cups are a fun and refreshing dessert that will instantly brighten up any gathering. Perfectly sweet and bursting with flavor, these layered cups of jello mimic the colors of watermelon and are a hit among both kids and adults. They’re simple to make and can be prepared the night before, making them a stress-free option for any water-themed party.
The combination of fruity jello flavors and chocolate chips adds a playful twist to this easy-to-make treat. The layers of green and red jello create a vibrant presentation, while the chocolate chips add a delightful crunch. Your guests will love digging into these colorful cups!
Tools and Supplies Needed
- Clear plastic cups
- Pots for heating
- Mixing spoon
- Refrigerator
Ingredients
- 1 package of watermelon-flavored jello
- 1 package of green apple-flavored jello
- 2 cups boiling water
- 2 cups cold water
- 1 cup chocolate chips
Instructions
- Prepare the Jello: In separate bowls, dissolve the watermelon jello and green apple jello in 1 cup of boiling water each. Stir until completely dissolved.
- Add Cold Water: Once dissolved, add 1 cup of cold water to each bowl and mix well.
- Layer the Jello: Start by pouring a layer of green apple jello into the bottom of each plastic cup. Place them in the refrigerator until set, about 30 minutes.
- Repeat with Watermelon Jello: Once the green layer is set, pour the watermelon jello on top of the green layer, filling the cups. Refrigerate again until set, about another 30 minutes.
- Add Toppings: Once both layers are fully set, top each cup with chocolate chips before serving.
Beach Cup Parfaits

Beach Cup Parfaits are a delightful treat that brings a taste of summer right to your table. These colorful and playful desserts combine layers of creamy pudding, crushed cookies, and vibrant blue gelatin, simulating the look of sparkling ocean waters and sandy beaches.
This recipe is straightforward and perfect for prepping the night before your water party. It’s not only visually appealing but also deliciously sweet, making it a hit with both kids and adults. Each layer adds a fun texture and flavor, transforming a simple dessert into a memorable experience.
Tools and Supplies Needed
- Large mixing bowls
- Whisk
- Spatula
- Serving cups or bowls
- Refrigerator
Ingredients
- 2 cups vanilla pudding mix
- 4 cups milk
- 2 cups blue gelatin (prepared)
- 2 cups crushed vanilla wafers
- 1 cup gummy bears or other fun candies
- Whipped cream (for topping)
- Mini paper umbrellas (for decoration)
Instructions
- Prepare the Pudding: In a large mixing bowl, whisk together the vanilla pudding mix and milk until smooth and thick. Let it sit for about 5 minutes.
- Layer the Dessert: In serving cups, start with a layer of crushed vanilla wafers, followed by a layer of pudding, then a layer of blue gelatin. Repeat until cups are filled, finishing with blue gelatin on top.
- Add Toppings: Top each parfait with a dollop of whipped cream and sprinkle gummy bears around for added fun. Insert mini paper umbrellas for a festive touch.
- Chill: Place the parfaits in the refrigerator for at least an hour before serving to let the flavors meld together.
Frozen Yogurt Bark

Frozen yogurt bark is a delightful treat that’s both refreshing and easy to whip up. With a creamy base and colorful toppings, it’s a hit among kids and adults alike. The taste is a perfect balance of sweet and tangy, making it a light yet satisfying dessert that feels indulgent without the guilt.
Making frozen yogurt bark is simple and can be done in just a few steps, allowing you to prepare it the night before your water party. You can customize toppings to suit everyone’s preferences, from fresh fruits to crunchy granola, making it versatile and fun!
Ingredients
- 2 cups plain yogurt (Greek or regular)
- 1 tablespoon honey or maple syrup (optional)
- 1/2 cup granola
- 1 cup mixed berries (strawberries, blueberries, blackberries)
- 1/4 cup chopped nuts (optional)
Instructions
- Prepare the Yogurt Base: In a bowl, mix yogurt and honey (if using) until well combined.
- Spread the Yogurt: Line a baking sheet with parchment paper and spread the yogurt mixture evenly onto the sheet, about 1/4 inch thick.
- Add Toppings: Sprinkle granola, mixed berries, and nuts evenly over the yogurt layer.
- Freeze: Place the baking sheet in the freezer for about 4-6 hours, or until fully frozen.
- Serve: Once frozen, break the yogurt bark into pieces and enjoy! Store any leftovers in an airtight container in the freezer.
Pool Blue Poke Cake

Pool Blue Poke Cake is a fun and colorful dessert that brings the spirit of summer right to your dining table. This cake is light, fluffy, and made even more delightful with a refreshing blue jello filling that resembles a sparkling pool on a sunny day. It’s incredibly simple to whip up, making it the perfect treat for any water-themed party.
Kids and adults alike will love the sweet, fruity flavor that bursts with every bite. Topped with fluffy whipped cream and playful candy decorations, this cake is sure to be the star of your gathering. Plus, it can be made the night before, allowing you to enjoy the party without any last-minute kitchen stress!
Tools and Supplies Needed
- 9×13 inch baking dish
- Mixing bowls
- Whisk or electric mixer
- Spatula
- Poking tool (like a skewer or fork)
Ingredients
- 1 box of yellow cake mix
- 3 large eggs
- 1 cup water
- 1 package (3 oz) blue raspberry jello
- 1 cup boiling water
- 1 cup whipped topping (like Cool Whip)
- Decorative candies (like gummy fish and colorful sprinkles)
Instructions
- Preheat your oven to 350°F (175°C). Grease and flour a 9×13 inch baking dish.
- Prepare the cake mix according to the package instructions, using water, eggs, and any required ingredients. Pour the batter into the prepared baking dish.
- Bake for about 30 minutes or until a toothpick inserted in the center comes out clean. Let the cake cool completely.
- Once cooled, use a poking tool to poke holes all over the cake, about 1 inch apart.
- In a separate bowl, dissolve the blue raspberry jello in boiling water. Stir well until completely dissolved. Pour the jello mixture over the cake, allowing it to seep into the holes.
- Refrigerate the cake for at least 2 hours to set the jello.
- Once set, spread whipped topping evenly over the cake and decorate with gummy fish and sprinkles for a fun touch.
- Slice and serve chilled, enjoying the refreshing taste of summer!
Lifesaver Fruit Kabobs
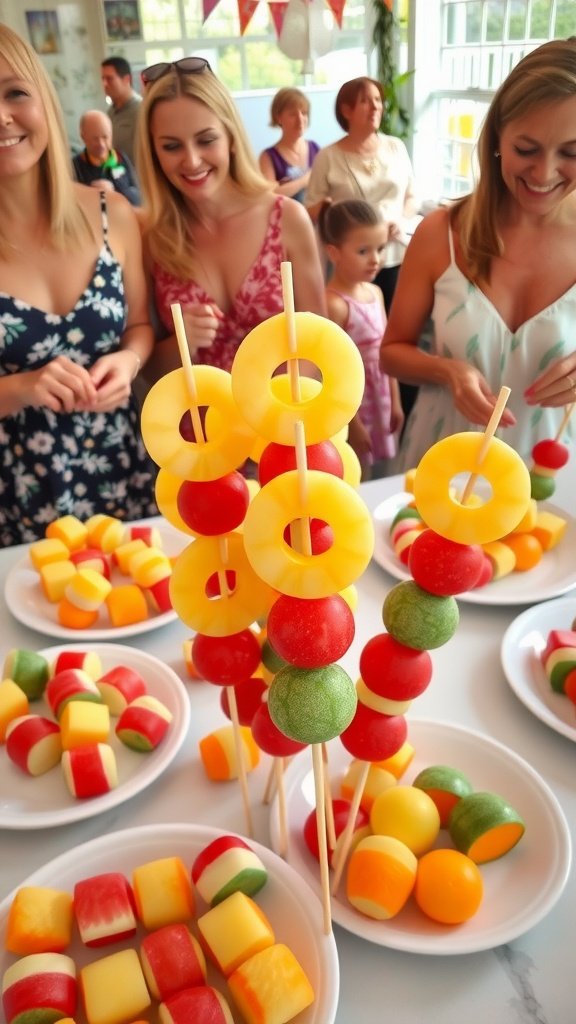
Lifesaver fruit kabobs are a fun and colorful treat that kids and adults alike will enjoy. These fruity skewers are easy to make and can be prepared the night before your water party, making them a convenient option for busy moms. The combination of sweet melons, juicy berries, and tangy citrus will keep everyone refreshed and satisfied on a hot day.
These kabobs not only look festive but are also a healthy snack that can be customized with your favorite fruits. The flavors blend beautifully, creating a delicious burst of freshness with every bite. Plus, they are perfect for little hands, encouraging kids to eat more fruit!
Tools and Supplies Needed
- Wooden skewers
- Cutting board
- Knife
- Large mixing bowl
- Plates for serving
Ingredients
- 1 cup watermelon, cut into cubes
- 1 cup cantaloupe, cut into cubes
- 1 cup honeydew melon, cut into cubes
- 1 cup strawberries, hulled
- 1 cup pineapple, cut into rings or cubes
- 1 cup green grapes
- 1 cup blueberries
Instructions
- Prepare the Fruit: Wash all the fruits thoroughly. Cut the watermelon, cantaloupe, honeydew, and pineapple into bite-sized pieces. Hull the strawberries and keep them whole. Rinse the grapes and blueberries.
- Assemble the Kabobs: Take a wooden skewer and start threading the fruit onto it. Alternate between different fruits for a colorful presentation, starting with a watermelon cube, followed by a honeydew, a grape, a strawberry, and a pineapple ring. Repeat until the skewer is filled, leaving a little space at the bottom for easy handling.
- Chill and Serve: Once all the kabobs are assembled, place them on a plate and cover with plastic wrap. Refrigerate until ready to serve. Enjoy these refreshing fruit kabobs at your water party!
Ocean Water Punch Cups

Ocean Water Punch Cups are a fun and refreshing treat that perfectly captures the essence of summer. With their vibrant blue color and playful gummy sea creatures, these cups are a hit at any water party.
Easy to prepare, this delightful drink combines sweet flavors with a splash of fizzy soda, making it a favorite among kids and adults alike. The addition of gummy candy adds a whimsical touch that makes every sip feel like a little adventure.
Tools and Supplies Needed
- Clear cups
- Mixing pitcher
- Stirring spoon
- Measuring cups
Ingredients
- 4 cups blue sports drink
- 2 cups lemon-lime soda
- 1 cup pineapple juice
- Gummy sea creatures (e.g., fish, starfish, sea turtles)
- Ice cubes
Instructions
- In a large mixing pitcher, combine the blue sports drink, lemon-lime soda, and pineapple juice. Stir gently to mix the ingredients.
- Fill each clear cup with ice cubes to the top.
- Pour the blue punch mixture over the ice in each cup, leaving some space at the top.
- Top off each cup with a handful of gummy sea creatures for a fun and decorative touch.
- Serve immediately, or refrigerate until ready to serve. Enjoy your Ocean Water Punch Cups!
Mermaid Tail Rice Krispie Treats
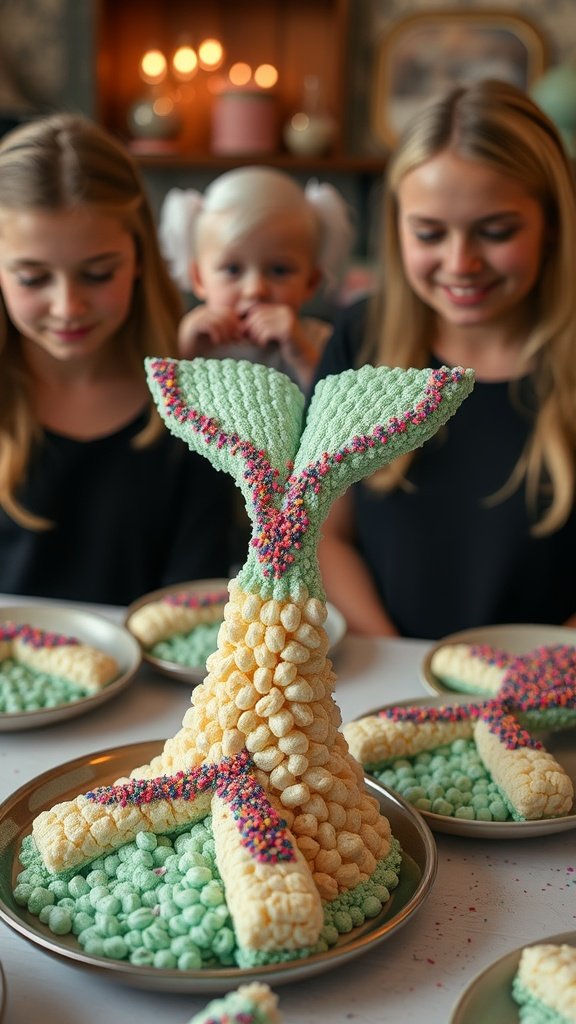
Mermaid Tail Rice Krispie Treats are a fun and colorful dessert that brings a splash of whimsy to any water party. With their delightful combination of crispy cereal and marshmallows, these treats are sweet, chewy, and a total hit with kids and adults alike. Plus, they’re easy to whip up the night before, making them a perfect choice for busy moms.
The vibrant colors and playful shape make these treats stand out, making your party feel extra special. The addition of sprinkles adds a fun touch that everyone will love. Get ready to impress your little mermaids with this tasty treat!
Tools and Supplies Needed
- Large mixing bowl
- Microwave-safe bowl
- Spatula
- 9×13 inch baking dish
- Wax paper or parchment paper
- Cookie cutter (mermaid tail shape)
- Sprinkles for decoration
Ingredients
- 6 cups Rice Krispies cereal
- 1 package (10 oz) marshmallows
- 3 tablespoons unsalted butter
- Food coloring (green and blue)
- Rainbow sprinkles
Instructions
- Prepare the Mixture: In a microwave-safe bowl, melt the butter and marshmallows together in 30-second intervals, stirring in between, until fully melted and smooth.
- Add Color: Divide the melted mixture into two bowls. Add green food coloring to one bowl and blue to another, mixing until you achieve your desired colors.
- Combine: Add 3 cups of Rice Krispies to each bowl. Mix well until all the cereal is coated with the melted marshmallow mixture.
- Shape the Treats: Press the green mixture into one side of the greased baking dish and the blue mixture into the other side. Let it cool for about 30 minutes.
- Cut and Decorate: Once cooled, use the cookie cutter to cut out mermaid tails. Decorate with sprinkles to add some sparkle.
Dolphin Banana Pops

Dolphin Banana Pops are a fun and tasty treat that combines the sweetness of bananas with a playful design. They are perfect for summer gatherings or water-themed parties. With their creamy coating and fruity accents, these pops are not only delicious but also easy to make.
This simple recipe can be prepped the night before, making it a great option for busy moms. Your kids will love how cute they are, and you’ll love how quickly they come together!
Tools and Supplies Needed
- Bananas
- Milk chocolate or white chocolate for coating
- Blue food coloring (if using white chocolate)
- Wooden popsicle sticks
- Blueberries for decoration
- Wax paper
- Microwave-safe bowl
- Knife for cutting
Ingredients
- 2 ripe bananas
- 1 cup milk chocolate or white chocolate chips
- 1-2 teaspoons blue food coloring (if using white chocolate)
- Fresh blueberries
Instructions
- Prepare the Bananas: Peel the bananas and cut them in half. Insert a popsicle stick into each banana half, making sure it goes in about halfway.
- Melt the Chocolate: In a microwave-safe bowl, melt the chocolate chips in 30-second intervals, stirring in between until smooth. If using white chocolate, mix in blue food coloring to achieve a dolphin-like color.
- Coat the Bananas: Dip each banana half into the melted chocolate, ensuring they are fully coated. Allow excess chocolate to drip off.
- Decorate: Place the coated bananas on a sheet of wax paper. Use blueberries to create eyes or other fun decorations on the chocolate-covered surface.
- Freeze: Place the decorated banana pops in the freezer for about 1-2 hours or until firm. Once frozen, they’re ready to serve!
Beach Ball Cookie Cups

Beach Ball Cookie Cups are a fun and playful treat that perfectly captures the spirit of summer gatherings. These cookie cups are filled with a light and creamy frosting, topped with colorful fondant to resemble beach balls. Not only do they taste amazing, with a delightful combination of sweetness and creaminess, but they’re also simple enough for even novice bakers to whip up the night before your water party.
Your family and friends will love the vibrant colors and playful design, making them a hit with both kids and adults. Plus, they can be made ahead of time, allowing you to focus on enjoying the day in the sun!
Tools and Supplies Needed
- Mixing bowl
- Electric mixer
- Muffin tin
- Parchment paper
- Rolling pin
- Cookie cutters
- Measuring cups and spoons
- Spatula
Ingredients
- 1 cup unsalted butter, softened
- 1 cup granulated sugar
- 1 large egg
- 1 teaspoon vanilla extract
- 2 1/2 cups all-purpose flour
- 1 teaspoon baking soda
- 1/2 teaspoon salt
- 1 cup frosting (store-bought or homemade)
- Colored fondant (red, yellow, blue, green)
Instructions
- Preheat the oven to 350°F (175°C). Grease a muffin tin or line it with parchment paper.
- In a mixing bowl, cream together the softened butter and sugar until light and fluffy. Add in the egg and vanilla extract, mixing well.
- In another bowl, combine the flour, baking soda, and salt. Gradually add the dry ingredients to the wet mixture, mixing until just combined.
- Press the cookie dough into the muffin tin, creating cup shapes. Bake for about 10-12 minutes or until lightly golden. Let them cool completely.
- Once cooled, fill each cookie cup with frosting. Roll out the fondant and cut out shapes to create beach ball designs. Place the fondant on top of the frosting, decorating as desired.
- Serve immediately or store in an airtight container in the fridge until ready to enjoy!
Flip-Flop Sugar Cookies

Flip-flop sugar cookies are a fun and playful treat perfect for any water-themed gathering. These cookies are not only adorable but also deliciously sweet, making them a hit among kids and adults alike. With their bright colors and unique shape, they add a festive touch to your dessert table.
This recipe is simple to make, allowing you to whip up a batch the night before your party. The cookies have a soft, chewy texture and can be decorated with vibrant icing to resemble trendy flip-flops. Everyone will love customizing their cookies, making it a delightful activity for guests!
Tools and Supplies Needed
- Baking sheet
- Parchment paper
- Mixing bowls
- Rolling pin
- Cookie cutter (flip-flop shape)
- Piping bags for icing
- Offset spatula
- Cooling rack
Ingredients
- 2 3/4 cups all-purpose flour
- 1 teaspoon baking powder
- 1/2 teaspoon salt
- 1 cup unsalted butter, softened
- 1 1/2 cups granulated sugar
- 1 large egg
- 1 teaspoon vanilla extract
- Food coloring (various colors for icing)
- 2 cups powdered sugar (for icing)
- 2 tablespoons milk (for icing)
Instructions
- Prepare the Dough: In a mixing bowl, whisk together flour, baking powder, and salt. In a separate bowl, cream together the softened butter and granulated sugar until light and fluffy. Beat in the egg and vanilla extract. Gradually add the dry ingredients to the wet ingredients, mixing until combined.
- Chill: Wrap the dough in plastic wrap and refrigerate for at least 1 hour to firm up.
- Shape and Bake: Preheat the oven to 350°F (175°C). Roll out the chilled dough on a floured surface to about 1/4 inch thick. Use the flip-flop cookie cutter to cut out shapes and place them on a baking sheet lined with parchment paper. Bake for 8-10 minutes or until the edges are lightly golden. Let cool on a rack.
- Decorate: In a mixing bowl, combine powdered sugar and milk to create a smooth icing. Divide into smaller bowls and add food coloring as desired. Use piping bags to decorate the cookies with colorful icing to resemble flip-flops.
- Serve and Enjoy: Once the icing has set, your flip-flop cookies are ready to be served at your water party!
Wave Jello Cups

Wave Jello Cups are a fun and refreshing treat perfect for any water-themed gathering. With their vibrant colors and light, sweet flavor, these cups bring a burst of joy to the dessert table. They are super easy to make, allowing moms to whip them up the night before, so they’re ready to go when the party starts.
These delightful treats consist of layers of blue raspberry and whipped topping, mimicking the look of ocean waves. Kids love the fun textures and bright colors, making them a perfect addition to any summer celebration!
Tools and Supplies Needed
- Clear plastic cups
- Mixing bowls
- Whisk
- Refrigerator
Ingredients
- 1 package (3 oz) blue raspberry Jello
- 1 package (3 oz) lime Jello
- 2 cups boiling water
- 1 cup cold water
- 1 cup whipped topping
Instructions
- Prepare the Blue Layer: In a mixing bowl, dissolve the blue raspberry Jello in 1 cup of boiling water. Stir until fully dissolved, then add 1 cup of cold water. Pour the mixture into clear plastic cups, filling them about halfway. Refrigerate for about 1 hour until set.
- Create the Green Layer: Repeat the process with the lime Jello, dissolving it in 1 cup of boiling water and adding 1 cup of cold water. Once the blue layer is set, carefully pour the lime Jello over the blue layer, filling the cups to the top. Return them to the refrigerator until fully set, about another hour.
- Add the Whipped Topping: Once both layers are set, top each cup with a generous dollop of whipped topping to mimic the frothy ocean waves.
Shark Attack Pudding Cups

Get ready for a splash of fun with these Shark Attack Pudding Cups! These delightful desserts combine layers of creamy vanilla pudding, vibrant blue jello, and crunchy bits for an exciting treat that will thrill kids and adults alike.
They’re simple to prepare and can be made the night before your water party. With a touch of creativity, you’ll have a dessert that not only tastes good but also looks fantastic. Dive into this recipe and make your gathering unforgettable!
Tools and Supplies Needed
- Clear cups or dessert glasses
- Mixing bowls
- Whisk or spoon
- Measuring cups and spoons
- Refrigerator
Ingredients
- 1 package (3.4 oz) vanilla instant pudding mix
- 2 cups milk
- 1 package (3 oz) blue raspberry gelatin
- 1 cup boiling water
- 1 cup cold water
- Cereal or crushed cookies for topping
- Shark fin candies (or similar) for decoration
Instructions
- Prepare the Vanilla Pudding: In a mixing bowl, combine the vanilla pudding mix and milk. Whisk for about 2 minutes until thickened. Set aside.
- Make the Blue Raspberry Jello: In another bowl, dissolve the blue raspberry gelatin in boiling water, stirring until fully dissolved. Then add cold water and mix well.
- Assemble the Cups: In clear cups, layer the vanilla pudding on the bottom, followed by a layer of blue jello. Repeat layers until the cup is full.
- Add the Toppings: Once assembled, sprinkle cereal or crushed cookies on top for texture. Finally, place a shark fin candy on top for that finishing touch.
- Chill and Serve: Cover the cups and refrigerate for at least 2 hours before serving. Enjoy your festive and fun Shark Attack Pudding Cups!
Under-The-Sea Graham Crackers

Under-the-Sea Graham Crackers are a fun and tasty treat that kids will love! These delightful snacks combine the crunch of graham crackers with a vibrant blue frosting to resemble ocean waves. Topped with colorful candies like gummy fish and seashells, they are not only delicious but also visually appealing, making them perfect for any water-themed party.
The best part is that this recipe is super simple to prepare. You can whip up these ocean-inspired treats in no time, making them an ideal option for busy moms. Just prep them the night before, and you’ll be all set for your party the next day!
Tools and Supplies Needed
- Mixing bowl
- Electric mixer or whisk
- Baking sheet
- Spatula
- Decorating bags or plastic sandwich bags
- Cookie cutters (optional)
Ingredients
- 1 package graham crackers
- 1 cup blue frosting (store-bought or homemade)
- Assorted candies (gummy fish, candy seashells, etc.)
Instructions
- Prepare the Frosting: If making homemade frosting, mix butter, powdered sugar, vanilla extract, and blue food coloring until smooth. Adjust the color to your liking.
- Assemble the Crackers: Take a graham cracker and spread a generous amount of blue frosting on top to create the ocean wave effect.
- Add Toppings: Decorate the frosting with gummy fish, candy seashells, or any other ocean-themed candies to make them more festive.
- Chill: Place the decorated graham crackers on a baking sheet and refrigerate for at least 30 minutes to set the frosting.
- Serve: Once the frosting has firmed up, your Under-the-Sea Graham Crackers are ready to enjoy! Serve these at your water party for a splash of fun!
Frozen Lemonade Cupcakes

Frozen lemonade cupcakes are the perfect treat to cool off on a hot day. These light and refreshing cupcakes combine the tangy taste of lemonade with a fluffy, moist cake base. Topped with a bright blue frosting, they give a fun, party vibe that’s great for any water-themed gathering.
Making these cupcakes is simple and can be done the night before your event. With just a few basic ingredients, you’ll have a delightful dessert that everyone will love. Plus, serving them with cute little umbrellas adds a festive touch!
Tools and Supplies Needed
- Mixing bowls
- Electric mixer or whisk
- Cupcake pan and liners
- Measuring cups and spoons
- Spatula
- Cooling rack
- Decorating supplies (piping bag, tips, and umbrellas)
Ingredients
- 1 box of lemon cake mix
- 1 cup water
- 1/2 cup vegetable oil
- 3 large eggs
- 1 cup lemonade concentrate, thawed
- 1/2 cup unsalted butter, softened
- 3 cups powdered sugar
- 2-3 tablespoons heavy cream
- Blue food coloring
Instructions
- Preheat the oven to 350°F (175°C) and line a cupcake pan with liners.
- In a large bowl, combine the lemon cake mix, water, vegetable oil, and eggs. Mix until well combined and smooth.
- Fill each cupcake liner about two-thirds full with the batter and bake for 18-20 minutes or until a toothpick inserted comes out clean. Allow to cool completely on a wire rack.
- To make the frosting, beat the softened butter in a bowl until creamy. Gradually add the powdered sugar and heavy cream, mixing until smooth. Add blue food coloring until desired color is achieved.
- Once the cupcakes are cool, pipe the frosting on top and add little umbrellas for a fun touch. Serve chilled for the best experience!
Octopus Fruit Cups

Octopus Fruit Cups are a fun and fruity treat that’s perfect for a water party! These cups are filled with a colorful mix of fresh fruits, topped with playful octopus-like grape tails. They’re not only eye-catching but also refreshingly tasty, making them a hit among kids and adults alike.
These cups are simple to assemble, requiring minimal prep work. Just chop up your favorite fruits and stack them in clear cups for a vibrant display. The best part? You can prepare them the night before, so they’re ready to go when your guests arrive!
Tools and Supplies Needed
- Clear plastic cups or glass cups
- Cutting board
- Sharp knife
- Mixing bowl
- Skewers or toothpicks
Ingredients
- 1 cup watermelon, diced
- 1 cup honeydew melon, diced
- 1 cup cantaloupe, diced
- 1 cup strawberries, hulled and halved
- 1 cup red grapes
- 1 cup blueberries
- 1 cup raspberries
Instructions
- Prepare the Fruit: Wash and cut all the fruits into bite-sized pieces. Make sure to remove any seeds from the grapes and hull the strawberries.
- Layer the Fruit: In each cup, start layering the fruit—begin with watermelon, followed by honeydew, cantaloupe, strawberries, and then top with grapes, blueberries, and raspberries for a colorful effect.
- Create the Octopus: For the octopus effect, thread a cluster of grapes onto a skewer or toothpick and insert it into the top of the fruit cup, resembling the head and tentacles of an octopus.
- Chill and Serve: Cover the cups with plastic wrap and refrigerate until ready to serve. Enjoy the delicious and nutritious treat!
Sailboat Brownie Bites

Sailboat Brownie Bites are a fun and easy treat that combines the rich, fudgy goodness of brownies with the whimsy of sailboats. These adorable desserts are perfect for a water-themed party and are sure to be a hit with kids and adults alike. They’re sweet, satisfying, and provide a delightful crunch with the addition of pretzel sails. Plus, they can be prepped the night before, making them a convenient option for busy moms.
Making these brownie bites is simple, requiring only a few ingredients and some creative assembly. You’ll bake the brownies in a mini muffin tin, then top each one with a pretzel for a sail. Decorate them with icing for added flair. These treats are not only tasty but also add a playful touch to your dessert table.
Dip-Dyed Marshmallow Pops

Dip-dyed marshmallow pops are a fun and tasty treat that can’t be missed at any water party. These sweet bites are simple to make and offer a delightful mix of fluffy marshmallow and colorful chocolate coating. Each pop is a little burst of joy, making them perfect for kids and adults alike.
With just a few steps, you can create these eye-catching desserts that not only taste great but also look fabulous on your dessert table. They’re a great make-ahead option, allowing you to prep them the night before and enjoy more time at your party!
Ingredients
- 1 bag of large marshmallows
- 1 cup of melting chocolate (white or colored)
- Sprinkles (various colors)
- Wooden sticks or skewers
- Paraffin or wax paper
Instructions
- Prepare the Work Area: Lay out wax paper on a baking sheet to place the finished pops on.
- Melt the Chocolate: In a microwave-safe bowl, melt the chocolate according to the package instructions until smooth.
- Assemble the Pops: Insert a wooden stick into each marshmallow. Dip the marshmallow into the melted chocolate, letting any excess drip off.
- Add Color: While the chocolate is still wet, sprinkle your desired toppings on the marshmallow. You can also use colored chocolate to create a dip-dyed effect by dipping one end of the marshmallow into a different color.
- Let Them Set: Place the finished pops on the wax paper and let them cool until the chocolate hardens.
- Store: Once set, they can be stored in an airtight container until the party!
Shell-Shaped Mini Cheesecakes

Shell-shaped mini cheesecakes are a delightful treat that’s perfect for any water party. These bite-sized desserts are creamy, rich, and have a wonderful sweet flavor that pairs perfectly with a splash of summertime fun. They’re super easy to make, meaning you can whip them up the night before and leave the day free for enjoying your party.
Not only do they look charming with their unique shell shape, but they also provide a perfect balance of textures. The crunchy cookie crust complements the smooth cheesecake filling, making every bite satisfying. Plus, you can customize them with fresh fruits or a swirl of chocolate for added flair.
Tools and Supplies Needed
- Mixing bowl
- Whisk or electric mixer
- Measuring cups and spoons
- Mini cheesecake or muffin pan
- Plastic wrap
- Serving plates
Ingredients
- 1 1/2 cups graham cracker crumbs
- 1/4 cup granulated sugar
- 1/2 cup unsalted butter, melted
- 16 oz cream cheese, softened
- 1 cup powdered sugar
- 1 teaspoon vanilla extract
- 1 cup heavy cream
- Fresh fruits or chocolate for topping (optional)
Instructions
- Prepare the Crust: In a mixing bowl, combine graham cracker crumbs, sugar, and melted butter. Mix until the mixture resembles wet sand.
- Form the Shells: Press the crust mixture firmly into the bottom and up the sides of a mini cheesecake or muffin pan. Bake at 350°F (175°C) for 5-7 minutes, then allow to cool.
- Make the Filling: In another bowl, beat together the softened cream cheese, powdered sugar, and vanilla extract until smooth. In a separate bowl, whip the heavy cream until stiff peaks form, then fold it into the cream cheese mixture.
- Fill the Shells: Spoon the cheesecake filling into the cooled crusts, smoothing the tops as needed.
- Chill: Cover the mini cheesecakes with plastic wrap and refrigerate for at least 4 hours or overnight.
- Serve: Before serving, add fresh fruits or a drizzle of chocolate on top for a colorful touch.
Fishbowl Pudding Parfaits

Fishbowl pudding parfaits are a fun, whimsical dessert that kids and adults will love. With layers of creamy pudding and crunchy toppings, they are both sweet and satisfying. The combination of flavors and textures makes each bite delightful, and the colorful presentation is sure to impress at any water-themed party.
These parfaits are super easy to prepare, which is perfect for busy moms. Just whip up some pudding, layer it with your favorite snacks, and let it chill overnight. In the morning, you’ll have a show-stopping dessert ready to enjoy!
Tools and Supplies Needed
- Clear cups or bowls
- Mixing bowls
- Whisk
- Spoon
- Measuring cups
- Plastic fish and candy rocks for decoration
Ingredients
- 1 package (3.4 oz) instant blue raspberry pudding mix
- 2 cups milk
- 1 cup crushed Graham crackers
- 1 cup mini chocolate cookies or crushed Oreos
- 1 cup gummy fish candies
- Edible candy rocks
- Whipped cream (optional, for topping)
Instructions
- Prepare the Pudding: In a mixing bowl, whisk together the blue raspberry pudding mix and milk until it thickens, about 2 minutes. Set aside.
- Layer Ingredients: In clear cups or bowls, start layering by adding a layer of crushed Graham crackers, followed by a layer of the blue pudding. Repeat with mini chocolate cookies and another layer of pudding.
- Top it Off: Once you’ve reached the top, add a final layer of whipped cream (if using) and decorate with gummy fish and candy rocks for that fun fishbowl effect.
- Chill: Cover the parfaits with plastic wrap and refrigerate for at least 2 hours or overnight.
- Serve: Enjoy your Fishbowl pudding parfaits chilled, and watch everyone delight in this creative treat!
Frozen Watermelon Pops

Frozen watermelon pops are a refreshing treat that’s perfect for hot days. They are sweet, juicy, and incredibly easy to make. With just a few simple steps, you can create a fun dessert that everyone will love.
This recipe is a hit for kids and adults alike, providing a burst of flavor with every bite. Plus, they can be prepped the night before your water party, making them a great option for busy moms.
Tools and Supplies Needed
- Watermelon
- Sharp knife
- Ice pop molds or wooden sticks
- Blender (optional)
Ingredients
- 1 medium-sized watermelon
- 1 tablespoon lime juice (optional)
- 1 tablespoon honey or agave syrup (optional, adjust for sweetness)
Instructions
- Prepare the Watermelon: Cut the watermelon in half. Scoop out the flesh and cut it into small pieces. If you prefer a smoother texture, blend the watermelon pieces until pureed.
- Add Flavor: If using, mix in the lime juice and honey or agave syrup for added sweetness and tang. Stir well.
- Fill the Molds: Pour the watermelon mixture into ice pop molds. If you’re using wooden sticks, insert them into the molds before freezing.
- Freeze: Place the molds in the freezer for at least 4-6 hours, or until completely frozen.
- Serve: To remove the pops, run warm water over the outside of the molds for a few seconds. Enjoy your refreshing watermelon pops!