Snacking while camping doesn’t have to be complicated! Here’s a collection of 25 easy camping snacks that are sure to please everyone, from kids to adults. Each recipe offers simplicity without sacrificing fun, making those outdoor moments even more delightful. Plus, we’ll include a list of tools and supplies needed for each snack, so you’ll be all set for munching under the stars!
• Trail Mix Energy Balls
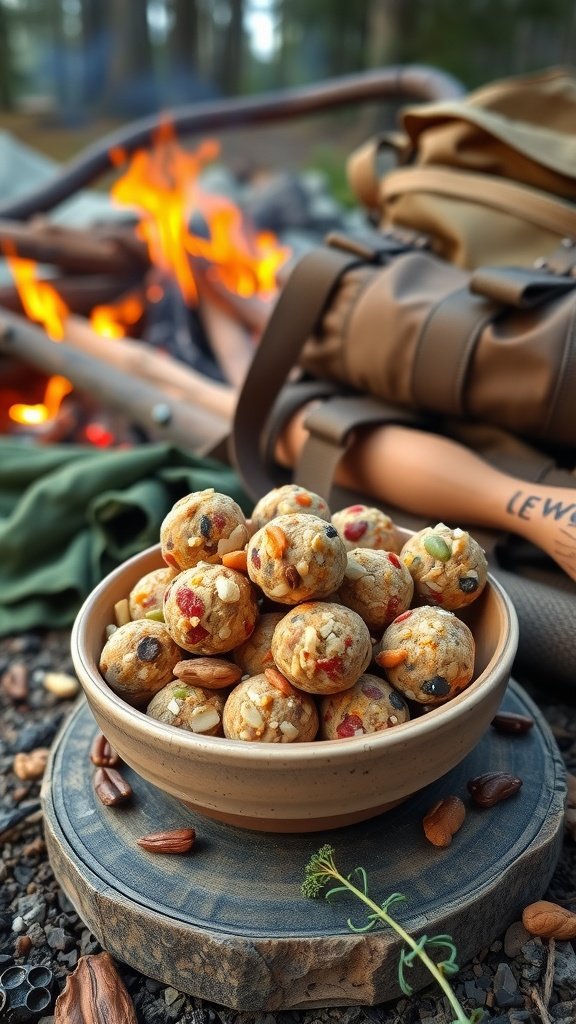
Trail Mix Energy Balls are a fantastic treat for both kids and adults. They combine wholesome ingredients like oats, nuts, and dried fruits to create a delicious snack that’s perfect for camping or on-the-go. Not only are they easy to make, but they also provide a good energy boost for outdoor activities.
These bite-sized snacks are chewy, crunchy, and packed with flavor. They can be customized with your favorite ingredients, making them versatile and fun to prepare. Plus, they require no baking, so you can whip them up in just a few minutes!
Ingredients
- 1 cup rolled oats
- 1/2 cup nut butter (like almond or peanut butter)
- 1/4 cup honey or maple syrup
- 1/2 cup mixed nuts, chopped
- 1/2 cup dried fruit (like cranberries, raisins, or apricots)
- 1/4 cup chocolate chips (optional)
- 1/4 cup flaxseed or chia seeds (optional)
Tools and Supplies Needed
- Mixing bowl
- Measuring cups
- Spatula or spoon
- Plastic wrap or wax paper
- Refrigerator
Instructions
- In a mixing bowl, combine the rolled oats, nut butter, and honey (or maple syrup). Mix well until everything is combined.
- Add the chopped nuts, dried fruit, and optional ingredients if desired. Stir until evenly mixed.
- Using your hands, form the mixture into small balls, about 1 inch in diameter.
- Place the energy balls on a sheet of plastic wrap or wax paper and refrigerate for at least 30 minutes to firm up.
- Once set, store them in an airtight container in the refrigerator for up to a week. Enjoy them as a quick and tasty camping snack!
• Campfire Banana Boats
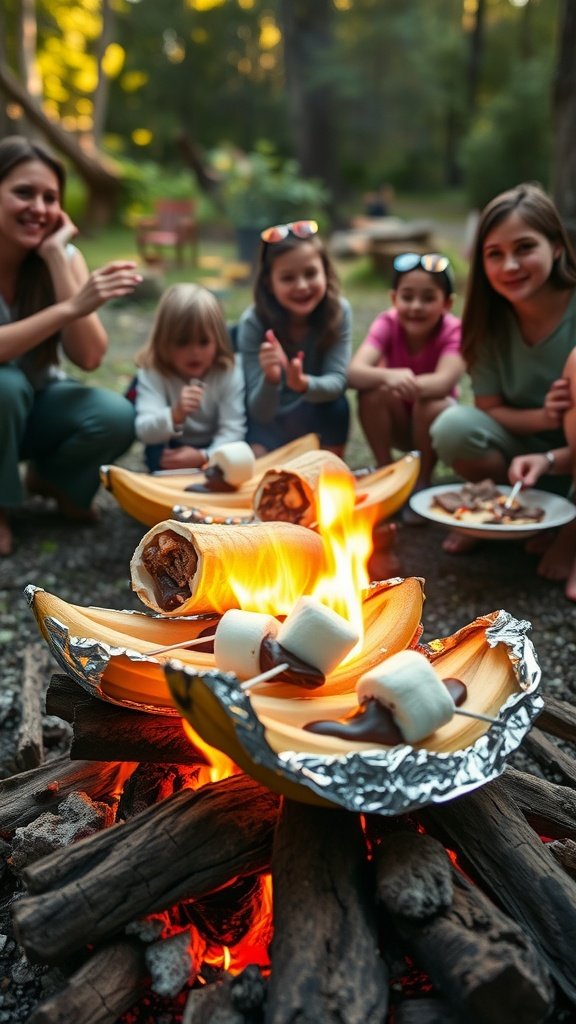
Campfire banana boats are a fun and easy treat for campers of all ages. With the natural sweetness of bananas paired with gooey chocolate and marshmallows, these snacks are sure to be a hit around the fire. They’re simple to make, so everyone can join in on the fun!
Just slice open a banana, stuff it with your favorite goodies, wrap it in foil, and let the campfire do the rest. Watching the banana caramelize while the chocolate melts creates an irresistible flavor that’s hard to resist. Perfect for a camping trip or a backyard fire, these banana boats are a delightful way to satisfy your sweet tooth outdoors.
Tools and Supplies Needed
- Fresh bananas
- Aluminum foil
- Chocolate chips or candy bars
- Marshmallows
- Optional toppings (peanut butter, nuts, etc.)
Ingredients
- 4 ripe bananas
- 1 cup chocolate chips
- 1 cup mini marshmallows
- Optional: 1/4 cup peanut butter
Instructions
- Prepare the Bananas: Slice each banana lengthwise, making sure not to cut all the way through. You want to create a pocket for the fillings.
- Stuff the Bananas: Open the sliced banana slightly and fill it with chocolate chips and marshmallows. Add any optional toppings like peanut butter if desired.
- Wrap in Foil: Wrap each stuffed banana in aluminum foil, sealing it tightly.
- Cook Over Campfire: Place the foil-wrapped bananas on the campfire coals or grill for about 10-15 minutes, or until the chocolate and marshmallows are melted.
- Unwrap and Enjoy: Carefully remove the foil, and enjoy your warm and gooey banana boat straight from the fire!
• No-Bake Granola Bars
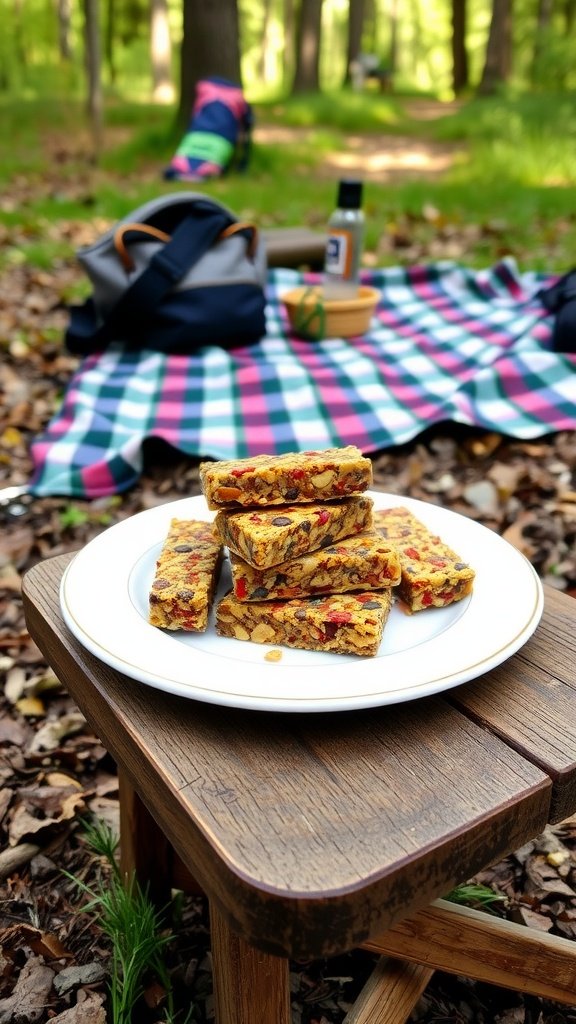
No-bake granola bars are the perfect treat for camping trips. These bars are chewy, sweet, and packed with nutritious ingredients, making them a hit for both kids and adults. The great thing about this recipe is that it’s super simple to prepare—no oven required!
With a combination of oats, honey, and your favorite add-ins like nuts or chocolate chips, these granola bars are not only delicious but also customizable to suit everyone’s taste. They’re great to nibble on while relaxing by the campfire or to fuel up for a day of outdoor fun.
Tools and Supplies Needed
- Large mixing bowl
- Wooden spoon or spatula
- Measuring cups and spoons
- 9×9-inch baking pan
- Parchment paper
Ingredients
- 2 cups rolled oats
- 1/2 cup honey or maple syrup
- 1/2 cup peanut butter or almond butter
- 1/2 cup mini chocolate chips or M&Ms
- 1/4 cup chopped nuts (optional)
- 1/4 cup dried fruits (optional)
- 1 teaspoon vanilla extract
Instructions
- Prepare the Pan: Line a 9×9-inch baking pan with parchment paper, leaving some overhang for easy removal later.
- Mix Ingredients: In a large mixing bowl, combine rolled oats, honey, and peanut butter. Stir until well combined. Add in chocolate chips, nuts, dried fruits, and vanilla extract, mixing until evenly distributed.
- Transfer Mixture: Pour the mixture into the prepared pan and press down firmly with the back of a spatula or your hands to create an even layer.
- Chill: Refrigerate the bars for at least 2 hours, or until set. Once firm, lift the bars out of the pan using the parchment overhang and cut into squares.
- Store: Keep the bars in an airtight container at room temperature or in the fridge for longer freshness.
• Beef Jerky Bites
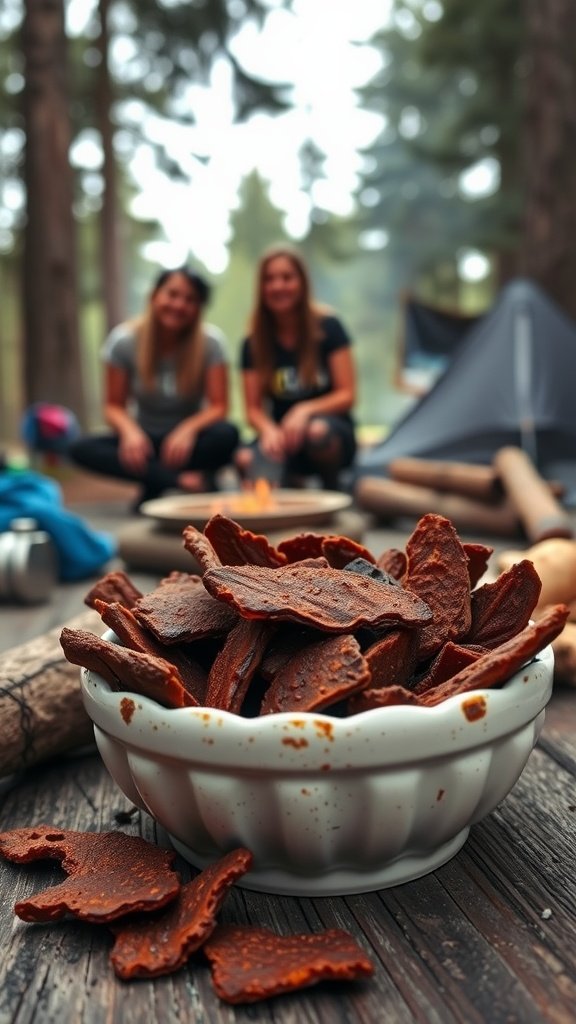
Beef jerky bites are a fantastic snack for camping trips, providing a savory kick that both kids and adults will enjoy. These chewy morsels are not only flavorful but also packed with protein, making them a great option for fueling outdoor fun. Plus, they are simple to prepare, allowing you to spend more time enjoying nature and less time in the kitchen.
Whether you’re hiking, fishing, or just relaxing by the campfire, these bites will satisfy cravings while offering a hearty taste. The best part? You can customize the flavors to suit your taste, ensuring everyone gets a snack they love.
Tools and Supplies Needed
- Dehydrator or oven
- Large mixing bowl
- Meat tenderizer (optional)
- Zip-top bags or airtight containers
Ingredients
- 1 pound beef (top round or flank steak)
- 1/4 cup soy sauce
- 2 tablespoons Worcestershire sauce
- 1 tablespoon garlic powder
- 1 tablespoon onion powder
- 1 teaspoon black pepper
- 1 teaspoon smoked paprika
- 1 teaspoon red pepper flakes (optional, for heat)
- 1 tablespoon brown sugar
Instructions
- Prepare the Meat: Trim any excess fat from the beef and slice it into thin strips, about 1/4 inch thick. For easier slicing, partially freeze the meat for 1-2 hours.
- Marinate: In a large mixing bowl, combine soy sauce, Worcestershire sauce, garlic powder, onion powder, black pepper, smoked paprika, red pepper flakes, and brown sugar. Add the beef strips to the marinade, ensuring they are thoroughly coated. Cover and let it marinate in the refrigerator for at least 4 hours, or overnight for more flavor.
- Dehydrate: If using a dehydrator, arrange the marinated beef strips on the dehydrator trays in a single layer. Set the temperature to 155°F (68°C) and dehydrate for 6-8 hours, or until the jerky is dry but still slightly pliable. If using an oven, preheat it to 175°F (80°C) and place the beef strips on a baking sheet lined with parchment paper, baking for 4-6 hours.
- Cool and Store: Once dried, let the jerky cool completely. Store it in zip-top bags or airtight containers. It can last for several weeks if kept in a cool, dry place.
• Roasted Chickpea Trail Mix
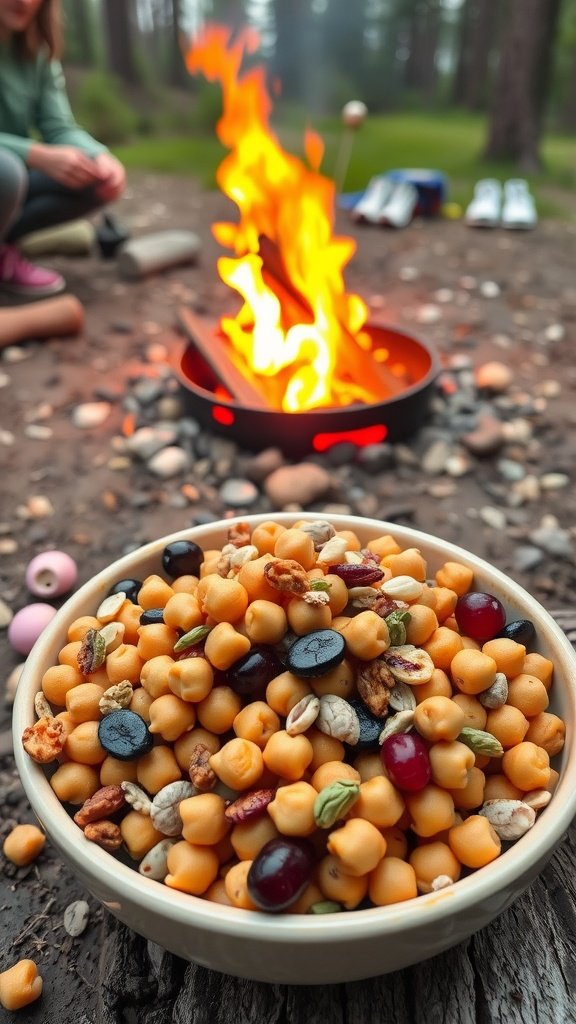
Roasted chickpea trail mix is a crunchy, protein-packed snack perfect for both kids and adults. It combines the nutty flavor of roasted chickpeas with a variety of nuts, seeds, and dried fruits, making it a tasty and satisfying treat for your next camping trip.
This easy-to-make trail mix is not only nutritious but also customizable. You can add your favorite ingredients to create a mix that everyone will love. Plus, it’s a great option for keeping energy levels up during outdoor activities!
Ingredients
- 1 can chickpeas, rinsed and drained
- 2 tablespoons olive oil
- 1 teaspoon garlic powder
- 1 teaspoon paprika
- 1/2 teaspoon salt
- 1/4 teaspoon black pepper
- 1 cup mixed nuts (almonds, walnuts, pecans)
- 1/2 cup dried cranberries
- 1/2 cup pumpkin seeds
- 1/2 cup sunflower seeds
Instructions
- Preheat the Oven: Preheat your oven to 400°F (200°C).
- Prepare the Chickpeas: In a bowl, toss the rinsed chickpeas with olive oil, garlic powder, paprika, salt, and black pepper until well-coated.
- Roast the Chickpeas: Spread the seasoned chickpeas on a baking sheet and roast in the oven for about 25-30 minutes, stirring halfway through, until they are golden and crispy.
- Mix It Up: Once the chickpeas are roasted and cooled, combine them with the mixed nuts, dried cranberries, pumpkin seeds, and sunflower seeds in a large bowl. Stir until evenly mixed.
- Store and Enjoy: Transfer the trail mix to an airtight container or zip-lock bags for easy snacking while camping.
• Apple Slices With Peanut Butter Dip
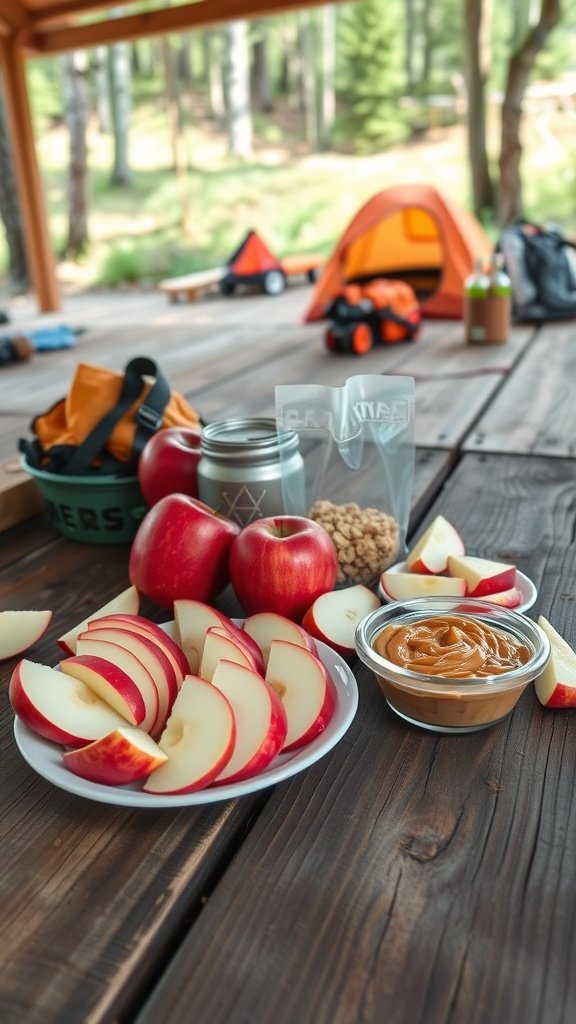
Apple slices with peanut butter dip are a delightful snack that combines the crispness of fresh apples with the creamy richness of peanut butter. This simple recipe is perfect for camping, providing a healthy option that kids and adults will both enjoy. The sweet and nutty flavors complement each other wonderfully, making this a satisfying treat that keeps hunger at bay.
Making this snack is incredibly easy and requires minimal preparation. Just slice up some apples, whip up a quick peanut butter dip, and you’re all set for a delicious outdoor snack. It’s a great way to fuel up during your camping adventures!
Tools and Supplies Needed
- Cutting board
- Sharp knife
- Small bowl
- Measuring spoons
Ingredients
- 2 large apples (any variety)
- 1/2 cup peanut butter
- 1 tablespoon honey (optional)
- 1/4 teaspoon cinnamon (optional)
Instructions
- Prepare the Apples: Wash the apples thoroughly. Slice them into wedges or rounds, removing the core and seeds as needed.
- Make the Peanut Butter Dip: In a small bowl, mix the peanut butter with honey and cinnamon if using. Stir until smooth and well combined.
- Serve: Arrange the apple slices on a plate and serve with the peanut butter dip on the side for dipping.
- Enjoy your healthy and tasty camping snack!
• Campfire Popcorn Packets
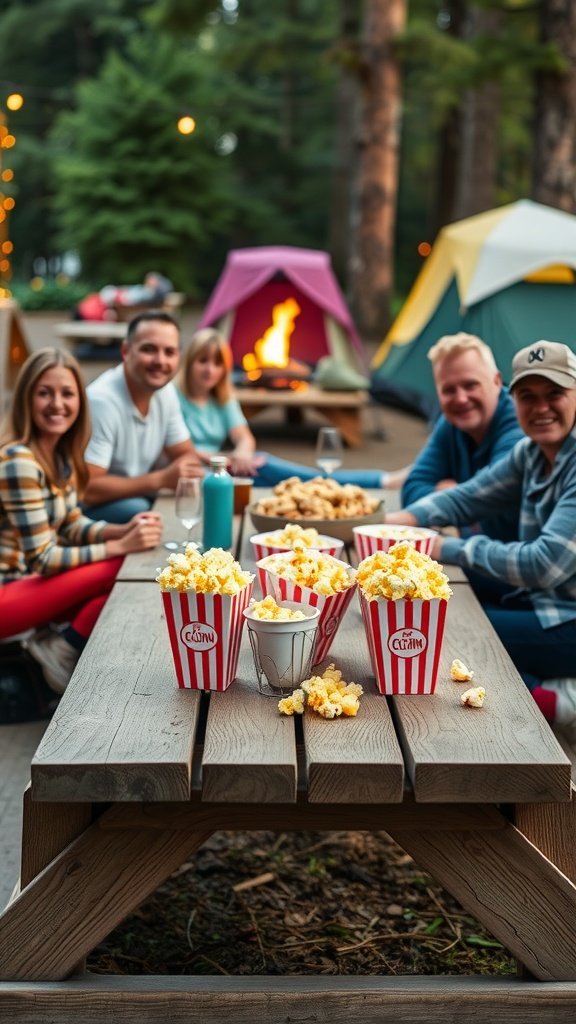
Campfire popcorn packets are a fun and easy snack perfect for a night under the stars. With a mix of popping corn and your favorite toppings, they create a delightful crunch that everyone will enjoy. Toss them in the fire, and in just a few minutes, you’ll have a delicious treat that’s hot, fresh, and bursting with flavor.
This recipe is simple to put together, making it a hit with both kids and adults. You can customize it with various seasonings, whether you prefer classic butter and salt or something a bit more adventurous like cheese or spices. Enjoy sharing this tasty snack with your camping crew!
Tools and Supplies Needed
- Aluminum foil
- Popcorn kernels
- Butter or oil
- Your choice of seasonings (salt, cheese powder, etc.)
- Campfire or grill
- Scissors
Ingredients
- 1/4 cup popcorn kernels
- 1 tablespoon melted butter (optional)
- 1/2 teaspoon salt (or to taste)
- Your choice of seasonings (cheese powder, garlic powder, etc.)
Instructions
- Prepare the Foil: Cut a large square piece of aluminum foil, about 12 inches by 12 inches.
- Add Ingredients: In the center of the foil, add the popcorn kernels, melted butter, salt, and any additional seasonings you desire.
- Seal the Packet: Fold the foil into a pouch, making sure to seal it tightly to keep the popcorn contained while it cooks.
- Cook Over the Fire: Place the packet on the campfire grill or directly over the fire (be cautious of the flames). Cook for about 5-10 minutes, shaking occasionally, until you hear popping slow down.
- Open Carefully: Once done, carefully open the packet (watch out for steam!) and enjoy your freshly popped popcorn!
• Make-Ahead Cheese And Cracker Packs
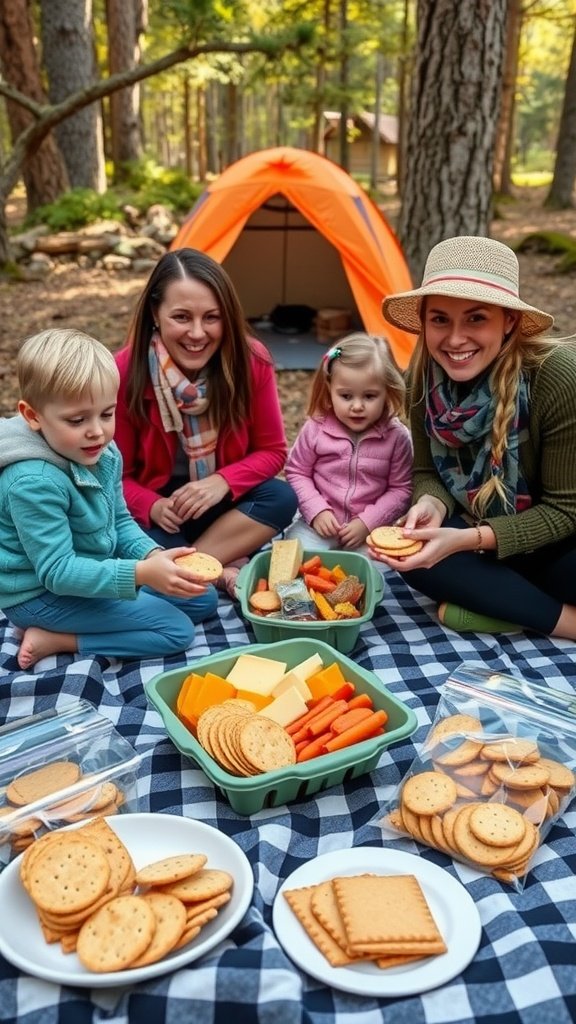
Make-Ahead Cheese and Cracker Packs are perfect camping snacks for both kids and adults. They are easy to prepare and can be customized to fit everyone’s taste. The combination of crisp crackers and creamy cheese creates a satisfying treat that’s both tasty and filling.
These snack packs are not only fun to eat, but they’re also great for sharing around the campfire. You can pair them with fresh vegetables or fruits for added crunch and flavor. Preparing these packs ahead of time makes snack time a breeze during your camping trip!
Tools and Supplies Needed
- Resealable plastic bags or containers
- Cheese (pre-sliced or cut into cubes)
- Variety of crackers
- Fresh veggies (like carrots or bell peppers)
- Optional: fruit slices or nuts
Ingredients
- 1 cup of your favorite cheese (cheddar, gouda, or mozzarella)
- 1 cup of assorted crackers (saltines, whole grain, or flavored)
- 1 cup of fresh vegetables (carrot sticks, cucumber slices)
- Optional: a handful of grapes or apple slices
Instructions
- Prepare the Cheese: Cut your cheese into slices or cubes, depending on your preference.
- Box It Up: In resealable bags or containers, layer the cheese, crackers, and vegetables. Feel free to mix and match based on taste!
- Add a Sweet Touch: If desired, include a few pieces of fruit for a sweet contrast.
- Seal and Store: Close the bags tightly or secure the containers, then store them in a cooler until you’re ready to enjoy.
- Enjoy: Grab your pack during snack time at the campsite and enjoy the delicious flavors!
• Cinnamon Sugar Grilled Pita Chips
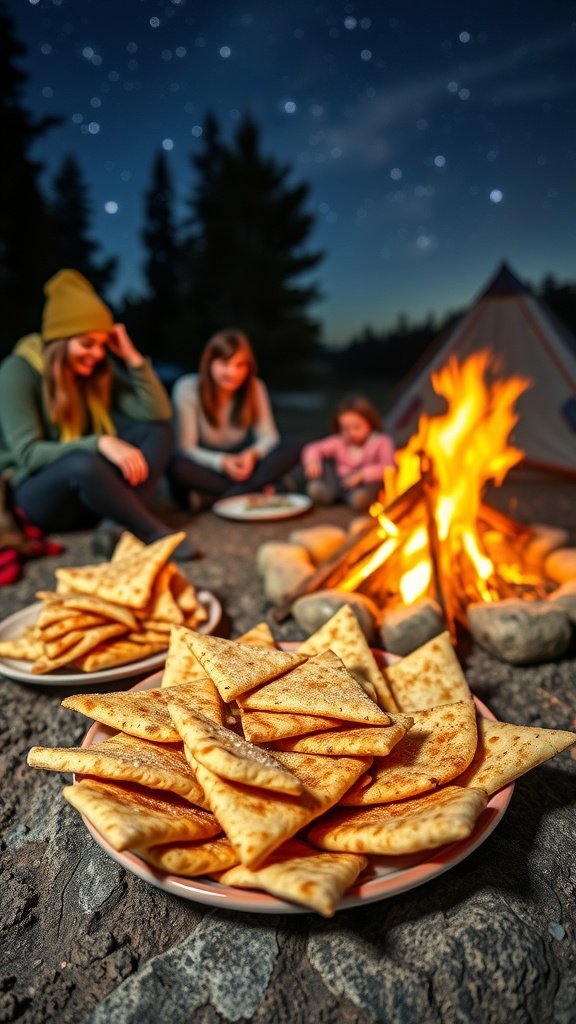
Cinnamon sugar grilled pita chips are a delightful treat that brings a warm, sweet flavor to your camping snacks. With a crispy texture and a hint of cinnamon, they are perfect for all ages. Plus, they are super easy to make, making them a go-to choice for your next outdoor gathering.
These chips are not only delicious but also versatile. You can enjoy them on their own or with dips like yogurt or chocolate spread. The process is quick, and the ingredients are simple, making it a fun activity to do with kids around the campfire.
Ingredients
- 4 large pita breads
- 1/4 cup granulated sugar
- 1 tablespoon ground cinnamon
- 1/4 cup melted butter
- Pinch of salt
Instructions
- Prepare the Pitas: Start by preheating your grill or campfire. Cut each pita bread into triangles.
- Mix the Cinnamon Sugar: In a small bowl, combine the sugar, cinnamon, and a pinch of salt.
- Coat the Pitas: Brush the melted butter onto both sides of each pita triangle, then sprinkle the cinnamon sugar mixture generously over them.
- Grill the Chips: Place the pita triangles on the grill. Cook for about 2-3 minutes on each side until they are golden brown and crispy.
- Serve: Remove the chips from the grill and let them cool slightly before serving. Enjoy them warm!
Tools and Supplies Needed
- Grill or campfire
- Brush for butter
- Mixing bowl
- Knife for cutting pita
- Plates for serving
• S’Mores Trail Mix
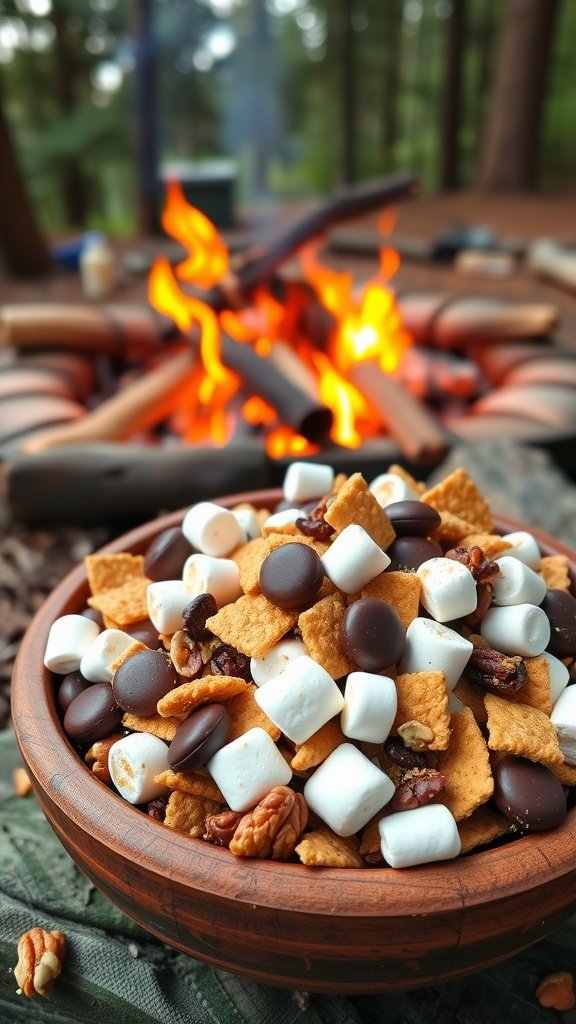
S’Mores Trail Mix is a fun and delicious twist on the classic camping treat. Combining crunchy graham crackers, sweet chocolate, and fluffy marshmallows, this snack captures that unmistakable s’mores flavor in a convenient, easy-to-make mix. Perfect for kids and adults alike, it’s a great addition to any camping trip, and you can whip it up in just a few minutes!
This trail mix is not only tasty but also versatile. It’s perfect for munching around the campfire or as a sweet pick-me-up during hikes. Just grab a handful, and you’ll be transported to the cozy, campfire nights filled with laughter and stories.
Tools and Supplies Needed
- Large mixing bowl
- Measuring cups
- Measuring spoons
- Storage bags or containers
Ingredients
- 2 cups graham cracker squares
- 1 cup mini marshmallows
- 1 cup chocolate chips (milk or dark)
- 1 cup chopped nuts (walnuts or pecans)
- Optional: 1/2 cup dried fruits (like cranberries or raisins)
Instructions
- In a large mixing bowl, combine graham cracker squares, mini marshmallows, chocolate chips, and chopped nuts. If you’re adding dried fruits, mix those in as well.
- Gently stir until everything is evenly distributed.
- Transfer the trail mix into storage bags or containers for easy snacking while camping.
- Enjoy this tasty treat around the campfire or on your outdoor adventures!
• Turkey And Cheese Roll-Ups
Turkey and cheese roll-ups are a fun and tasty way to enjoy a healthy snack while camping. These bite-sized treats are packed with flavor and are super easy to make, making them perfect for kids and adults alike. The combination of turkey, cheese, and your favorite toppings wrapped in a tortilla creates a satisfying munch that pairs well with fresh veggies or dip.
Not only are they delicious, but they’re also versatile. You can customize the roll-ups with different spreads, veggies, or even different types of deli meats. Plus, they’re easy to pack and carry, making them an ideal choice for your next camping trip!
Tools and Supplies Needed
- Cutting board
- Knife
- Large flat tortillas
- Wrap or sandwich bags
Ingredients
- 4 large tortillas
- 8 slices of turkey
- 4 slices of cheese (Swiss or cheddar work well)
- 1/2 cup cream cheese or hummus
- 1 cup mixed vegetables (like bell peppers, spinach, or cucumbers)
Instructions
- Spread a thin layer of cream cheese or hummus evenly over each tortilla.
- Layer slices of turkey and cheese on top of the spread.
- Add a handful of mixed vegetables on each tortilla.
- Starting from one edge, tightly roll the tortilla up to the other edge. Slice into bite-sized pieces.
- Wrap each roll-up in plastic wrap or place in sandwich bags for easy transport.
• Mini Frittata Muffins
Mini frittata muffins are a fun and tasty camping snack that both kids and adults will enjoy. These little bites pack a punch of flavor and can be customized to suit everyone’s taste preferences, making them a versatile option for any outdoor meal. With a light and fluffy texture, they are perfect for breakfast or as a quick snack throughout the day.
These muffins are easy to prepare, requiring just a handful of ingredients and minimal cooking time. You can whip them up ahead of your camping trip, or make them fresh at the campsite. They’re sure to be a hit with the whole family, offering a delightful blend of eggs and veggies in every bite!
Tools and Supplies Needed
- Mixing bowl
- Whisk or fork
- Measuring cups and spoons
- Muffin tin
- Non-stick cooking spray or muffin liners
- Oven or campfire cooking setup
Ingredients
- 6 large eggs
- 1 cup milk
- 1 cup diced vegetables (like bell peppers, spinach, and onions)
- 1 cup shredded cheese (like cheddar or mozzarella)
- Salt and pepper to taste
- Optional: cooked bacon or sausage bits for added flavor
Instructions
- Preheat your oven to 350°F (175°C) or prepare your campfire cooking setup.
- In a mixing bowl, whisk together the eggs and milk until well combined. Season with salt and pepper.
- Stir in the diced vegetables and cheese. If using, add in the cooked bacon or sausage bits.
- Spray a muffin tin with non-stick cooking spray or line with muffin liners.
- Pour the egg mixture evenly into the muffin tin, filling each cup about 3/4 full.
- Bake in the oven or place over your campfire until set, about 15-20 minutes. You can check for doneness by inserting a toothpick into the center; it should come out clean.
- Allow to cool slightly before removing from the muffin tin. Serve warm or let cool completely before packing them for your camping trip!
• Roasted Nuts With Honey Glaze
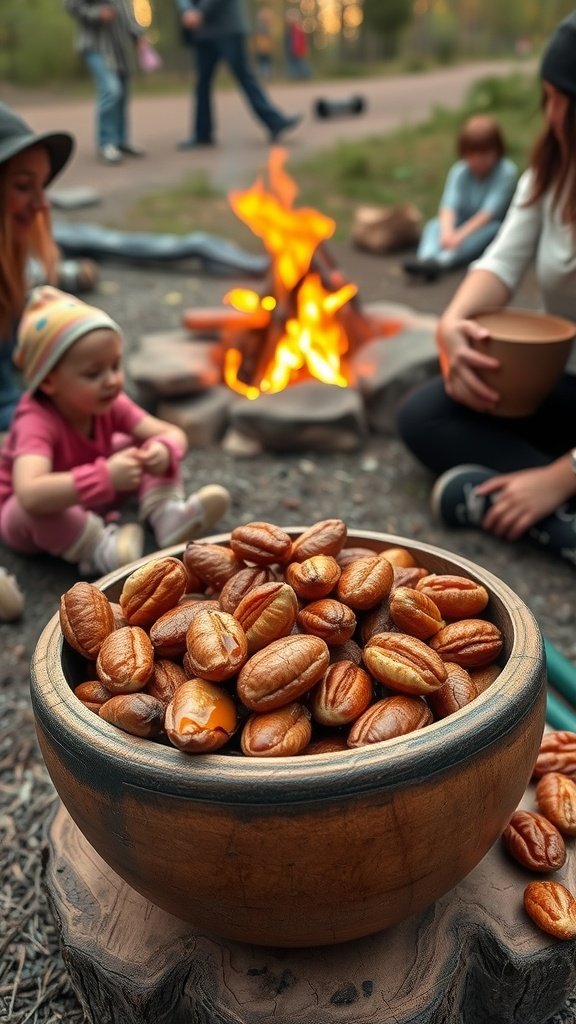
Roasted nuts with a honey glaze are a delicious and simple camping snack that both kids and adults will enjoy. The sweet honey coating adds a delightful crunch, making them a perfect treat around the campfire. Easy to prepare, these nuts are not only satisfying but also provide a good source of energy for outdoor adventures.
Making these roasted nuts is straightforward. Just mix your favorite nuts with honey and a few spices, then toss them in the oven or over the campfire to achieve that golden, crunchy texture. Whether you’re hiking, relaxing at the campsite, or enjoying a family gathering, these glazed nuts are sure to be a hit!
Ingredients
- 2 cups mixed nuts (almonds, cashews, walnuts, etc.)
- 1/4 cup honey
- 1 teaspoon cinnamon
- 1/4 teaspoon salt
- 1 tablespoon olive oil
Tools and Supplies Needed
- Baking sheet
- Mixing bowl
- Spatula
- Oven or campfire
- Parchment paper (optional)
Instructions
- Preheat your oven to 350°F (175°C) or prepare your campfire for cooking.
- In a mixing bowl, combine the mixed nuts, honey, cinnamon, salt, and olive oil. Stir until the nuts are evenly coated.
- If using an oven, spread the nut mixture on a baking sheet lined with parchment paper. Bake for 10-15 minutes, stirring occasionally, until golden brown.
- If using a campfire, place the nut mixture in a cast-iron skillet and cook over the fire, stirring frequently, for about 10-15 minutes until they are toasted and fragrant.
- Remove from heat and let cool before serving. Enjoy your tasty roasted nuts around the campfire!
• Veggie Sticks With Hummus Cups
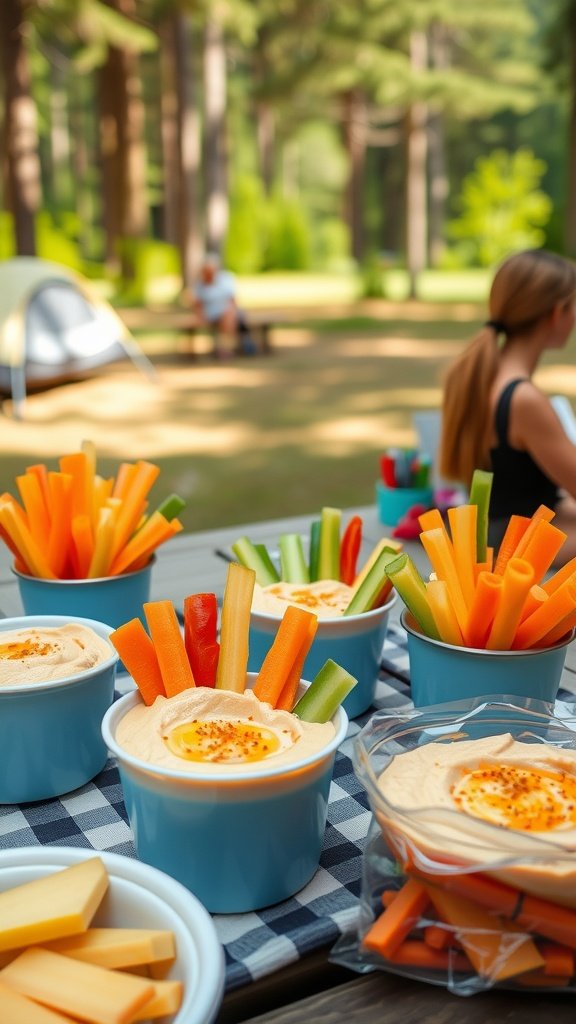
Veggie sticks with hummus cups are a fun and nutritious camping snack that everyone can enjoy. These cups are filled with creamy hummus, surrounded by colorful veggie sticks, making them not only tasty but also visually appealing. The combination of crunchy vegetables and smooth hummus offers a satisfying munch that’s both healthy and refreshing.
This recipe is simple to prepare, perfect for a day outdoors. Just cut up your favorite veggies, whip up some hummus, and you’re ready to go. It’s a great way to get kids involved in the kitchen as they can help with the veggie prep!
Tools and Supplies Needed
- Cutting board
- Knife
- Measuring cups
- Mixing bowl
- Food processor (optional)
- Plastic cups or containers
Ingredients
- 1 can (15 oz) chickpeas, rinsed and drained
- 2 tablespoons tahini
- 2 tablespoons olive oil
- 1 clove garlic, minced
- 2 tablespoons lemon juice
- Salt, to taste
- 1 teaspoon cumin (optional)
- Carrots, cut into sticks
- Cucumbers, cut into sticks
- Bell peppers, cut into sticks
- Celery, cut into sticks
Instructions
- Make the Hummus: In a food processor, combine chickpeas, tahini, olive oil, garlic, lemon juice, salt, and cumin (if using). Blend until smooth. Add water as needed to reach desired consistency.
- Prepare the Veggies: While the hummus is blending, wash and cut your chosen vegetables into sticks.
- Assemble the Cups: Spoon hummus into plastic cups or containers. Arrange the veggie sticks upright in the hummus for a colorful display.
- Serve and Enjoy: These veggie sticks with hummus cups can be enjoyed immediately or stored in a cooler for later. Perfect for snacking around the campfire!
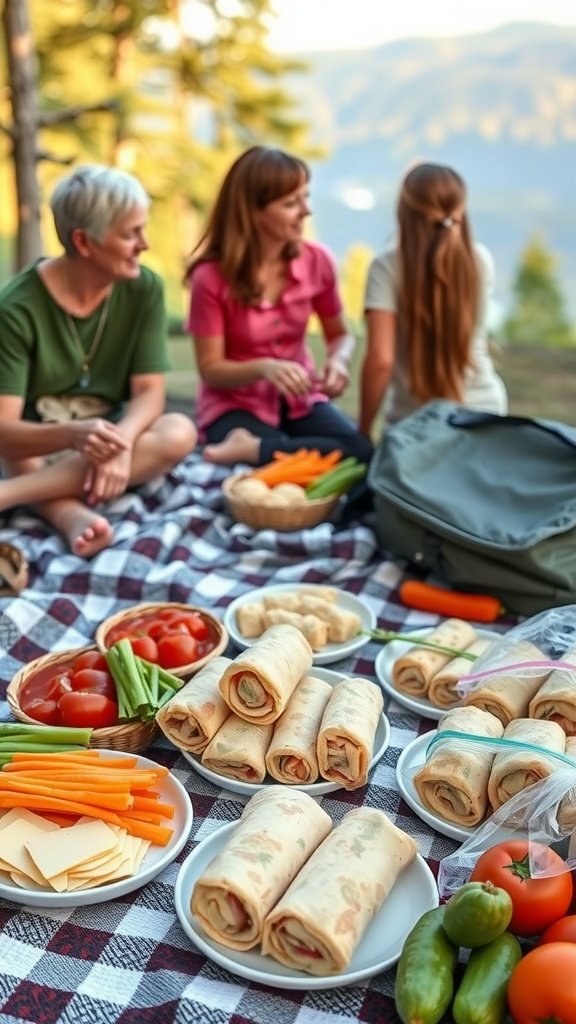
• Loaded Tortilla Pinwheels

Loaded Tortilla Pinwheels are a fun and tasty camping snack that everyone will love. They’re packed with flavor and can be made in just a few minutes, making them perfect for your outdoor adventures. These pinwheels are not only colorful and appealing but also customizable, allowing you to use your favorite ingredients!
Great for sharing, they combine the creaminess of cheese with fresh veggies and flavorful spreads. Plus, they’re easy to prepare ahead of time and travel well, which is a win for any camping trip!
Ingredients
- 4 large tortillas
- 8 oz cream cheese, softened
- 1/2 cup shredded cheese (cheddar or your choice)
- 1 cup fresh spinach leaves
- 1/2 cup bell peppers, diced (red, yellow, or green)
- 1/4 cup red onion, finely chopped
- 1/4 cup sliced olives (optional)
- 1 teaspoon garlic powder
- Salt and pepper to taste
Instructions
- Prepare the Spread: In a bowl, combine the softened cream cheese, shredded cheese, garlic powder, salt, and pepper. Mix well until smooth.
- Layer the Ingredients: Spread the cream cheese mixture evenly over each tortilla. Then layer with spinach, bell peppers, red onion, and olives if using.
- Roll it Up: Starting from one edge, carefully roll the tortilla tightly. Repeat with all tortillas.
- Slice and Serve: Once rolled, slice each tortilla into bite-sized pinwheels. Arrange on a plate and serve immediately, or pack them up for your camping trip!
Tools and Supplies Needed
- Mixing bowl
- Spatula or knife for spreading
- Cutting board
- Sharp knife for slicing
- Storage container or plastic wrap for transport
• Fruit Leather Roll-Ups
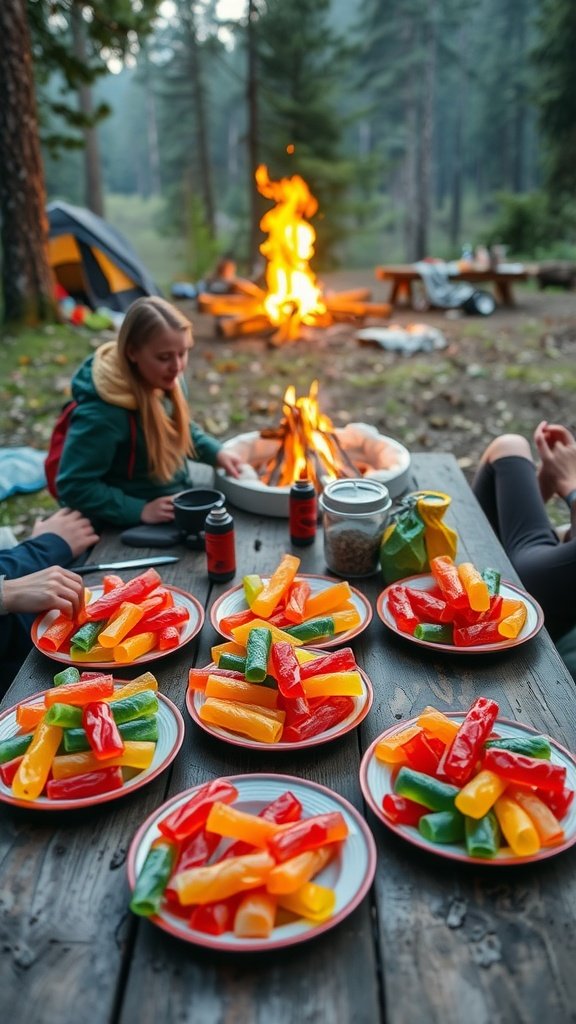
Fruit leather roll-ups are a fun and delicious camping snack that both kids and adults will enjoy. They’re sweet, chewy, and packed with fruity flavors, making them a healthier alternative to traditional sugary snacks. Plus, they’re super easy to make, so you can whip up a batch before your next outdoor trip!
Making fruit leather at home allows you to customize flavors and use your favorite fruits. You can roll them up for easy sharing around the campfire or simply store them for a quick snack on the go. These treats are sure to be a hit during your camping adventures!
Tools and Supplies Needed
- Blender or food processor
- Dehydrator or oven
- Parchment paper
- Sharp knife or kitchen scissors
- Mixing bowl
Ingredients
- 4 cups of fresh fruit (strawberries, apples, peaches, or any fruit of your choice)
- 1/4 cup honey or maple syrup (optional, depending on the sweetness of the fruit)
- 1 tablespoon lemon juice
Instructions
- Prepare the Fruit: Wash and chop the fruit into small pieces. If you’re using apples or other harder fruits, it’s best to peel them first.
- Blend: In a blender or food processor, combine the chopped fruit, honey or maple syrup, and lemon juice. Blend until smooth.
- Spread: Line a dehydrator tray or a baking sheet with parchment paper. Pour the blended fruit mixture onto the tray and spread it out evenly. Aim for a thickness of about 1/8 inch.
- Dry: If using a dehydrator, set it to 135°F (57°C) and let it dry for 6-8 hours. If using an oven, preheat it to the lowest setting and leave the door slightly ajar. It may take 4-6 hours for the fruit leather to fully dry.
- Cut and Store: Once the fruit leather is dry and no longer sticky, remove it from the tray and cut it into strips or squares. Roll them up and store in an airtight container for your camping trip!
• Crispy Rice Cereal Treats
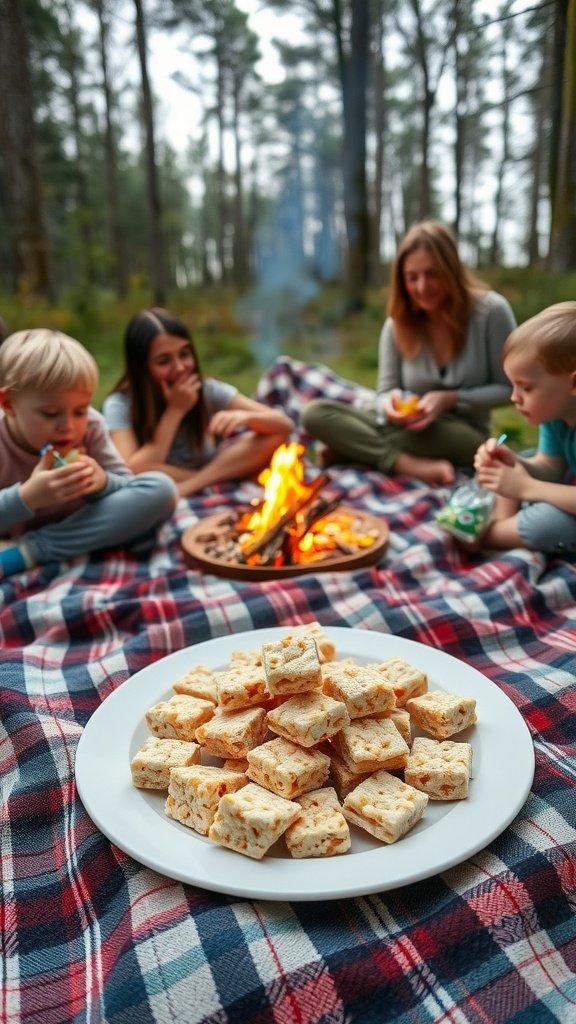
Crispy rice cereal treats are a sweet, chewy delight that both kids and adults will enjoy. With their crisp texture and marshmallow flavor, these treats are a hit around the campfire or during any outdoor gathering. Plus, they are incredibly simple to make, requiring just a few ingredients that are easy to pack for your camping trip.
This no-bake recipe brings together the classic combination of marshmallows and crispy rice cereal, resulting in a treat that’s satisfying and fun to eat. Whether you cut them into squares or shapes, they’re perfect for sharing with family and friends while making memories in the great outdoors!
Tools and Supplies Needed
- Large mixing bowl
- Spatula
- Butter or cooking spray
- 9×13 inch baking dish
- Microwave-safe bowl
Ingredients
- 6 cups crispy rice cereal
- 4 cups mini marshmallows
- 3 tablespoons unsalted butter
- 1 teaspoon vanilla extract
Instructions
- Prepare the Dish: Grease a 9×13 inch baking dish with butter or cooking spray.
- Melt the Marshmallows: In a microwave-safe bowl, combine the mini marshmallows and butter. Microwave on high for about 1-2 minutes, stirring halfway, until melted and smooth.
- Add Vanilla: Stir in the vanilla extract into the melted marshmallow mixture.
- Combine with Cereal: In a large mixing bowl, add the crispy rice cereal. Pour the melted marshmallow mixture over the cereal and stir until evenly coated.
- Press into Dish: Transfer the mixture into the prepared baking dish. Press it down firmly with a spatula or your hands to create an even layer.
- Cool and Cut: Allow the treats to cool for about 30 minutes. Once set, cut into squares or desired shapes. Enjoy your crispy rice cereal treats outdoors!
• Savory Parmesan Crackers
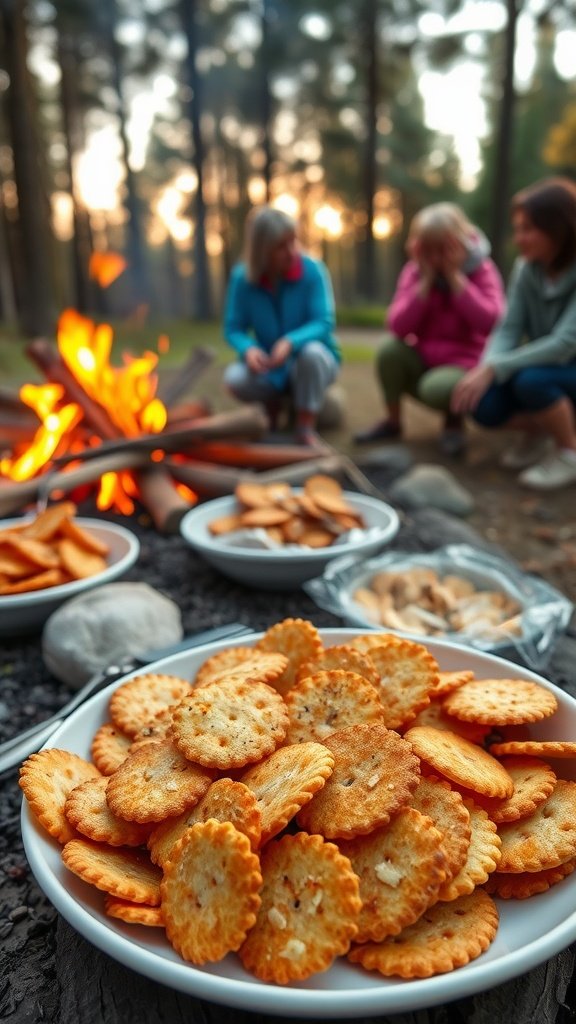
These Savory Parmesan Crackers are a delightful mix of crunch and cheesy goodness, making them perfect for both kids and adults around the campfire. With a hint of garlic and the rich flavor of Parmesan, they offer a satisfying snack that everyone will enjoy. Plus, they’re surprisingly easy to whip up!
Ideal for camping snacks, these crackers are not only tasty but also portable and can be made ahead of time. Pair them with your favorite dips or enjoy them on their own for a flavorful treat.
Tools and Supplies Needed
- Mixing bowl
- Baking sheet
- Parchment paper
- Rolling pin
- Cookie cutter or sharp knife
Ingredients
- 1 cup all-purpose flour
- 1/2 cup grated Parmesan cheese
- 1/2 teaspoon garlic powder
- 1/4 teaspoon salt
- 1/4 cup unsalted butter, softened
- 3 tablespoons cold water
Instructions
- Preheat your oven to 350°F (175°C) and line a baking sheet with parchment paper.
- In a mixing bowl, combine flour, Parmesan cheese, garlic powder, and salt. Mix well.
- Add the softened butter and mix until crumbly. Gradually add cold water, stirring until a dough forms.
- On a floured surface, roll out the dough to about 1/8-inch thickness. Use a cookie cutter or knife to cut into desired shapes.
- Place the crackers on the prepared baking sheet and bake for 12-15 minutes, or until golden brown.
- Let them cool before serving. Enjoy your savory treats!
• Chocolate Dipped Pretzel Rods
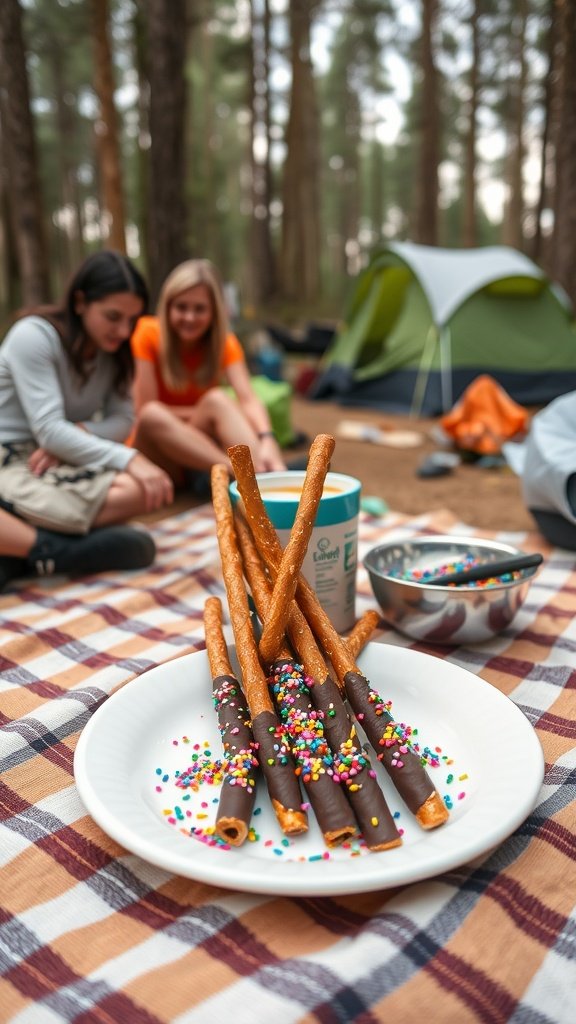
Chocolate dipped pretzel rods are a sweet and salty treat that everyone will adore. They combine the crunch of pretzels with rich chocolate for a delicious snack perfect for camping. Simple to make, these treats are a delightful way to satisfy cravings around the campfire!
These pretzel rods are not just easy to prepare, but they also allow for creativity. You can sprinkle them with colorful toppings like sprinkles or nuts for an extra touch. Kids will love helping out in the kitchen or campsite, making this snack fun for the whole family!
Tools and Supplies Needed
- Microwave-safe bowl
- Fork or dipping tool
- Parchment paper or baking sheet
- Plate for serving
Ingredients
- 1 bag pretzel rods
- 1 cup semi-sweet chocolate chips
- 1 tablespoon vegetable oil (optional, for thinning chocolate)
- 1/4 cup sprinkles or toppings of your choice
Instructions
- Melt the Chocolate: In a microwave-safe bowl, combine the chocolate chips and vegetable oil. Microwave in 30-second intervals, stirring in between, until smooth.
- Dip the Pretzel Rods: Hold a pretzel rod by one end and dip it into the melted chocolate, coating about two-thirds of the rod. Let the excess chocolate drip off.
- Add Toppings: While the chocolate is still wet, sprinkle your choice of toppings onto the chocolate-covered portion.
- Set and Cool: Place the dipped pretzels on a parchment-lined baking sheet. Allow them to cool and harden at room temperature or in the fridge for quicker results.
- Serve and Enjoy: Once set, serve these delightful snacks around the campfire or pack them for later!
• Mason Jar Pasta Salad
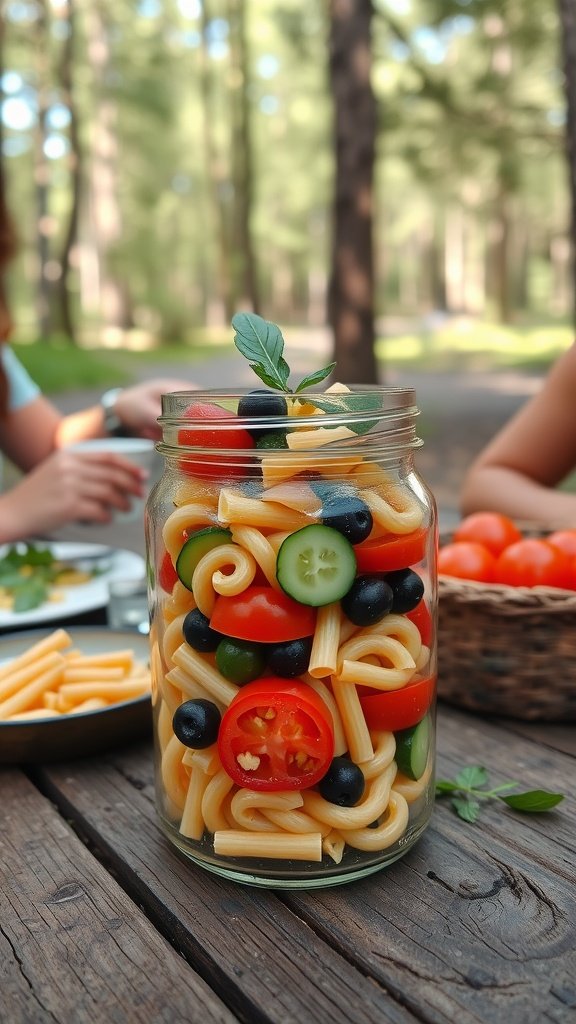
Mason jar pasta salad is a fun and easy way to enjoy a delicious meal while camping. This salad combines pasta, fresh vegetables, and your favorite dressing, all packed neatly in a jar. It’s not only tasty but also portable, making it a perfect addition to your camping snacks for both kids and adults.
The flavors blend beautifully, with the crunch of veggies complementing the soft pasta. Prepare it ahead of time, and it’s ready to grab when hunger strikes during your outdoor activities!
Tools and Supplies Needed
- 1 large mason jar
- Pot for boiling pasta
- Cutting board
- Knife
- Mixing bowl
Ingredients
- 2 cups cooked pasta (any shape)
- 1 cup cherry tomatoes, halved
- 1 cup cucumber, sliced
- 1/2 cup black olives, sliced
- 1/2 cup bell pepper, diced
- 1/4 cup red onion, diced
- 1/2 cup Italian dressing
- Salt and pepper to taste
- Fresh basil for garnish (optional)
Instructions
- Cook the Pasta: Boil the pasta according to package instructions. Drain and let it cool.
- Prepare the Veggies: While the pasta cools, chop the cherry tomatoes, cucumber, bell pepper, and red onion.
- Layer in the Jar: Start with a layer of pasta at the bottom of the mason jar, followed by olives, tomatoes, cucumbers, bell peppers, and onions. Repeat until the jar is full.
- Add Dressing: Pour the Italian dressing over the top layer, ensuring it reaches the pasta.
- Season: Sprinkle with salt and pepper, and add fresh basil on top if desired.
- Seal and Chill: Tightly seal the jar and refrigerate until ready to serve. This can be made a day in advance for convenience!
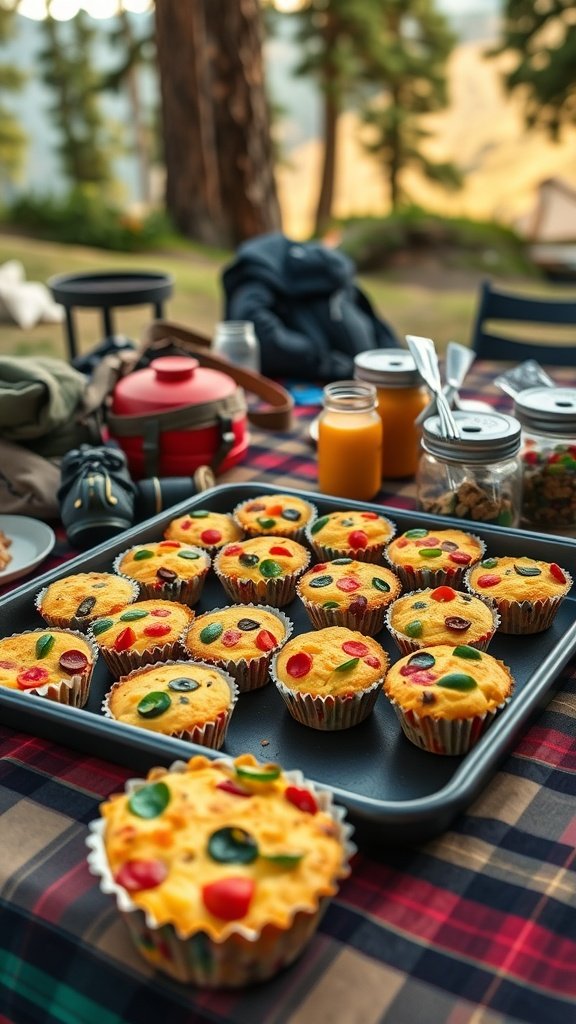
• Pizza Muffins
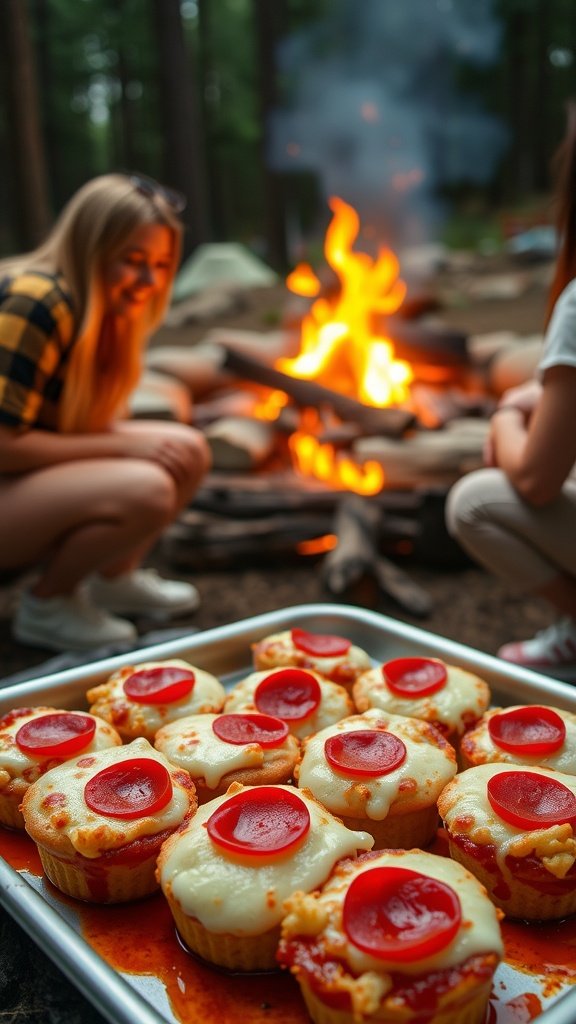
Pizza muffins are a fun and easy camping snack that everyone will love! They combine the classic flavors of pizza into a bite-sized treat that’s perfect for sharing around the campfire. Soft and cheesy, with a zesty sauce and your favorite toppings, these muffins are sure to satisfy both kids and adults alike.
Making pizza muffins is a breeze, requiring minimal prep and just a few simple ingredients. They are ideal for camping trips since they can be made ahead of time or whipped up quickly on-site. Enjoy the warm, gooey goodness right from the oven or let them cool for a tasty snack later!
Tools and Supplies Needed
- Oven or campfire setup
- Mixing bowl
- Muffin tin
- Measuring cups and spoons
- Spatula
- Cooling rack
Ingredients
- 1 ½ cups all-purpose flour
- 1 tablespoon baking powder
- ½ teaspoon salt
- 1 cup milk
- 1 large egg
- ¼ cup olive oil
- 1 cup pizza sauce
- 1 ½ cups shredded mozzarella cheese
- ½ cup sliced pepperoni
- Optional: other toppings like bell peppers or olives
Instructions
- Preheat the oven to 375°F (190°C) and grease a muffin tin.
- In a mixing bowl, whisk together the flour, baking powder, and salt.
- In another bowl, combine the milk, egg, and olive oil. Mix well.
- Pour the wet ingredients into the dry ingredients and stir until just combined.
- Add the pizza sauce, half of the mozzarella cheese, and any additional toppings. Mix until evenly distributed.
- Fill each muffin cup about ¾ full with the batter. Top with the remaining mozzarella and pepperoni slices.
- Bake for 18-20 minutes or until the muffins are golden brown and a toothpick comes out clean.
- Let them cool in the pan for a few minutes before transferring to a cooling rack. Serve warm or at room temperature.
• Quick Quesadilla Triangles
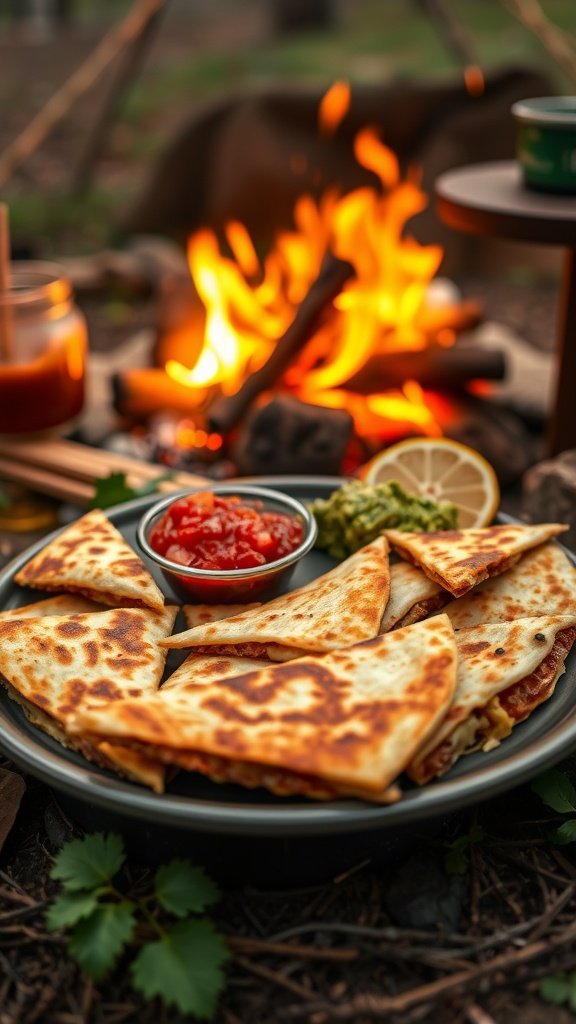
Quick quesadilla triangles are a fantastic camping snack that both kids and adults will enjoy. With their crispy exterior and gooey cheese filling, they offer a delicious blend of flavors that are sure to satisfy any appetite. Easy to prepare over a campfire or on a portable stove, these quesadillas are perfect for a quick meal or snack during your outdoor adventures.
Getting creative with fillings is part of the fun! You can stick to classic cheese, or add ingredients like beans, veggies, or cooked chicken. They cook up in just a few minutes and can be paired with salsa or guacamole for an extra kick. These quesadilla triangles are practical, tasty, and a hit around the campfire!
Tools and Supplies Needed
- Cast iron skillet or non-stick pan
- Spatula
- Campfire or portable stove
- Cutting board
- Knife
Ingredients
- 4 flour tortillas
- 2 cups shredded cheese (cheddar, mozzarella, or a blend)
- 1 cup cooked chicken (optional)
- 1/2 cup black beans (optional)
- 1/2 cup chopped bell peppers (optional)
- Salsa or guacamole for serving
Instructions
- Heat the skillet over the campfire or stove until hot.
- Place one tortilla in the skillet and sprinkle half of the cheese evenly over it.
- If using, add cooked chicken, black beans, and chopped bell peppers on top of the cheese.
- Top with another tortilla and cook for about 2-3 minutes until the bottom is golden brown and the cheese starts to melt.
- Carefully flip the quesadilla using the spatula and cook for another 2-3 minutes until the other side is golden brown and the cheese is fully melted.
- Remove from the heat and let it cool for a minute. Cut into triangles and serve with salsa or guacamole.
• Peanut Butter Stuffed Dates
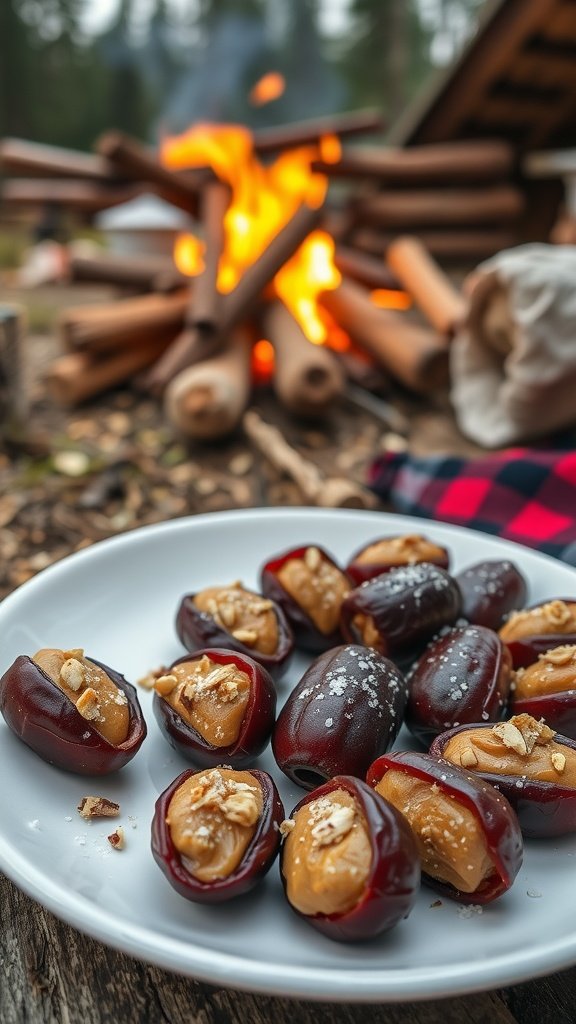
Peanut Butter Stuffed Dates are a simple yet delicious snack perfect for any camping trip. These sweet and chewy treats combine the natural sweetness of dates with creamy peanut butter, creating a delightful flavor combination that both kids and adults will enjoy.
Not only are they easy to make, but they also pack a nutritious punch. The dates provide fiber and natural sugars, while peanut butter adds protein and healthy fats. A sprinkle of nuts or sea salt on top enhances the taste even more!
Ingredients
- 20 Medjool dates
- 1 cup creamy peanut butter
- 1/2 cup chopped nuts (like almonds or walnuts)
- Sea salt (optional)
Tools and Supplies Needed
- Butter knife or small spoon
- Cutting board
- Snack bag or container for storage
Instructions
- Prepare the Dates: Slice each date lengthwise and remove the pit. Be careful not to cut all the way through; just create a pocket for the filling.
- Stuff the Dates: Use a butter knife or small spoon to fill each date with peanut butter, ensuring it’s generous but not overflowing.
- Add Toppings: Sprinkle chopped nuts over the peanut butter for added crunch. If you like a salty touch, add a pinch of sea salt on top.
- Store: Place the stuffed dates in a snack bag or container, and they’re ready to go!
• Crispy Kale Chips
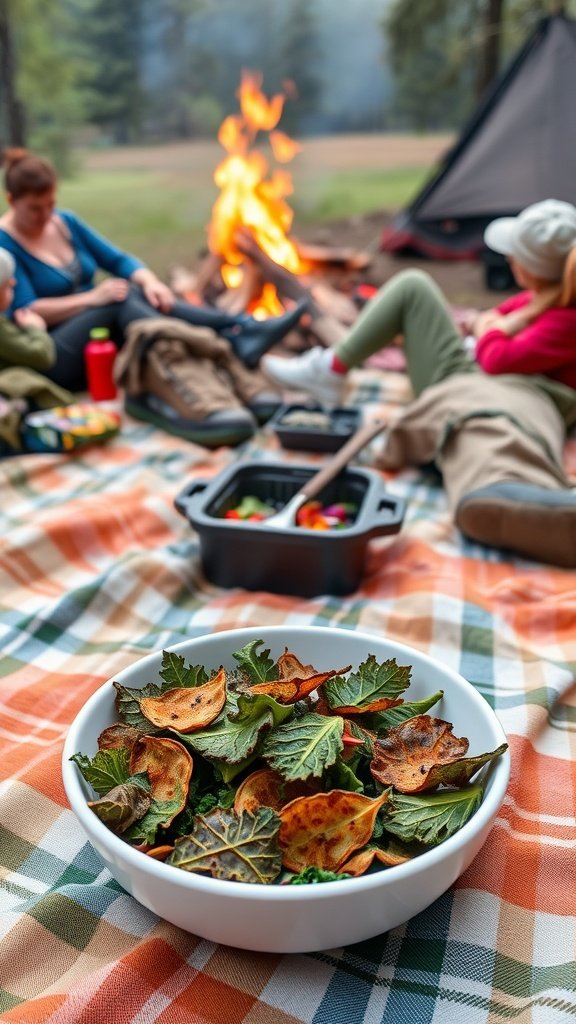
Crispy kale chips are a fun and healthy snack that everyone will enjoy, whether you’re lounging by the campfire or hiking through the woods. These chips are light, crunchy, and packed with flavor, making them a perfect alternative to traditional chips. Plus, they’re super simple to make and can be seasoned to suit any taste!
Kids and adults alike will love munching on these tasty snacks while enjoying the great outdoors. With just a few ingredients and some quick prep, you can create a nutritious treat that satisfies those crunchy cravings. Get ready to impress your fellow campers!
Tools and Supplies Needed
- Baking sheet
- Parchment paper
- Mixing bowl
- Oven or campfire grill
Ingredients
- 1 bunch of kale
- 1 tablespoon olive oil
- 1 teaspoon salt
- 1 teaspoon garlic powder (optional)
- 1 teaspoon paprika (optional)
Instructions
- Preheat your oven to 350°F (175°C) or prepare your campfire grill.
- Wash and dry the kale thoroughly. Remove the tough stems and tear the leaves into bite-sized pieces.
- In a mixing bowl, toss the kale with olive oil, salt, and any additional seasonings you’d like.
- Spread the kale evenly on a baking sheet lined with parchment paper.
- Bake for about 10-15 minutes, or until the leaves are crispy and slightly golden. Keep an eye on them to avoid burning.
- Let the chips cool slightly before serving. Enjoy your crispy kale chips around the campfire!
• Mini Bagels With Cream Cheese
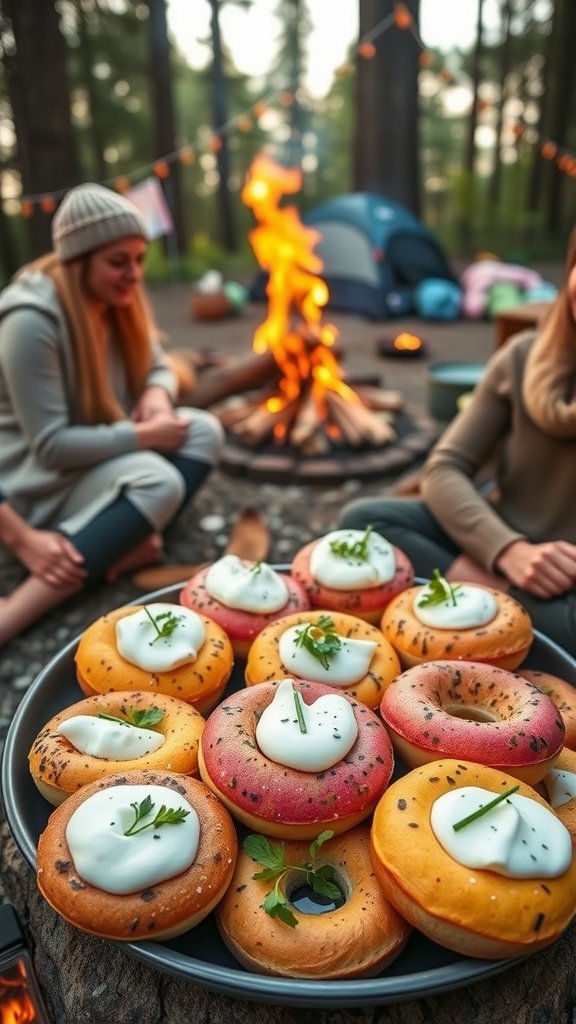
Mini bagels with cream cheese make for a tasty and satisfying camping snack that everyone will enjoy. They’re easy to make, and their chewy texture pairs perfectly with the smooth cream cheese spread. You can customize toppings too, making it a fun activity for the kids.
These bagels are not only delicious but also versatile. You can choose different flavors of cream cheese or add fresh ingredients like herbs or veggies on top. It’s a snack that’s sure to please both kids and adults around the campfire!
Ingredients
- 1 package mini bagels
- 8 oz cream cheese, softened
- 1 tablespoon fresh herbs (like chives or dill), chopped
- Salt and pepper to taste
- Optional toppings: sliced cucumbers, tomatoes, or smoked salmon
Instructions
- Prepare the Bagels: Slice the mini bagels in half and lightly toast them if you prefer a warm snack.
- Mix the Cream Cheese: In a bowl, combine the softened cream cheese with fresh herbs, salt, and pepper. Mix until well incorporated.
- Spread and Top: Generously spread the cream cheese mixture over each bagel half. Add your choice of toppings like sliced cucumbers or tomatoes to elevate the flavor.
- Serve: Arrange the decorated bagels on a plate and enjoy them around the campfire!
Tools and Supplies Needed
- Cutting board
- Knife
- Bowl for mixing
- Spoon or spreader
- Plate for serving