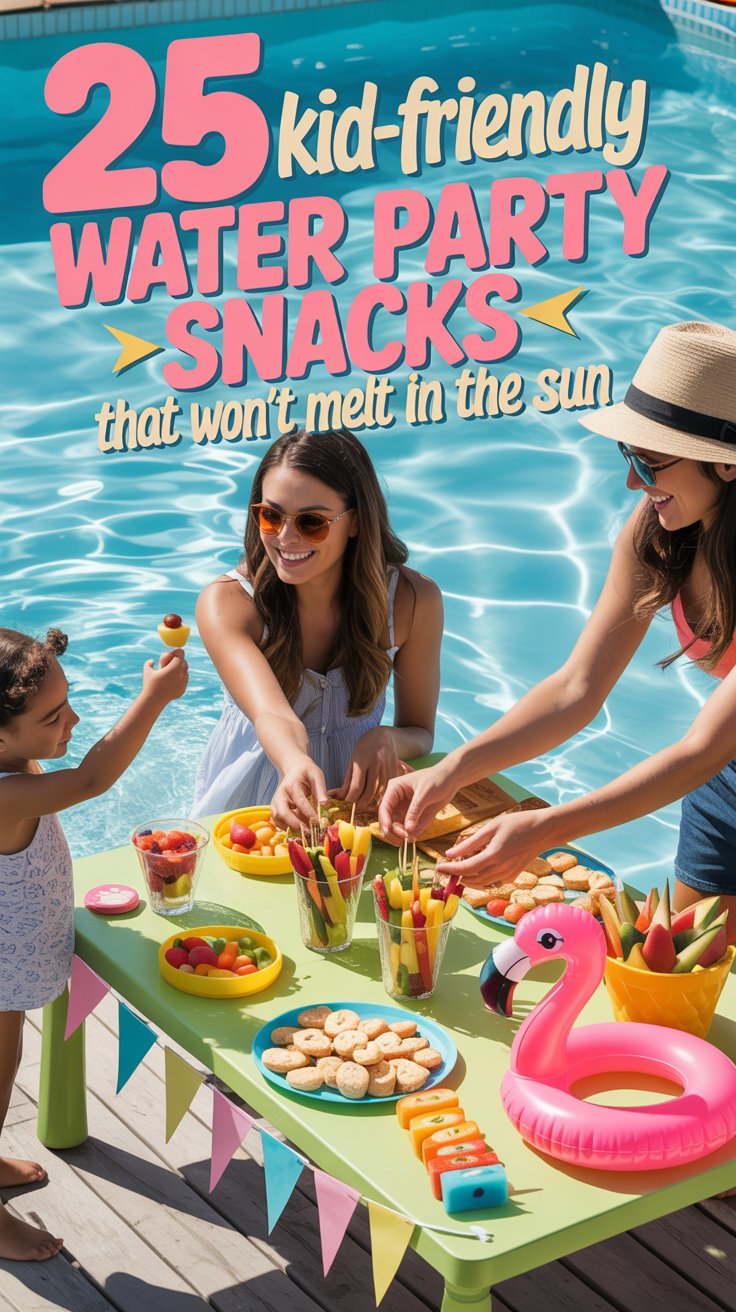
Warm weather means it’s time for some fun in the sun, and what better way to enjoy a day by the water than with tasty snacks that kids will love? This list features 25 kid-friendly water party snacks that are perfect for keeping energy levels up without the worry of melting in the heat. From crunchy to fruity, there’s something here for everyone without the fuss of sticky messes!
Tools and Supplies Needed For Recipes (Get From Amazon):
- Coolers or insulated bags
- Plastic or paper plates
- Napkins
- Utensils (if needed)
- Serving containers for dips and spreads
- Ice packs to keep items cool
- Water bottles for hydration
Watermelon Star Skewers

Watermelon star skewers are a fun and refreshing treat perfect for any summer gathering. Bursting with natural sweetness, these fruity snacks are not just easy to make—they also bring a splash of color to your table. Kids and adults alike will love these delightful bites that are both healthy and delicious!
Creating these skewers is simple. Just cut watermelon into star shapes, slide them onto skewers, and you’re ready to go. Add a few other fruits for extra flavor and variety. Serve them chilled for a refreshing snack that won’t melt away in the sun!
Tools and Supplies Needed
- Watermelon
- Star-shaped cookie cutter
- Skewers or lollipop sticks
- Optional: Other fruits like cantaloupe, honeydew, or grapes
Ingredients
- 1 large watermelon
- 1 medium cantaloupe (optional)
- 1 medium honeydew melon (optional)
- Grapes (optional)
- Skewers or lollipop sticks
Instructions
- Cut the Watermelon: Slice the watermelon into thick pieces. Use a star-shaped cookie cutter to cut out star shapes from the watermelon.
- Prepare Other Fruits: If using cantaloupe or honeydew, repeat the process to create star shapes or simply slice them into bite-sized pieces. You can also use whole grapes for easy assembly.
- Assemble the Skewers: Take a skewer and slide on a star of watermelon, followed by other fruit pieces as desired. Alternate the fruit for a colorful look.
- Chill and Serve: Place the assembled skewers in the refrigerator for a bit before serving. Enjoy these refreshing snacks at your next water party!
Veggie Cups With Hummus

Veggie cups with hummus are a fun and healthy snack option that kids will love. They combine crunchy vegetables with a creamy dip, making them a hit at any water party. Plus, they are super easy to prepare, taking just minutes to assemble!
This snack is not only tasty but also packed with nutrients, offering a great way to sneak in some veggies. Whether it’s crisp bell peppers, refreshing cucumbers, or vibrant carrots, each bite is full of flavor, enhanced by the rich and smooth hummus.
Tools and Supplies Needed
- Plastic cups or small bowls
- Knife for cutting vegetables
- Cutting board
- Serving platter (optional)
Ingredients
- 1 cup hummus (store-bought or homemade)
- 1 red bell pepper, cut into sticks
- 1 yellow bell pepper, cut into sticks
- 1 cucumber, cut into sticks
- 1 carrot, cut into sticks
Instructions
- Prepare the Vegetables: Wash and cut the bell peppers, cucumber, and carrot into sticks.
- Assemble the Cups: Spoon hummus into the bottom of each plastic cup, filling it about one-third full.
- Add the Veggies: Stand the vegetable sticks upright in the hummus, mixing colors for a visually appealing display.
- Serve: Arrange the cups on a platter or serve them individually to guests. Enjoy fresh!
Frozen Grape Poppers

Frozen grape poppers are a fun and refreshing snack that kids will love. They are sweet, juicy, and perfect for hot summer days, making them an excellent choice for any water party. Plus, they are super easy to prepare, requiring just a little bit of time in the freezer to transform them into a cool treat.
This snack is not only delicious but also healthy! Packed with vitamins, frozen grapes are a great way to satisfy a sweet craving without any added sugars. Kids can pop them in their mouths like candy, and with the variety of colors, they look delightful on a platter. When you’re ready to make these simple snacks, here’s what you’ll need.
Tools and Supplies Needed
- Large bowl
- Colander or strainer
- Freezer-safe container or baking sheet
Ingredients
- 2 cups of seedless grapes (red, green, or a mix)
- 1 tablespoon of lemon juice (optional, for added flavor)
Instructions
- Wash the Grapes: Rinse the grapes thoroughly under cold water in a colander to remove any dirt or pesticides.
- Prep for Freezing: If desired, toss the clean grapes in a bowl with lemon juice for extra zing. This step is optional but adds a fun citrus twist.
- Freeze: Arrange the grapes in a single layer on a baking sheet or place them directly into a freezer-safe container. Freeze for at least 2-3 hours or until completely solid.
- Serve: Once frozen, transfer the grapes to a serving bowl and enjoy! They can be eaten straight from the freezer for the ultimate icy snack.
Pretzel Rod Dippers

Pretzel rod dippers are a fun and tasty treat that kids love. They combine the crunch of pretzel rods with a creamy dip, making them perfect for a water party or any outdoor gathering. With a hint of sweetness and a satisfying crunch, these snacks are simple to whip up and are sure to be a hit.
Not only are they easy to make, but they also encourage dipping and snacking, which kids absolutely enjoy. You can customize the dips with various flavors and toppings, allowing for creativity in every bite!
Tools and Supplies Needed
- Long pretzel rods
- Your choice of dips (chocolate, yogurt, or cream cheese)
- Sprinkles or toppings (optional)
- Small cups or bowls for the dips
- Serving platter
Ingredients
- 1 cup chocolate chips (for melting)
- 1/2 cup vanilla yogurt
- 1/2 cup cream cheese, softened
- 2 tablespoons powdered sugar (for the cream cheese dip)
- Sprinkles or nuts (optional)
Instructions
- Prepare the Dips: For the chocolate dip, melt the chocolate chips in a microwave-safe bowl in 30-second increments, stirring until smooth. For the yogurt dip, simply scoop vanilla yogurt into a bowl. For the cream cheese dip, mix softened cream cheese with powdered sugar until smooth.
- Set Up the Dipping Station: Place the dips in small cups or bowls on a serving platter. Arrange the pretzel rods around the dips for easy access.
- Add Toppings: If desired, sprinkle some colorful sprinkles or chopped nuts on top of the dips for extra flair.
- Serve and Enjoy: Let the kids dip their pretzel rods into the dips and enjoy these delicious snacks!
Berry-Stuffed Strawberries

Berry-stuffed strawberries are a delightful and refreshing treat perfect for any summer gathering. These juicy strawberries filled with blueberries create a burst of flavor in every bite. Not only do they taste great, but they’re also super easy to make, making them a go-to snack for kids and adults alike.
Bright and colorful, these snacks look fantastic on any table. They are perfect for a water party or picnic since they won’t melt in the sun. Plus, they offer the sweetness of strawberries combined with the tang of blueberries, creating a tasty treat that kids will love!
Tools and Supplies Needed
- A sharp knife
- A small spoon or melon baller
- A mixing bowl
- Toothpicks or small skewers
- A serving platter
Ingredients
- 1 pound large strawberries
- 1 cup fresh blueberries
- 1 tablespoon honey (optional)
- Fresh mint leaves for garnish (optional)
Instructions
- Prepare the Strawberries: Rinse the strawberries under cool water and gently pat them dry. Cut a small slice off the top of each strawberry to create a flat base so they can stand upright. Remove the stem.
- Hollow the Strawberries: Use a sharp knife or a melon baller to carefully scoop out some of the flesh from the inside of each strawberry, creating a hollow space for the blueberries.
- Fill with Blueberries: In a mixing bowl, combine the blueberries and honey (if using). Stuff each hollowed strawberry with blueberries, packing them in tightly.
- Assemble and Serve: Place the stuffed strawberries on a serving platter. If desired, garnish with fresh mint leaves. Insert a toothpick or skewer into each strawberry for easy handling.
- Chill and Enjoy: Keep the strawberries in the fridge until ready to serve for an extra refreshing treat!
Mini Sandwich Skewers

Mini sandwich skewers are a fun and easy snack that kids will love! They combine all the favorite flavors of a sandwich, neatly stacked on a stick for easy eating. This recipe is perfect for warm weather since they won’t melt in the sun, and they offer a delightful mix of textures and tastes.
Plus, they are super simple to assemble. Just choose your ingredients, layer them on skewers, and you’re ready to go. Whether it’s a party by the pool or a backyard barbecue, these skewers are sure to be a hit!
Tools and Supplies Needed
- Skewers or toothpicks
- Cutting board
- Knife
- Plate for serving
Ingredients
- 8 slices of bread (white or whole grain)
- 4 slices of ham
- 4 slices of cheese (cheddar or Swiss)
- 1 cup cherry tomatoes
- 1 cucumber, sliced
- Optional: mustard or mayonnaise
Instructions
- Prepare the Bread: Cut the bread into quarters or smaller squares, depending on your preference.
- Layer Ingredients: Place a piece of ham and cheese on each piece of bread. If desired, spread a thin layer of mustard or mayonnaise.
- Assemble Skewers: Thread a piece of bread onto a skewer, followed by a cherry tomato, followed by another piece of bread. You can add cucumber slices in between for extra crunch.
- Repeat: Continue layering ingredients until your skewers are filled. Aim for 2-3 layers per skewer.
- Serve: Arrange the skewers on a plate and serve immediately, or refrigerate until ready to serve.
Trail Mix Cups

Trail mix cups are a fun and easy snack that kids love. They combine a variety of tasty ingredients, making them both delicious and nutritious!
Perfect for a water party, these cups are simple to prepare and can be customized to suit everyone’s taste. With crunchy nuts, sweet dried fruits, and crispy cereals, they offer a delightful mix of flavors and textures. Best of all, they won’t melt in the sun, making them ideal for outdoor fun!
Tools and Supplies Needed
- Mixing bowls
- Measuring cups and spoons
- Cupcake liners or small paper cups
- Spoon for mixing
Ingredients
- 1 cup mixed nuts (cashews, almonds, peanuts)
- 1 cup granola or crispy cereal
- 1 cup dried fruit (raisins, cranberries, apricots)
- 1/2 cup chocolate chips or yogurt-covered treats (optional)
- 1 cup pretzel pieces
- 1/2 cup seeds (pumpkin or sunflower)
Instructions
- Mix Ingredients: In a large mixing bowl, combine the mixed nuts, granola, dried fruit, chocolate chips (if using), pretzel pieces, and seeds. Stir well until everything is evenly distributed.
- Portion into Cups: Take your cupcake liners or small cups and fill each with the trail mix mixture. You can make them as full as you like!
- Serve: Set them out on a table for everyone to grab. Enjoy these tasty trail mix cups during your water party!
Cheese And Cracker Stackers

Cheese and cracker stackers are the perfect snacks for a sunny water party! They are simple to make and provide a delightful crunch combined with creamy cheese that kids love. This snack is not only quick to prepare but also easy for little hands to pick up and enjoy.
This fun treat allows for creativity, as you can mix and match different cheeses and crackers. The combination of flavors makes each bite satisfying without the worry of melting, making them a hit at any outdoor event!
Tools and Supplies Needed
- Cheese slicer or knife
- Cutting board
- Plates or serving trays
- Toothpicks or skewers (optional)
Ingredients
- Your choice of assorted crackers (e.g., wheat, cheese, or rice crackers)
- Variety of cheeses (e.g., cheddar, mozzarella, pepper jack)
- Optional toppings: slices of deli meats, cucumber, or cherry tomatoes
Instructions
- Prepare the Ingredients: Slice the cheese into squares that fit well on the crackers. If using optional toppings, prep those as well.
- Assemble the Stackers: Start by placing a cracker on the plate, add a slice of cheese, and then top it with another cracker. For added fun, you can use a toothpick to secure the stack.
- Repeat: Continue making stackers until you have enough for your guests. Feel free to mix and match cheeses and crackers for variety.
- Serve and Enjoy: Arrange the stackers on a serving tray and let the kids enjoy this tasty, no-melt snack!
Cucumber Sandwich Rounds

Cucumber sandwich rounds are a refreshing and playful snack perfect for a water party. Combining cool cucumber with a creamy filling, these bites are not only delicious but also super easy to make.
The crisp texture of the cucumber paired with the soft bread creates a delightful contrast. Plus, they won’t melt in the sun, making them an ideal choice for any outdoor gathering!
Tools and Supplies Needed
- Cutting board
- Sharp knife
- Mixing bowl
- Spreading knife
Ingredients
- 1 large cucumber
- 4 slices of bread (white or whole grain)
- 1/2 cup cream cheese, softened
- 1 tablespoon fresh dill (or your choice of herbs)
- Salt and pepper to taste
Instructions
- Prepare the Cucumber: Wash and slice the cucumber into thick rounds, about 1/4 inch each.
- Make the Filling: In a mixing bowl, combine softened cream cheese, chopped dill, salt, and pepper. Mix until smooth.
- Assemble the Sandwiches: Spread the cream cheese mixture on a slice of bread, then top with several cucumber rounds. Add another slice of bread on top and repeat with remaining ingredients.
- Cut and Serve: Cut each sandwich into quarters or halves for easy handling. Arrange on a platter and enjoy!
Frozen Yogurt Covered Berries

Frozen yogurt covered berries make for a refreshing and healthy snack that’s perfect for hot summer days. The sweet, tangy flavor of the berries combined with the creamy yogurt coating creates a delightful treat that kids will love. Plus, they are super easy to prepare, making them an ideal choice for any water-themed party.
Simply dip your favorite berries in yogurt, freeze them, and enjoy! They won’t melt in the sun, allowing everyone to savor these delicious bites without a mess. This snack is not just tasty; it’s also packed with nutrients, ensuring kids get a healthy dose of vitamins while having fun.
Tools and Supplies Needed
- Mixing bowl
- Baking sheet
- Parchment paper
- Freezer
Ingredients
- 1 cup Greek yogurt (plain or flavored)
- 2 cups fresh strawberries, hulled
- 2 cups fresh blueberries
- Honey or maple syrup (optional, for sweetness)
Instructions
- Prepare the Berries: Rinse the strawberries and blueberries under cold water. Pat them dry with a towel.
- Mix the Yogurt: In a mixing bowl, you can whisk in honey or maple syrup into the yogurt if you prefer a sweeter taste.
- Dip the Berries: Use a fork to dip each berry into the yogurt, ensuring they are fully coated.
- Arrange on Baking Sheet: Place the yogurt-covered berries onto a baking sheet lined with parchment paper. Be sure to leave space between each berry.
- Freeze: Put the baking sheet in the freezer for about 2-3 hours, or until the yogurt is completely frozen.
- Serve: Once frozen, enjoy the yogurt-covered berries straight from the freezer. Store any leftovers in an airtight container in the freezer.
Veggie Pinwheels
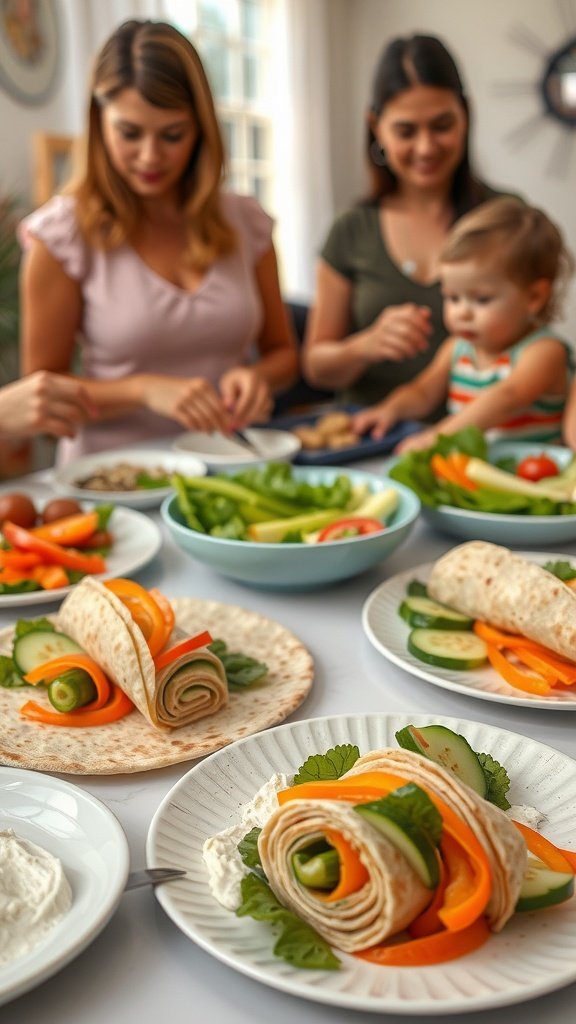
Veggie pinwheels are a fun and colorful snack that kids will love! They’re packed with fresh vegetables and wrapped in a soft tortilla, making them both tasty and easy to handle. These bites are not only a great way to sneak in some veggies, but they also offer a delightful crunch that kids enjoy. Plus, they’re super simple to make, which means you can whip them up quickly for a pool party or picnic.
The flavor combination is refreshing, with the crispness of cucumbers and bell peppers complementing the creaminess of the spread. You can customize them with your favorite veggies or dips, making them a versatile choice for any gathering. These pinwheels are ideal for a water party, as they won’t melt in the sun and can be enjoyed by everyone!
Tools and Supplies Needed
- Cutting board
- Sharp knife
- Mixing bowl
- Rolling pin (optional)
- Plate for serving
Ingredients
- 4 large flour tortillas
- 8 oz cream cheese, softened
- 1 cup shredded carrots
- 1 cup cucumber, thinly sliced
- 1 cup bell peppers (any color), thinly sliced
- 1 cup spinach or lettuce leaves
- Salt and pepper to taste
Instructions
- Prepare the Filling: In a mixing bowl, combine the softened cream cheese with salt and pepper. Mix until smooth.
- Spread the Cream Cheese: Lay a tortilla flat on the cutting board. Spread a generous layer of the cream cheese mixture evenly over the entire tortilla.
- Add Vegetables: Sprinkle shredded carrots, cucumber, bell peppers, and spinach on top of the cream cheese. Make sure to layer them evenly.
- Roll It Up: Starting from one side, carefully roll the tortilla tightly until you reach the other side. Make sure to keep the filling intact.
- Slice and Serve: Using a sharp knife, slice the rolled tortilla into bite-sized pinwheels. Arrange them on a plate and serve immediately or refrigerate until serving.
Apple Cookies

Apple cookies are a fun and tasty treat that kids will love. They combine the sweet crunch of fresh apples with creamy nut butter and tasty toppings, making them a delightful snack for any water party. These cookies are not only easy to prepare but also healthy and full of flavor.
The taste is a perfect blend of sweet and nutty, with a satisfying crunch from the apple and a creamy texture from the nut butter. Plus, they won’t melt under the sun, making them a perfect choice for outdoor gatherings!
Tools and Supplies Needed
- Cutting board
- Knife
- Small bowl
- Spoon
Ingredients
- 2 medium apples
- 1/2 cup peanut butter (or almond butter)
- 1/4 cup granola
- 1/4 cup mini chocolate chips
Instructions
- Prepare the Apples: Wash the apples and slice them into rounds, removing the seeds.
- Add Nut Butter: Spread a generous layer of peanut butter on each apple slice.
- Top with Goodies: Sprinkle granola and mini chocolate chips over the nut butter.
- Serve and Enjoy: Assemble on a plate and serve immediately to enjoy the fresh flavors!
Pizza Muffins

Pizza muffins are a delightful and easy-to-make snack that kids absolutely love. They have all the delicious flavors of pizza wrapped in a handy muffin form, making them perfect for outdoor parties. The soft, fluffy texture combined with gooey cheese and your favorite toppings creates a taste explosion that is sure to please young palates.
What makes these muffins even better is how simple they are to whip up! Just mix your ingredients, pour the batter into a muffin tin, and bake. They hold up well in the sun, making them a great addition to any water party. You can customize them with various toppings, like pepperoni, veggies, or even different cheeses, to suit everyone’s tastes.
Tools and Supplies Needed
- Muffin tin
- Mixing bowl
- Measuring cups and spoons
- Whisk or spoon
- Oven mitts
- Cooling rack
Ingredients
- 2 cups all-purpose flour
- 2 teaspoons baking powder
- 1 teaspoon garlic powder
- 1/2 teaspoon salt
- 1 cup shredded mozzarella cheese
- 1/2 cup sliced pepperoni or your preferred toppings
- 1/2 cup pizza sauce
- 2 large eggs
- 1 cup milk
- 1/4 cup olive oil
Instructions
- Preheat the Oven: Preheat your oven to 375°F (190°C) and grease your muffin tin.
- Mix Dry Ingredients: In a mixing bowl, combine flour, baking powder, garlic powder, and salt.
- Add Cheese and Toppings: Stir in the shredded mozzarella and sliced pepperoni until well mixed.
- Combine Wet Ingredients: In another bowl, whisk together eggs, milk, and olive oil.
- Mix Together: Pour the wet mixture into the dry ingredients and stir until just combined; do not overmix.
- Add Sauce: Gently fold in the pizza sauce until evenly distributed.
- Fill Muffin Tin: Spoon the batter into the muffin tin, filling each cup about 3/4 full.
- Bake: Bake for about 20-25 minutes or until golden brown and a toothpick inserted comes out clean.
- Cool: Allow the muffins to cool in the tin for a few minutes before transferring them to a cooling rack.
Cereal Necklaces
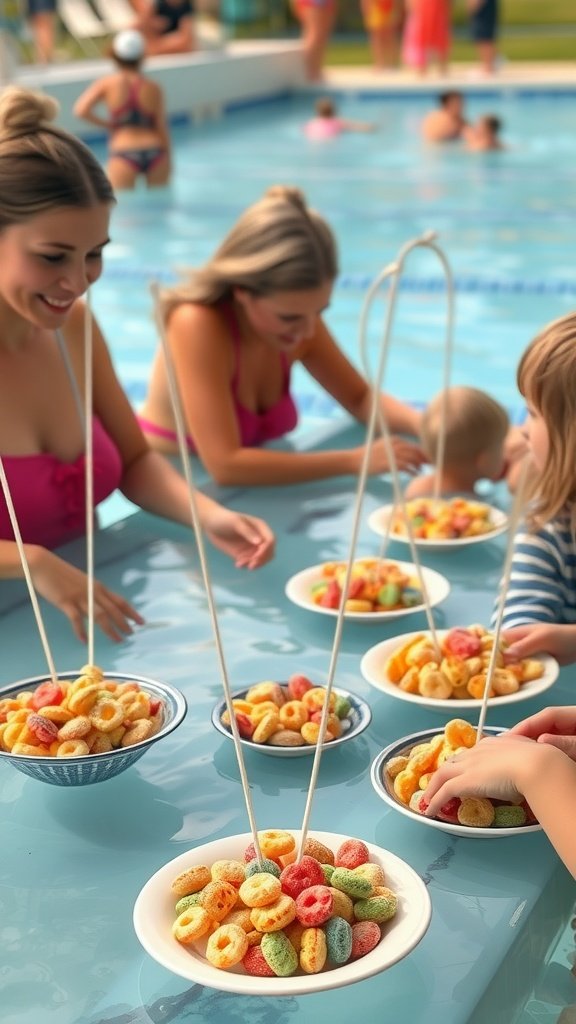
Cereal necklaces are a fun and easy snack that kids can make while enjoying a water party. They combine the crunch of cereal with a creative activity, letting little ones express their artistic side. Each colorful piece is not only tasty but also a joy to wear, making it a perfect addition to any poolside gathering.
The best part? These necklaces are simple to assemble and require minimal adult supervision, allowing kids to take the lead. Plus, they won’t melt in the sun, making them ideal for warm days. Just gather some brightly colored cereal, some string, and you’re all set!
Tools and Supplies Needed
- Colored cereal (like Fruit Loops or Cheerios)
- String or yarn
- Scissors
Ingredients
- 2 cups of colored cereal
- 1 yard of string or yarn (adjust as needed)
Instructions
- Cut a length of string or yarn, approximately 1 yard long.
- Help your child thread the cereal onto the string, creating a pattern or random assortment.
- Once finished, tie the ends of the string together to form a necklace.
- Let your child wear their creation or snack on it for a tasty treat!
Cherry Tomato Caprese Pops
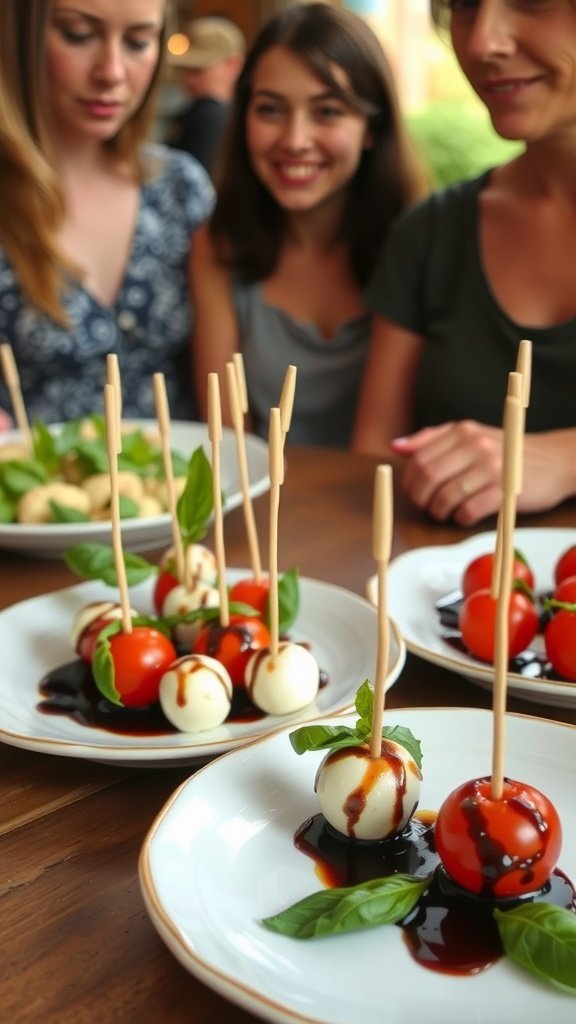
Cherry Tomato Caprese Pops are a fun and refreshing twist on the classic Caprese salad. They combine the sweetness of cherry tomatoes with creamy mozzarella and fragrant basil, creating a delightful burst of flavor in every bite. These snacks are not only delicious but also incredibly easy to prepare, making them perfect for a sunny water party.
With their colorful presentation on skewers, kids will love these bite-sized treats. The combination of fresh ingredients and a drizzle of balsamic glaze adds an extra zing that elevates the taste. Plus, they won’t melt in the sun, ensuring you can enjoy them throughout your gathering!
Tools and Supplies Needed
- Skewers or toothpicks
- Cutting board
- Knife
- Serving platter
Ingredients
- 1 pint cherry tomatoes
- 1 pound fresh mozzarella balls
- 1 bunch fresh basil leaves
- Balsamic glaze
- Salt and pepper to taste
Instructions
- Prepare the Ingredients: Rinse the cherry tomatoes and basil leaves. Drain the mozzarella balls.
- Assemble the Pops: On each skewer or toothpick, thread one cherry tomato, a basil leaf, and a mozzarella ball. Repeat until the skewer is filled.
- Season: Arrange the assembled pops on a serving platter. Drizzle with balsamic glaze and sprinkle with salt and pepper.
- Serve: Enjoy the Cherry Tomato Caprese Pops immediately or refrigerate until ready to serve.
Hard-Boiled Egg Sailboats
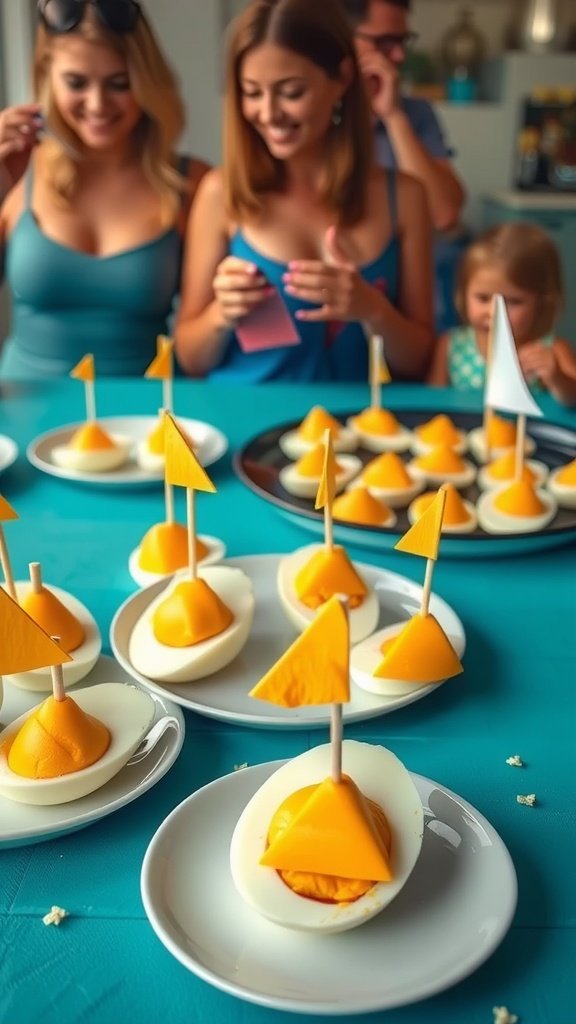
Hard-boiled egg sailboats are a fun and creative snack that kids will love at any water party. They’re not just cute; they’re also healthy and satisfying, making them a perfect choice for warm days. With a mix of creamy egg yolk and cheese, these little boats pack a savory punch while keeping a playful vibe.
Making these sailboats is a breeze! Simply boil some eggs, hollow out the yolks, and mix them with your favorite ingredients. Then, use cheese triangles to create sails that add a touch of whimsy to your platter. They won’t melt in the sun, making them an ideal addition to your outdoor festivities.
Tools and Supplies Needed
- Large pot for boiling eggs
- Egg timer or clock
- Cutting board
- Knife
- Mixing bowl
- Spoon for mixing
- Toothpicks
- Cheese slices
Ingredients
- 6 large eggs
- 1/4 cup mayonnaise
- 1 teaspoon mustard
- Salt and pepper to taste
- Cheese slices (cheddar or your choice)
- Optional: olives or cherry tomatoes for decoration
Instructions
- Boil the Eggs: Place the eggs in a pot, cover with water, and bring to a boil. Once boiling, cover and remove from heat, letting them sit for about 12 minutes.
- Cool and Peel: After 12 minutes, transfer the eggs to cold water to cool. Once cooled, peel the eggs carefully.
- Prepare the Yolks: Slice the boiled eggs in half and scoop out the yolks into a mixing bowl. Mash them with mayonnaise, mustard, salt, and pepper until smooth.
- Assemble the Sailboats: Fill the egg white halves with the yolk mixture. Cut cheese slices into triangles and attach them to toothpicks, then insert them into the filled eggs to create sails.
- Serve: Arrange the sailboats on a platter and, if desired, add olives or cherry tomatoes as additional decorations. Enjoy!
Dippable Veggie Boats

Dippable veggie boats are a fun and colorful way to enjoy fresh vegetables at your next water party. These delightful snacks are not only easy to prepare but are also a hit with kids and adults alike. With their crunchy texture and vibrant presentation, they’re perfect for dipping into your favorite sauces.
This recipe involves scooping out cucumbers and filling them with a tasty dip, making them both interactive and enjoyable. You can customize the dips to suit your preferences, whether it’s ranch, hummus, or guacamole. The best part? They won’t melt in the sun, making them an ideal choice for outdoor gatherings!
Tools and Supplies Needed
- Knife
- Spoon
- Cutting board
- Serving platter
Ingredients
- 2 large cucumbers
- 4-5 carrots, cut into sticks
- 1 cup of your favorite dip (ranch, hummus, etc.)
- 1 tablespoon fresh herbs (optional, for garnish)
Instructions
- Prepare the Cucumbers: Slice the cucumbers in half lengthwise. Use a spoon to scoop out the seeds, creating “boats.”
- Cut the Carrots: Slice the carrots into sticks that can be easily dipped.
- Assemble: Arrange the cucumber boats on a platter, filling each one with your chosen dip. Surround with carrot sticks for a colorful display.
- Garnish: If desired, sprinkle fresh herbs on top of the dip in each boat for added flavor and decoration.
- Serve: Place the platter out for guests to enjoy. These snacks are ready to eat and perfect for dipping!
Rainbow Fruit Kabobs
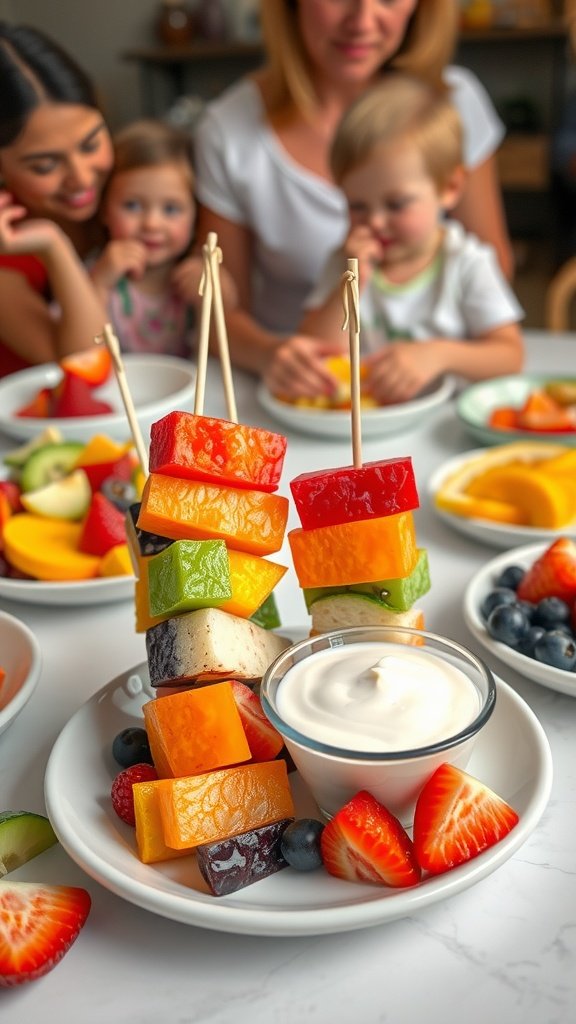
Rainbow fruit kabobs are a fun and colorful way to enjoy fresh fruit at any water party. With a mix of juicy and sweet flavors, these treats are not only appealing to kids but also easy to prepare! They make for a refreshing snack that won’t melt in the sun, ensuring everyone can enjoy them throughout the day.
These kabobs are simple to assemble, allowing kids to help out in the kitchen. You can mix and match your favorite fruits to create a beautiful rainbow effect that’s visually enticing. Serve them with a yogurt dip for added taste and healthiness!
Tools and Supplies Needed
- Wooden skewers
- Knife
- Cutting board
- Small bowl for yogurt dip
Ingredients
- 1 cup strawberries, hulled and halved
- 1 cup pineapple chunks
- 1 cup green grapes
- 1 cup blueberries
- 1 cup cantaloupe, cubed
- 1 cup watermelon, cubed
- 1 cup yogurt (for dipping)
Instructions
- Prepare the Fruits: Wash and cut all the fruits into bite-sized pieces.
- Assemble the Kabobs: Take a wooden skewer and start layering the fruits in a rainbow pattern: strawberries, pineapple, green grapes, blueberries, cantaloupe, and watermelon.
- Repeat until all the fruit is used, making sure to leave a bit of space at the ends of each skewer for easy handling.
- Serve with a bowl of yogurt for dipping. Enjoy your colorful, tasty fruit kabobs!
Pita Pocket Sandwiches
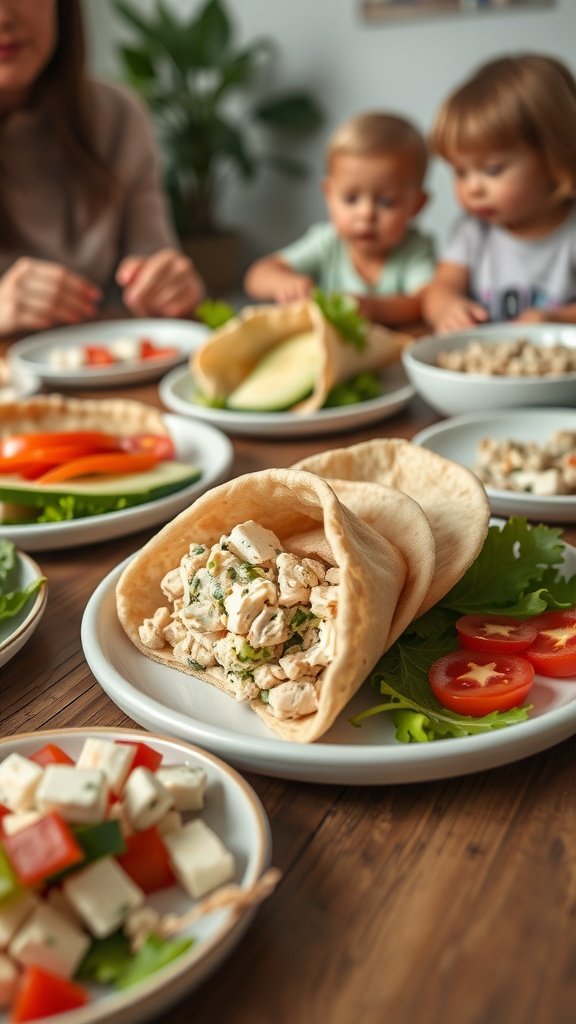
Pita pocket sandwiches are a fun and tasty option for a water party snack. They are easy to make and can be filled with a variety of ingredients to suit everyone’s taste. Kids will enjoy the interactive aspect of stuffing their own pita pockets, making it a great choice for a sunny day.
These sandwiches are light, fresh, and bursting with flavor. You can use deli meats, veggies, and even spreads to create a delicious filling. Plus, they won’t melt in the sun, making them perfect for outdoor gatherings.
Tools and Supplies Needed
- Cutting board
- Knife
- Mixing bowl
- Serving plates
- Measuring cups and spoons
Ingredients
- 4 whole wheat pitas
- 1 cup cooked chicken, chopped
- 1/2 cup diced cucumbers
- 1/2 cup diced tomatoes
- 1/4 cup plain yogurt or tzatziki
- 1/4 cup feta cheese, crumbled
- Salt and pepper to taste
- Fresh parsley or lettuce leaves
Instructions
- Prepare the Filling: In a mixing bowl, combine the chopped chicken, cucumbers, tomatoes, yogurt, feta cheese, salt, and pepper. Mix well until everything is combined.
- Warm the Pitas: If desired, warm the pitas in a toaster or microwave for a few seconds until soft.
- Assemble the Sandwiches: Cut each pita in half to create pockets. Stuff each pocket with the chicken mixture and add parsley or lettuce for extra crunch.
- Serve: Place the filled pitas on a serving plate and enjoy your tasty, kid-friendly snacks!
Popcorn Treat Cups

Popcorn treat cups are a delightful and simple snack that kids will love. They combine the light, airy crunch of popcorn with the sweetness of dried fruits, making them both fun to eat and enjoyable to look at. This no-bake treat is perfect for hot days, as it won’t melt under the sun and can be made in just a few easy steps!
The flavors come together beautifully, with the buttery popcorn providing a savory base and the dried fruits adding a chewy sweetness. Easy to assemble, these treat cups can be customized with your favorite add-ins, making them a versatile snack for any water party!
Tools and Supplies Needed
- Large mixing bowl
- Measuring cups
- Mixing spoon
- Popcorn maker or microwave
- Paper cups or small bowls for serving
Ingredients
- 8 cups popped popcorn
- 1 cup mixed dried fruits (like raisins, cranberries, and apricots)
- 1/4 cup mini chocolate chips (optional)
- 1/4 cup melted butter
- 1/4 teaspoon salt
Instructions
- Pop the Popcorn: Use an air popper or a microwave to pop the popcorn. Place the popcorn in a large mixing bowl.
- Mix with Ingredients: Drizzle the melted butter over the popcorn, and sprinkle with salt. Mix well to ensure the popcorn is evenly coated.
- Add Dried Fruits: Stir in the mixed dried fruits and mini chocolate chips, if using, until well combined.
- Serve in Cups: Scoop the popcorn mixture into paper cups or small bowls for serving. Enjoy!
Cucumber Roll-Ups

Cucumber roll-ups are a fun and refreshing snack that kids love! They offer a crisp bite with a creamy filling, making them a delightful treat for any water party. These snacks are not only simple to make but also keep well in the heat, so you won’t have to worry about them melting away in the sun.
With their vibrant color and cool taste, cucumber roll-ups are perfect for keeping everyone energized during outdoor activities. Plus, they can be customized with different fillings, making them versatile for picky eaters!
Tools and Supplies Needed
- Cutting board
- Sharp knife
- Vegetable peeler
- Mixing bowl
- Small spoon or spatula
- Toothpicks or skewers
Ingredients
- 2 large cucumbers
- 1 cup cream cheese, softened
- 1/4 cup sour cream
- 1 tablespoon fresh dill, chopped
- 1/4 teaspoon garlic powder
- Salt and pepper to taste
- Cherry tomatoes (optional, for serving)
Instructions
- Prepare the Filling: In a mixing bowl, combine the softened cream cheese, sour cream, dill, garlic powder, salt, and pepper. Mix until smooth and well combined.
- Slice the Cucumbers: Using a vegetable peeler, peel long strips from the cucumbers. Cut the cucumbers lengthwise into thin slices, about 1/4 inch thick.
- Assemble the Roll-Ups: Take a slice of cucumber, spread a thin layer of the cream cheese mixture, and roll it up tightly. Secure with a toothpick.
- Serve: Arrange the cucumber roll-ups on a platter. Garnish with cherry tomatoes if desired. Enjoy!
Rice Crispy Treat Pops

Rice Crispy Treat Pops are a fun and tasty treat that kids love. These pops combine the classic flavors of butter, marshmallows, and crispy rice cereal into a delightful, handheld snack. They are not only simple to make but also customizable with various toppings and colors, making them a perfect addition to any water party.
With a crunchy texture and a sweet, gooey taste, these treats are sure to be a hit. Plus, they hold up well in the summer heat, so you don’t have to worry about them melting away. Grab some sticks, and let’s get crafting these delicious Rice Crispy Treat Pops!
Tools and Supplies Needed
- Large mixing bowl
- Microwave-safe bowl
- 9×13 inch baking dish
- Wooden dowels or popsicle sticks
- Spoon or spatula
- Plastic wrap or parchment paper
Ingredients
- 3 tablespoons unsalted butter
- 1 package (10 ounces) mini marshmallows
- 6 cups Rice Krispies cereal
- 1 cup colored sprinkles (optional)
- Melting chocolate or candy melts for dipping (optional)
Instructions
- Melt the Butter: In a microwave-safe bowl, melt the butter in 30-second intervals until fully melted. Add the mini marshmallows and stir until they are completely melted and smooth.
- Mix in the Cereal: Pour the Rice Krispies cereal into the melted marshmallow mixture. Stir well until all the cereal is fully coated.
- Shape the Treats: Press the mixture firmly into a greased 9×13 inch baking dish. Allow it to cool for about 30 minutes.
- Cut and Insert Sticks: Once cooled, cut the treats into squares or rectangles. Insert a wooden dowel or popsicle stick into each piece.
- Decorate: If desired, dip the tops in melted chocolate or candy melts and sprinkle colored sprinkles on top. Let them set before serving.
Turkey Pickle Roll-Ups

Turkey pickle roll-ups are a simple and fun snack that kids will love. They combine the savory taste of turkey with the crunch of pickles, making them a hit at any water party. These roll-ups are not only tasty but also easy to prepare, so you can whip them up in no time!
These snacks are great for keeping kids satisfied without the worry of them melting in the sun. Plus, they’re customizable—feel free to add cheese or other fillings to make them even more appealing. Perfect for a hot day!
Tools and Supplies Needed
- Large plate or platter
- Toothpicks or skewers
- Knife for slicing
Ingredients
- 8 slices of turkey deli meat
- 4 pickles, cut into spears
- 4 slices of cheese (optional)
- Mustard or cream cheese (optional)
Instructions
- Lay out a slice of turkey on a clean surface. If using, spread a thin layer of mustard or cream cheese on top.
- Place a slice of cheese on top of the turkey if desired, then add a pickle spear on one end.
- Roll the turkey tightly around the pickle, starting from the end with the pickle.
- Secure the roll with a toothpick or skewer to hold it together.
- Repeat the process with the remaining ingredients until you have the desired amount of roll-ups.
Frozen Applesauce Pouches
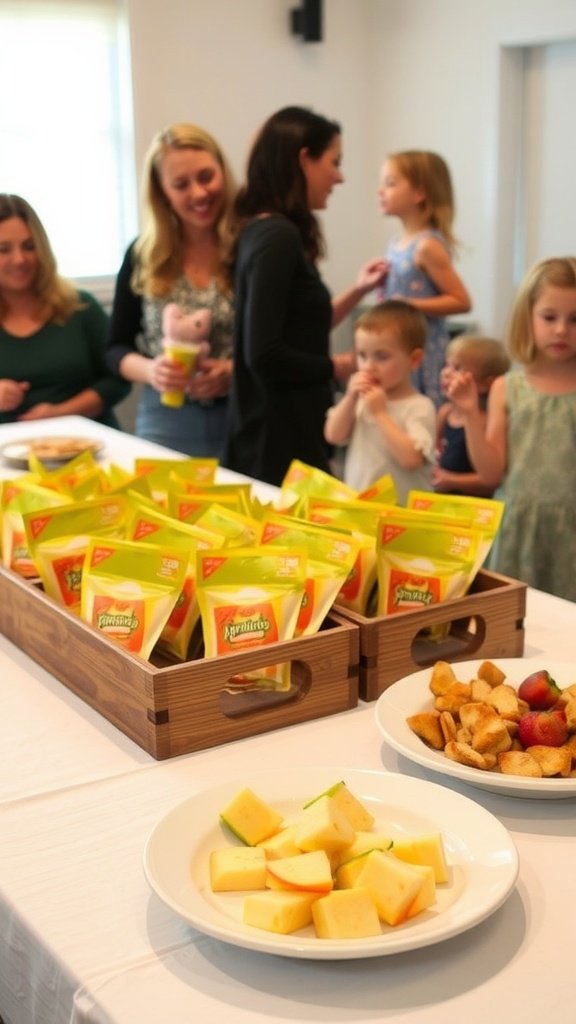
Frozen applesauce pouches are a fun and tasty snack for kids, perfect for water parties or any outdoor activity. They are naturally sweet, refreshing, and incredibly easy to make, ensuring kids stay cool while enjoying a nutritious treat. This recipe is a hit with kids and parents alike!
With just a few simple ingredients, you can whip up a batch of these pouches that are sure to please even the pickiest eaters. Plus, they are portable and can be kept frozen until it’s time to serve. Let’s get started!
Tools and Supplies Needed
- Blender or food processor
- Measuring cups
- Mixing bowl
- Freezer-safe pouches or silicone molds
- Spoon for filling
Ingredients
- 4 cups unsweetened applesauce
- 1 tablespoon lemon juice
- 1 teaspoon ground cinnamon (optional)
- Honey or maple syrup to taste (optional)
Instructions
- Blend the Applesauce: In a blender or food processor, combine the applesauce, lemon juice, and cinnamon. Blend until smooth. Taste and add honey or maple syrup if you want it sweeter.
- Fill the Pouches: Use a spoon to fill your freezer-safe pouches or molds with the applesauce mixture, leaving a little space at the top for expansion.
- Seal and Freeze: Seal the pouches tightly and lay them flat in the freezer. Freeze for at least 4 hours or until completely solid.
- Serve: When ready to enjoy, remove from the freezer and let sit for a few minutes before squeezing the applesauce into bowls or directly into little hands!
Banana Sushi

Banana sushi is a fun and nutritious snack that kids will love! With its sweet banana base wrapped in delicious fillings, it’s sure to be a hit at any water party. Plus, it’s simple to prepare, making it a great option for busy parents who want to whip up something tasty without a lot of fuss.
This snack offers a delightful combination of flavors and textures. The creamy peanut butter or chocolate spread pairs perfectly with the banana, and you can roll it up in a tortilla or rice paper for an exciting twist. It’s a refreshing treat that won’t melt in the sun, perfect for outdoor gatherings!
Tools and Supplies Needed
- Cutting board
- Knife
- Spreading knife
- Plate for serving
Ingredients
- 2 ripe bananas
- 2 whole wheat tortillas or rice paper
- 1/4 cup peanut butter or chocolate spread
- 1/4 cup granola or coconut flakes (optional)
- Honey or maple syrup (optional, for drizzling)
Instructions
- Spread the peanut butter or chocolate spread evenly over each tortilla or piece of rice paper.
- Place a banana at one end of the tortilla and roll it tightly.
- Slice the rolled banana into bite-sized pieces.
- If desired, sprinkle granola or coconut flakes over the top for added crunch.
- Drizzle with honey or maple syrup before serving for extra sweetness.