
Get ready for a 4th of July celebration filled with mouthwatering BBQ flavors! This collection of 30 picnic-perfect BBQ recipes is designed to make your gathering unforgettable. From juicy burgers to smoky ribs, each recipe is easy to follow and loaded with deliciousness. Plus, you’ll find a “Tools & Supplies Needed” section for every dish, ensuring you have everything you need for the grill and beyond. Let’s fire up those grills and make some delicious memories!
Smoked Brisket With Coffee Rub

Smoked brisket with coffee rub is a flavorful and tender dish that brings a delightful twist to your 4th of July picnic. The coffee rub adds a rich depth to the meat, balancing the smoky flavor with a hint of sweetness and spice. This recipe might sound complex, but it’s quite straightforward, making it an excellent choice for both seasoned grillers and beginners.
With a few simple ingredients and some patience, you can create a mouthwatering brisket that will impress your friends and family. Perfect for serving alongside classic barbecue sides, this dish is bound to be a hit at your gathering.
Tools & Supplies Needed
- Smoker or grill with a lid
- Wood chips (hickory or oak suggested)
- Meat thermometer
- Sharp knife
- Cutting board
- Mixing bowl
- Plastic wrap
Ingredients
- 3-4 lb brisket
- 1/4 cup ground coffee
- 2 tablespoons brown sugar
- 1 tablespoon smoked paprika
- 1 tablespoon garlic powder
- 1 tablespoon onion powder
- 1 tablespoon salt
- 1 teaspoon black pepper
- 1 teaspoon cayenne pepper (optional, for heat)
Instructions
- Prepare the Rub: In a mixing bowl, combine ground coffee, brown sugar, smoked paprika, garlic powder, onion powder, salt, black pepper, and cayenne pepper. Mix well.
- Season the Brisket: Pat the brisket dry with paper towels and rub the coffee mixture all over the meat. Wrap in plastic wrap and let it marinate in the fridge for at least 4 hours, preferably overnight.
- Preheat the Smoker: Set your smoker to 225°F (107°C) and add wood chips to the smoker box or directly onto the coals.
- Smoke the Brisket: Place the brisket on the smoker grates, fat side up. Cook for about 1.5 to 2 hours per pound, or until the internal temperature reaches 195°F (90°C) for tender slices.
- Rest and Serve: Once cooked, remove the brisket from the smoker and let it rest for at least 30 minutes before slicing. Serve with your favorite barbecue sides.
Grilled Portobello Mushroom Steaks

Grilled Portobello mushroom steaks are a tasty and satisfying option for any summer barbecue. These meaty mushrooms soak up marinades beautifully, giving them a rich, savory flavor that will please both vegetarians and meat lovers alike. Plus, they’re super simple to prepare, making them a great addition to your picnic spread.
The smoky char from the grill combined with a zesty marinade creates a delicious dish that pairs perfectly with a fresh salad or grilled veggies. Whether you’re hosting a backyard get-together or enjoying a relaxing day at the park, these mushroom steaks are sure to impress your guests.
Tools & Supplies Needed
- Grill or grill pan
- Mixing bowl
- Basting brush
- Plastic wrap or resealable bag
- Tongs
Ingredients
- 4 large portobello mushrooms
- 1/4 cup balsamic vinegar
- 2 tablespoons olive oil
- 1 tablespoon soy sauce
- 2 cloves garlic, minced
- 1 teaspoon dried oregano
- Salt and pepper to taste
Instructions
- Prepare the Marinade: In a mixing bowl, whisk together balsamic vinegar, olive oil, soy sauce, garlic, oregano, salt, and pepper.
- Marinate the Mushrooms: Place the portobello mushrooms in a resealable bag or shallow dish. Pour the marinade over the mushrooms, ensuring they are well coated. Let them marinate for at least 30 minutes, or up to 2 hours for more flavor.
- Preheat the Grill: Heat your grill or grill pan over medium-high heat.
- Grill the Mushrooms: Remove the mushrooms from the marinade and grill for about 5-7 minutes on each side, or until they are tender and have nice grill marks.
- Serve: Remove the mushrooms from the grill and let them rest for a minute. Slice and serve as a main dish or in a sandwich, topped with your favorite toppings.
Honey-Glazed Bbq Chicken Thighs

Honey-glazed BBQ chicken thighs are the perfect addition to your 4th of July picnic. They offer a delightful combination of sweet and savory flavors that everyone will love. This recipe is simple to prepare, making it great for both seasoned grillers and beginners.
The honey glaze adds a sticky sweetness that caramelizes beautifully on the grill, creating a mouthwatering dish that is sure to impress at any gathering. Plus, chicken thighs are juicy and flavorful, ensuring that each bite is delicious.
Ingredients
- 4 chicken thighs, bone-in and skin-on
- 1/4 cup honey
- 1/4 cup BBQ sauce
- 2 tablespoons soy sauce
- 1 tablespoon apple cider vinegar
- 1 teaspoon garlic powder
- 1 teaspoon onion powder
- Salt and pepper to taste
Instructions
- Prepare the Marinade: In a bowl, whisk together honey, BBQ sauce, soy sauce, apple cider vinegar, garlic powder, onion powder, salt, and pepper.
- Marinate the Chicken: Place the chicken thighs in a zip-top bag or a bowl and pour the marinade over them. Seal or cover and refrigerate for at least 1 hour, or overnight for more flavor.
- Preheat the Grill: Heat your grill to medium-high heat, around 375°F (190°C).
- Grill the Chicken: Remove the chicken from the marinade, letting excess drip off. Place on the grill and cook for about 7-10 minutes on each side, or until the internal temperature reaches 165°F (74°C).
- Serve: Let the chicken rest for a few minutes before serving. Enjoy with your favorite sides!
Cedar Plank Salmon With Dill Butter
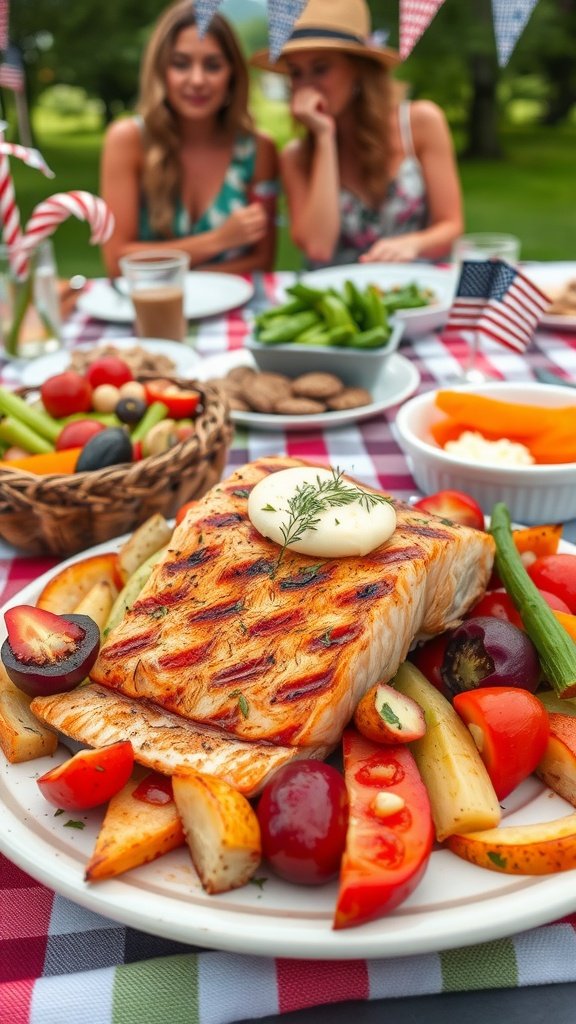
Cedar plank salmon is a delightful dish that brings the flavors of the grill right to your picnic table. The smoky aroma from the cedar wood infuses the salmon, creating a rich and savory experience that pairs perfectly with fresh dill butter. It’s not only simple to prepare, but it also makes for a stunning presentation that will impress your guests.
This recipe is great for outdoor gatherings, especially on the 4th of July. The combination of tender salmon, vibrant veggies, and the aromatic dill butter creates a delicious meal that feels festive and special.
Tools & Supplies Needed
- Cedar plank (soaked in water for at least an hour)
- Grill
- Fish spatula
- Meat thermometer
- Mixing bowl
- Cooking brush
Ingredients
- 1 large salmon fillet (about 1.5-2 pounds)
- 2 tablespoons olive oil
- Salt and pepper to taste
- 1 tablespoon fresh lemon juice
- 1/4 cup unsalted butter, softened
- 2 tablespoons fresh dill, chopped
- 1 tablespoon garlic, minced
- Assorted vegetables for grilling (like bell peppers, asparagus, and zucchini)
Instructions
- Prepare the Cedar Plank: Soak the cedar plank in water for at least an hour. This prevents it from burning on the grill.
- Make the Dill Butter: In a mixing bowl, combine softened butter, dill, garlic, lemon juice, and a pinch of salt and pepper. Mix well and set aside.
- Prep the Salmon: Preheat the grill to medium heat. Pat the salmon dry with paper towels, then rub it with olive oil and season with salt and pepper.
- Grill the Salmon: Place the soaked cedar plank onto the grill grates, close the lid, and heat for about 5 minutes until it starts to smoke. Carefully place the salmon on the plank. Brush with dill butter and add your assorted veggies around the salmon.
- Cook: Close the lid and grill for about 15-20 minutes, or until the salmon is cooked through and flakes easily with a fork (internal temperature of 145°F). Brush more dill butter over the salmon halfway through cooking.
- Serve: Remove the cedar plank from the grill and let it cool slightly. Serve the salmon directly on the plank for a rustic presentation, and enjoy with the grilled veggies!
Char-Grilled Corn With Chili-Lime Butter

This char-grilled corn with chili-lime butter is a vibrant and tasty addition to any picnic or BBQ. The sweet, juicy kernels are perfectly complemented by the zesty chili-lime butter, creating a flavor explosion with every bite. Plus, it’s super simple to whip up, making it a go-to recipe for outdoor gatherings.
The combination of smoky grilled corn and the tangy lime juice, with a kick from chili powder, makes this dish a crowd-pleaser. Not only is it delicious, but it also adds a pop of color to your picnic spread!
Ingredients
- 4 ears of corn, husked
- 1/2 cup unsalted butter, softened
- 1 tablespoon lime juice
- 1 teaspoon chili powder
- 1/2 teaspoon salt
- Fresh cilantro, for garnish
- Lime wedges, for serving
Instructions
- Preheat your grill to medium-high heat.
- In a small bowl, mix the softened butter, lime juice, chili powder, and salt until well combined.
- Grill the corn for about 10-12 minutes, turning occasionally until all sides are slightly charred.
- Remove the corn from the grill and brush with the chili-lime butter generously.
- Garnish with fresh cilantro and serve with lime wedges.
Tools & Supplies Needed
- Grill
- Grilling tongs
- Basting brush
- Small bowl for mixing
- Cutting board
- Knife
Bourbon Bbq Pulled Pork

Bourbon BBQ Pulled Pork is a crowd-pleaser that combines rich, smoky flavors with a hint of sweetness from the bourbon. The pork is slow-cooked, making it incredibly tender and easy to shred. It’s perfect for summer gatherings, especially the 4th of July, where it pairs beautifully with coleslaw and baked beans.
This recipe is simple to make, needing minimal active time while the slow cooker does most of the work. The result is a deliciously satisfying dish that everyone will love, making it a staple for any picnic or BBQ.
Tools & Supplies Needed
- Slow cooker
- Large mixing bowl
- Measuring cups and spoons
- Sharp knife
- Cutting board
Ingredients
- 3-4 pounds pork shoulder
- 1 cup bourbon
- 1 cup BBQ sauce (your favorite brand)
- 1 onion, chopped
- 4 cloves garlic, minced
- 2 tablespoons brown sugar
- 1 tablespoon Worcestershire sauce
- 1 teaspoon smoked paprika
- Salt and pepper to taste
Instructions
- Prepare the Pork: Season the pork shoulder with salt, pepper, and smoked paprika. Place it in the slow cooker.
- Mix the Sauce: In a bowl, combine bourbon, BBQ sauce, chopped onion, garlic, brown sugar, and Worcestershire sauce. Pour the sauce over the pork.
- Cook: Cover the slow cooker and cook on low for 8 hours or until the pork is tender and shreds easily with a fork.
- Shred the Meat: Once cooked, remove the pork from the slow cooker. Shred the meat with two forks and return it to the slow cooker, mixing it with the juices.
- Serve: Enjoy the pulled pork on buns, topped with extra BBQ sauce and coleslaw for a perfect picnic meal!
Grilled Vegetable Skewers With Herb Marinade
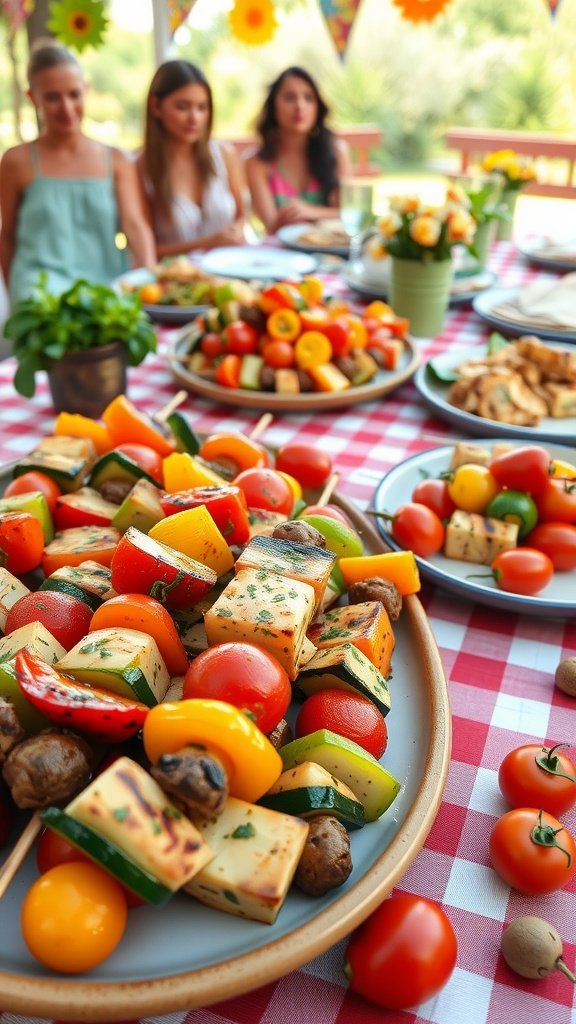
Grilled vegetable skewers are a fantastic choice for your 4th of July picnic. They are not only vibrant and colorful but also bursting with flavor thanks to a simple herb marinade. This dish brings out the natural sweetness of the vegetables while adding a delightful char from the grill. Perfect for both vegetarians and meat-lovers alike, these skewers are easy to make and add a fun element to your barbecue spread.
Making these skewers is a breeze! Just chop your favorite vegetables, marinate them, and thread them onto skewers. The result is a delicious and healthy side that pairs well with any main dish. Plus, they’re great for outdoor grilling, making them an ideal addition to your summer gatherings.
Tools & Supplies Needed
- Skewers (bamboo or metal)
- Mixing bowl
- Grill or grill pan
- Knife
- Cutting board
Ingredients
- 1 medium zucchini, sliced into rounds
- 1 bell pepper (any color), cut into chunks
- 1 cup cherry tomatoes
- 1 cup button mushrooms, stems removed
- 1 block of firm tofu, cut into cubes
- 1/4 cup olive oil
- 2 tablespoons balsamic vinegar
- 2 cloves garlic, minced
- 1 tablespoon fresh parsley, chopped
- 1 teaspoon dried oregano
- Salt and pepper, to taste
Instructions
- Prepare the Marinade: In a mixing bowl, whisk together olive oil, balsamic vinegar, minced garlic, parsley, oregano, salt, and pepper.
- Marinate the Vegetables: Add the zucchini, bell pepper, cherry tomatoes, mushrooms, and tofu cubes to the bowl. Toss to coat all the ingredients evenly in the marinade. Let them sit for at least 30 minutes.
- Assemble the Skewers: Thread the marinated vegetables and tofu onto skewers, alternating as you go.
- Grill the Skewers: Preheat your grill to medium-high heat. Grill the skewers for about 10-12 minutes, turning occasionally, until the vegetables are tender and have nice grill marks.
- Serve and Enjoy: Remove from the grill and serve warm. These skewers are perfect as a side dish or even as a main for a light meal.
Spicy Korean Bbq Short Ribs (Galbi)

Spicy Korean BBQ short ribs, or Galbi, are a delightful dish that packs a punch with a combination of sweet, savory, and spicy flavors. These tender, juicy ribs are marinated in a mix of soy sauce, sesame oil, garlic, and gochujang, offering a mouthwatering experience that will elevate any picnic. They’re perfect for grilling, making them a fantastic addition to your 4th of July celebration.
This recipe is simple to follow, and you’ll impress your friends and family with the delicious results. With a few key ingredients and some time to marinate, you can create a dish that’s sure to be the star of your BBQ spread!
Tools & Supplies Needed
- Grill or grill pan
- Mixing bowl
- Measuring cups and spoons
- Whisk or fork
- Plastic wrap or a resealable bag
Ingredients
- 2 pounds beef short ribs
- 1/2 cup soy sauce
- 1/4 cup brown sugar
- 2 tablespoons sesame oil
- 4 cloves garlic, minced
- 2 tablespoons gochujang (Korean chili paste)
- 1 tablespoon rice vinegar
- 1 teaspoon black pepper
- 2 green onions, chopped (for garnish)
- Sesame seeds (optional, for garnish)
Instructions
- Marinate the Ribs: In a mixing bowl, whisk together soy sauce, brown sugar, sesame oil, minced garlic, gochujang, rice vinegar, and black pepper. Place the short ribs in a plastic bag or dish and pour the marinade over them. Seal or cover and refrigerate for at least 4 hours, preferably overnight.
- Preheat the Grill: When ready to cook, preheat your grill to medium-high heat. Remove the ribs from the marinade and let any excess drip off.
- Grill the Ribs: Place the short ribs on the grill and cook for about 5-7 minutes on each side, or until they are nicely charred and cooked through. Baste with leftover marinade while grilling for extra flavor.
- Serve: Once done, remove the ribs from the grill and let them rest for a few minutes. Garnish with chopped green onions and sesame seeds before serving. Enjoy your delicious Galbi!
Smoked Cauliflower

Smoked cauliflower is a delicious and healthy addition to your picnic spread. It’s packed with flavor and has a wonderfully tender texture, making it a great alternative to traditional barbecue dishes. Whether you’re a veggie lover or just looking to add some variety to your 4th of July menu, this dish is simple to make and sure to impress your guests!
This recipe requires minimal ingredients and is easy enough for anyone to whip up. The smoky flavor combined with spices creates a mouthwatering side that pairs well with any grilled meats or can stand alone as a tasty appetizer. Let’s get started on this crowd-pleaser!
Tools & Supplies Needed
- Smoker or grill
- Mixing bowl
- Measuring spoons
- Sharp knife
- Cutting board
Ingredients
- 1 large head of cauliflower, cut into florets
- 3 tablespoons olive oil
- 1 teaspoon smoked paprika
- 1 teaspoon garlic powder
- 1 teaspoon onion powder
- Salt and pepper to taste
- Fresh parsley for garnish
Instructions
- Prepare the Cauliflower: In a mixing bowl, toss the cauliflower florets with olive oil, smoked paprika, garlic powder, onion powder, salt, and pepper until well coated.
- Preheat the Smoker: Preheat your smoker or grill to a temperature of 225°F (107°C). If using a grill, set it up for indirect heat.
- Smoke the Cauliflower: Place the seasoned cauliflower florets on the grill grates or in a smoker basket. Close the lid and smoke for about 30-40 minutes, or until tender and slightly charred.
- Garnish and Serve: Once cooked, remove the cauliflower from the smoker and garnish with fresh parsley. Serve warm as a side dish or appetizer!
Maple-Glazed Bacon-Wrapped Chicken

This Maple-Glazed Bacon-Wrapped Chicken is a delightful dish that brings together the smoky flavor of bacon with the sweet touch of maple syrup. It’s simple to make and perfect for your picnic gathering or 4th of July BBQ. Tender chicken breasts are wrapped in crispy bacon and brushed with a sweet maple glaze, creating a mouthwatering combination that everyone will love.
Not only does this dish taste amazing, but it also looks impressive on the table. The layers of bacon around the chicken give it a festive look, making it a standout choice for any summer celebration. Plus, it’s easy to prepare ahead of time, so you can focus on enjoying the company of your friends and family.
Tools & Supplies Needed
- Grill or oven
- Baking sheet
- Parchment paper or aluminum foil
- Meat thermometer
- Basting brush
Ingredients
- 4 boneless, skinless chicken breasts
- 8 slices of bacon
- 1/2 cup pure maple syrup
- 1 tablespoon Dijon mustard
- 1 teaspoon garlic powder
- Salt and pepper to taste
Instructions
- Preheat your grill or oven to 375°F (190°C). Line a baking sheet with parchment paper or aluminum foil for easy cleanup.
- In a small bowl, mix the maple syrup, Dijon mustard, garlic powder, salt, and pepper to create the glaze.
- Wrap each chicken breast with two slices of bacon, securing them with toothpicks if necessary.
- Place the bacon-wrapped chicken on the prepared baking sheet. Brush generously with the maple glaze.
- Cook in the preheated grill or oven for about 25-30 minutes, or until the chicken reaches an internal temperature of 165°F (75°C). Baste with more glaze halfway through cooking for extra flavor.
- Once done, let them rest for a few minutes before serving. Enjoy your Maple-Glazed Bacon-Wrapped Chicken hot off the grill!
Mesquite-Grilled Sweet Potato Wedges

Mesquite-grilled sweet potato wedges are a delicious side dish perfect for any summer BBQ. They have a satisfying sweetness balanced by the smoky flavor of mesquite, making them an appealing addition to your picnic spread. Plus, they’re simple to prepare, requiring just a few ingredients and minimal time on the grill.
The grilling process enhances the natural sugars in the sweet potatoes, giving them a slightly caramelized exterior while keeping the inside tender. Whether served alongside burgers or as a stand-alone snack, these wedges are sure to be a hit!
Tools & Supplies Needed
- Grill
- Cutting board
- Sharp knife
- Mixing bowl
- Baking sheet or grill basket
Ingredients
- 4 medium sweet potatoes
- 2 tablespoons olive oil
- 1 tablespoon mesquite seasoning
- 1 teaspoon salt
- 1/2 teaspoon black pepper
- Fresh cilantro for garnish (optional)
Instructions
- Prepare the Sweet Potatoes: Wash and scrub the sweet potatoes. Cut them into wedges, about 1 inch thick.
- Season: In a mixing bowl, toss the sweet potato wedges with olive oil, mesquite seasoning, salt, and black pepper until evenly coated.
- Preheat the Grill: Preheat your grill to medium-high heat. If you’re using a grill basket, make sure it’s ready as well.
- Grill: Place the sweet potato wedges on the grill. Cook for about 15-20 minutes, turning occasionally, until they are tender and have nice grill marks.
- Serve: Once done, remove the wedges from the grill and let them cool slightly. Garnish with fresh cilantro if desired, and serve warm.
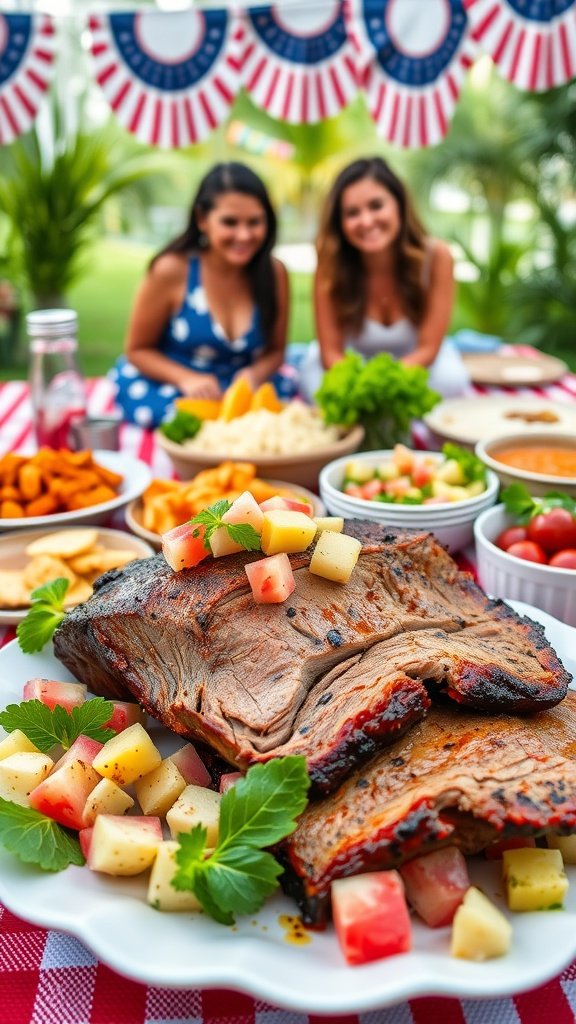
Texas-Style Beef Ribs

Texas-style beef ribs are a true BBQ delight that brings a smoky, juicy flavor to your grill. These ribs are tender, meaty, and coated with a rich, flavorful barbecue sauce that is simply irresistible. Perfect for a festive gathering, they are a crowd-pleaser that will leave everyone coming back for more!
Making these ribs is straightforward, requiring some patience while they cook to perfection. With a few basic ingredients and your favorite spices, you’ll create a mouthwatering dish that embodies the spirit of Texas BBQ.
Ingredients
- 4 pounds beef back ribs
- 2 tablespoons salt
- 1 tablespoon black pepper
- 1 tablespoon garlic powder
- 1 tablespoon onion powder
- 1 tablespoon smoked paprika
- 1 cup beef broth
- 1 cup barbecue sauce (store-bought or homemade)
Instructions
- Prepare the Ribs: Preheat your oven to 300°F (150°C). Remove the membrane from the back of the ribs and pat them dry with paper towels.
- Season the Ribs: In a small bowl, mix together salt, black pepper, garlic powder, onion powder, and smoked paprika. Rub this mixture generously over all sides of the ribs.
- Cook the Ribs: Place the ribs in a large roasting pan, bone side down. Pour the beef broth into the pan, cover it tightly with aluminum foil, and bake for about 3 hours until tender.
- Add the Sauce: Remove the foil and brush the barbecue sauce over the ribs. Increase the oven temperature to 400°F (200°C) and bake uncovered for an additional 30 minutes, basting with more sauce halfway through.
- Serve: Once cooked, let the ribs rest for a few minutes before slicing. Serve them hot with extra barbecue sauce on the side!
Tools & Supplies Needed
- Roasting pan
- Aluminum foil
- Meat thermometer
- Basting brush
- Cutting board
- Sharp knife
Grilled Asparagus With Lemon And Parmesan

Grilled asparagus with lemon and parmesan is a light and zesty dish that brings a burst of flavor to your picnic spread. The crisp-tender asparagus pairs beautifully with the brightness of lemon and the savory notes of parmesan, making it a crowd-pleaser that’s easy to prepare.
This recipe is simple enough for anyone to master, requiring just a handful of ingredients. Perfect for summer gatherings, it can be grilled alongside your favorite BBQ dishes or enjoyed on its own as a refreshing side.
Tools & Supplies Needed
- Grill or grill pan
- Cooking tongs
- Mixing bowl
- Measuring spoons
- Serving platter
Ingredients
- 1 pound of fresh asparagus, trimmed
- 2 tablespoons olive oil
- 1 lemon, zested and juiced
- 1/2 teaspoon salt
- 1/4 teaspoon black pepper
- 1/4 cup grated parmesan cheese
Instructions
- Prepare Asparagus: Preheat your grill to medium heat. In a mixing bowl, toss the trimmed asparagus with olive oil, lemon juice, lemon zest, salt, and black pepper until evenly coated.
- Grill: Place the asparagus on the grill and cook for about 5-7 minutes, turning occasionally, until they are tender and have nice grill marks.
- Add Parmesan: Just before removing from the grill, sprinkle the grated parmesan over the asparagus and close the grill lid for a minute to melt the cheese.
- Serve: Transfer the grilled asparagus to a serving platter, squeeze additional lemon juice over the top if desired, and serve warm.
Apple Cider Bbq Turkey Legs

These Apple Cider BBQ Turkey Legs are perfect for your 4th of July picnic! The sweet and tangy flavor from the apple cider combines beautifully with smoky BBQ spices, giving you a taste that’s both hearty and refreshing. They’re super easy to prepare, making them a great choice for casual gatherings.
The tenderness of the turkey legs complements the rich glaze, creating a mouthwatering experience with every bite. Plus, they’re a fun and festive option that everyone will love. Get ready for some deliciously messy fun!
Tools & Supplies Needed
- Grill or smoker
- Meat thermometer
- Large bowl for marinating
- Brush for applying BBQ sauce
- Tongs
- Aluminum foil (optional)
Ingredients
- 4 turkey legs
- 1 cup apple cider
- 1/4 cup apple cider vinegar
- 1/4 cup brown sugar
- 2 tablespoons Worcestershire sauce
- 1 tablespoon garlic powder
- 1 tablespoon onion powder
- 1 tablespoon smoked paprika
- 1 teaspoon black pepper
- 1 teaspoon salt
- 1 cup BBQ sauce (your favorite)
- Fresh herbs for garnish (optional)
Instructions
- Marinate the Turkey: In a large bowl, mix apple cider, apple cider vinegar, brown sugar, Worcestershire sauce, garlic powder, onion powder, smoked paprika, black pepper, and salt. Add turkey legs and coat well. Cover and let marinate in the fridge for at least 2 hours, preferably overnight.
- Preheat the Grill: Prepare your grill or smoker for indirect heat and preheat to 300°F (150°C).
- Grill the Turkey: Remove turkey legs from marinade and place them on the grill. Cook for about 1 to 1.5 hours, turning occasionally. Use a meat thermometer to ensure they reach an internal temperature of 165°F (74°C).
- Apply BBQ Sauce: During the last 15 minutes of cooking, brush the legs with BBQ sauce, allowing it to caramelize and create a sticky glaze.
- Serve: Once cooked, let the turkey legs rest for a few minutes. Garnish with fresh herbs if desired, and serve hot!
Charred Brussels Sprouts With Balsamic Glaze

Charred Brussels sprouts are a delightful combination of crispy edges and tender centers, offering a burst of flavor that pairs perfectly with a sweet and tangy balsamic glaze. This recipe is simple enough for anyone to whip up, making it a great addition to your 4th of July picnic.
The smoky flavor from the grill combined with the rich balsamic reduction transforms these little greens into a dish everyone will love. They’re not just a side dish; they can steal the show at your barbecue!
Ingredients
- 1 pound Brussels sprouts, halved
- 3 tablespoons olive oil
- Salt and pepper, to taste
- 1/2 cup balsamic vinegar
- 1 tablespoon honey
- Optional: grated Parmesan cheese and chopped fresh herbs for garnish
Instructions
- Prepare the Brussels sprouts: Rinse and trim the ends of the Brussels sprouts, then cut them in half.
- Season: In a bowl, toss the halved sprouts with olive oil, salt, and pepper.
- Grill: Preheat your grill to medium-high heat. Place the Brussels sprouts cut-side down directly on the grill. Cook for about 5-7 minutes, until charred and tender.
- Make the glaze: While the sprouts are grilling, combine balsamic vinegar and honey in a small saucepan. Bring to a boil, then reduce heat and simmer until thickened, about 10 minutes.
- Toss and serve: Once the Brussels sprouts are cooked, drizzle them with the balsamic glaze and toss to coat. Serve warm, garnished with Parmesan and herbs if desired.
Tools & Supplies Needed
- Grill
- Bowl for tossing
- Small saucepan
- Measuring spoons
- Cutting board and knife
Hawaiian Bbq Pork Belly
Hawaiian BBQ Pork Belly is a delicious dish that brings tropical flavors to your summer gatherings. This savory and sweet recipe features tender, juicy pork belly marinated in a blend of soy sauce, brown sugar, garlic, and ginger, creating a mouthwatering experience. The combination of these ingredients results in a rich umami flavor that’s sure to impress your guests.
Not only is this dish packed with flavor, but it’s also simple to prepare! With a bit of marinating time, you can have this BBQ pork belly ready for your picnic or 4th of July celebration. Serve it with fresh pineapple and a sprinkle of green onions for a delightful touch.
Tools & Supplies Needed
- Mixing bowl
- Whisk
- Measuring cups and spoons
- Cooking sheet or grill
- Sharp knife
- Cutting board
Ingredients
- 2 pounds pork belly
- 1/2 cup soy sauce
- 1/4 cup brown sugar
- 4 cloves garlic, minced
- 1 tablespoon fresh ginger, grated
- 1 tablespoon sesame oil
- 1 tablespoon rice vinegar
- Pineapple slices, for serving
- Green onions, sliced, for garnish
Instructions
- Prepare the Marinade: In a mixing bowl, whisk together the soy sauce, brown sugar, garlic, ginger, sesame oil, and rice vinegar until well combined.
- Marinate the Pork: Place the pork belly in a large resealable plastic bag or a shallow dish. Pour the marinade over the pork, ensuring it’s fully coated. Seal the bag or cover the dish, and refrigerate for at least 4 hours, or overnight for best results.
- Cook the Pork: Preheat your grill or oven to 375°F (190°C). Remove the pork from the marinade and place it on the cooking sheet. Reserve the marinade for basting. Cook for about 30-40 minutes, basting with the marinade halfway through, until the pork belly is caramelized and cooked through.
- Slice and Serve: Once cooked, let the pork rest for a few minutes before slicing. Serve with fresh pineapple slices and garnish with sliced green onions.
Grilled Eggplant With Tahini Sauce
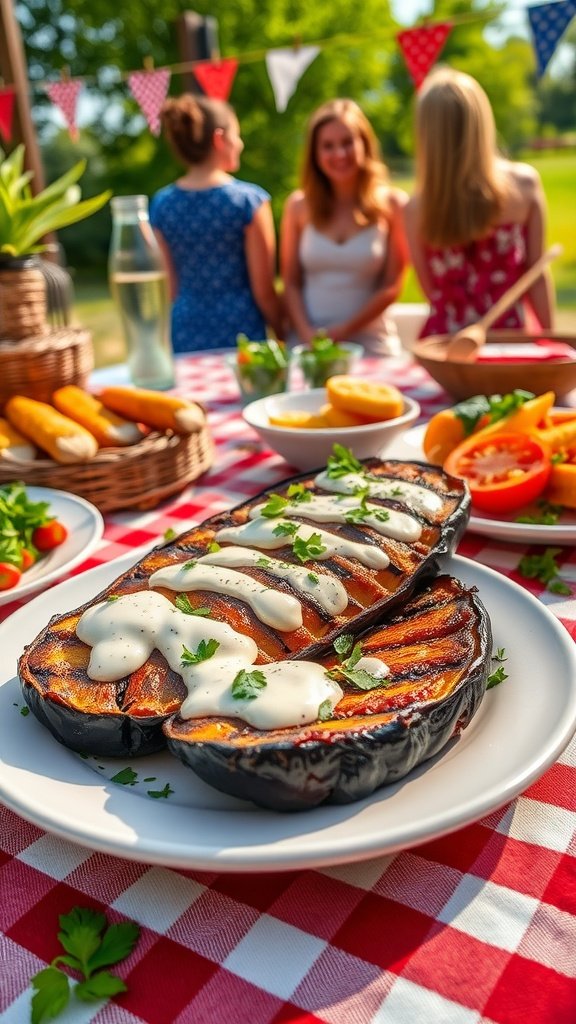
Grilled eggplant with tahini sauce is a delightful and simple dish that makes for a perfect addition to your 4th of July picnic. The eggplant becomes wonderfully tender and smoky when grilled, while the creamy tahini sauce adds a rich, nutty flavor that complements the vegetable beautifully.
This recipe is not only easy to prepare but also refreshing and light, making it ideal for warm summer days. Serve it alongside your favorite BBQ dishes, and watch it become a crowd-pleaser!
Tools & Supplies Needed
- Grill or grill pan
- Sharp knife
- Cutting board
- Mixing bowl
- Basting brush
Ingredients
- 2 medium eggplants
- 1/4 cup olive oil
- 1 teaspoon salt
- 1/2 teaspoon black pepper
- 1/2 cup tahini
- 1/4 cup water
- 2 tablespoons lemon juice
- 1 garlic clove, minced
- Fresh parsley, for garnish
Instructions
- Prepare the Eggplant: Slice the eggplants in half lengthwise. Score the flesh in a crisscross pattern and brush them with olive oil, then sprinkle with salt and pepper.
- Grill the Eggplant: Preheat your grill to medium-high heat. Place the eggplant halves, cut side down, on the grill. Cook for about 5-7 minutes or until the skin is charred and the flesh is tender. Flip and grill for an additional 3-4 minutes.
- Make the Tahini Sauce: In a bowl, whisk together tahini, water, lemon juice, minced garlic, and a pinch of salt until smooth. Adjust the water to achieve your desired consistency.
- Serve: Remove the eggplant from the grill and drizzle the tahini sauce over the top. Garnish with chopped fresh parsley and serve warm.
Hickory Smoked Beef Tri-Tip

Get ready to impress your friends and family with this hickory smoked beef tri-tip! This cut of meat is known for its robust flavor and tender texture, making it a perfect choice for a summer BBQ or picnic. The hickory smoke adds a delightful depth, infusing the beef with a savory, smoky taste that pairs beautifully with a tangy barbecue sauce.
Perfectly simple to prepare, this tri-tip requires minimal effort but delivers maximum flavor. With just a few ingredients and some time on the grill, you’ll create a mouthwatering centerpiece that will have everyone talking long after the last bite. Let’s dive into the recipe!
Tools & Supplies Needed
- Smoker or grill
- Meat thermometer
- Sharp knife
- Cutting board
- Wood chips (hickory preferred)
Ingredients
- 1 (2-3 lb) beef tri-tip roast
- 2 tablespoons olive oil
- 2 teaspoons garlic powder
- 2 teaspoons onion powder
- 1 tablespoon smoked paprika
- 1 teaspoon salt
- 1 teaspoon black pepper
- 1 cup barbecue sauce (for serving)
Instructions
- Prepare the Meat: Start by trimming any excess fat off the tri-tip. Rub the olive oil all over the meat. In a small bowl, mix together garlic powder, onion powder, smoked paprika, salt, and black pepper. Rub this spice mixture generously over the tri-tip.
- Preheat the Smoker: Soak hickory wood chips in water for about 30 minutes. Preheat your smoker or grill to about 225°F (107°C). Add the soaked wood chips to the smoker box or directly on the coals if you’re using a charcoal grill.
- Smoke the Tri-Tip: Place the seasoned tri-tip on the smoker grate. Close the lid and smoke for about 2 to 3 hours, or until the internal temperature reaches your desired doneness (135°F for medium-rare).
- Rest the Meat: Once cooked, remove the tri-tip from the grill and let it rest for at least 15 minutes. This helps the juices redistribute, making for a more tender and flavorful bite.
- Slice and Serve: Slice the tri-tip against the grain into thin slices. Serve with your favorite barbecue sauce on the side for dipping.
Spiced Bbq Butternut Squash

Spiced BBQ Butternut Squash is a fantastic addition to any picnic, especially for a memorable 4th of July. The natural sweetness of the squash pairs beautifully with smoky spices, creating a delicious side dish that everyone will love. Plus, this recipe is simple to make, perfect for those who want to impress without spending all day in the kitchen.
This dish is not only tasty but also colorful, making it a visually appealing choice for your picnic spread. The warm spices enhance the squash’s flavor, and it’s a great option for both vegetarians and meat lovers alike.
Tools & Supplies Needed
- Grill or BBQ
- Large mixing bowl
- Knife
- Cutting board
- Spatula
- Serving dish
Ingredients
- 1 medium butternut squash, peeled and diced
- 2 tablespoons olive oil
- 1 tablespoon brown sugar
- 1 teaspoon smoked paprika
- 1 teaspoon ground cumin
- 1 teaspoon chili powder
- Salt and pepper to taste
- Fresh cilantro for garnish (optional)
Instructions
- Prepare the Squash: In a large mixing bowl, combine the diced butternut squash with olive oil, brown sugar, smoked paprika, cumin, chili powder, salt, and pepper. Toss until the squash is evenly coated.
- Preheat the Grill: Preheat your grill to medium-high heat. If using skewers, thread the squash onto skewers for easy grilling.
- Grill the Squash: Place the squash on the grill and cook for about 15-20 minutes, turning occasionally, until tender and slightly charred.
- Serve: Remove the squash from the grill and transfer it to a serving dish. Garnish with fresh cilantro if desired, and serve warm.
Lemon-Herb Grilled Whole Fish

Grilling a whole fish is a simple yet impressive way to elevate your picnic spread. The Lemon-Herb Grilled Whole Fish is bright and refreshing, perfect for summer gatherings. With fragrant herbs and zesty lemon, the dish captures the essence of outdoor cooking while providing a hearty, flavorful option for your guests.
This recipe is straightforward, making it a great choice for both seasoned cooks and beginners. The combination of lemon, garlic, and fresh herbs infuses the fish with a delightful taste, while grilling ensures it retains its moist texture. Serve this dish alongside fresh salads and crusty bread for a complete meal that everyone will love.
Tools & Supplies Needed
- Grill
- Fish spatula
- Grilling basket (optional)
- Sharp knife
- Measuring spoons
- Mixing bowl
Ingredients
- 1 whole fish (about 2-3 lbs, such as snapper or trout), cleaned and scaled
- 2 lemons, sliced
- 4 cloves garlic, minced
- 1/4 cup fresh parsley, chopped
- 1/4 cup fresh cilantro, chopped
- 1/4 cup olive oil
- Salt and pepper to taste
- Fresh herbs for garnish (optional)
Instructions
- Preheat the grill to medium-high heat.
- In a mixing bowl, combine minced garlic, chopped parsley, chopped cilantro, olive oil, salt, and pepper. Mix well.
- Rub the herb mixture inside the cavity and on the skin of the fish.
- Stuff the cavity with lemon slices and additional herbs if desired.
- Place the fish on the grill, cooking for about 6-8 minutes on each side, or until the flesh flakes easily with a fork.
- Remove from the grill and let rest for a few minutes before serving.
- Garnish with fresh herbs and serve with extra lemon wedges.
Smoky Bbq Stuffed Bell Peppers

Smoky BBQ Stuffed Bell Peppers are a delicious twist on a picnic classic. These vibrant bell peppers are packed with a hearty filling of seasoned ground meat, rice, and tangy barbecue sauce. The smoky flavor adds an irresistible touch, making them perfect for a summer gathering. Plus, they are easy to prepare, so you can spend more time enjoying the outdoors with friends and family.
Each bite is bursting with flavor, and the colorful peppers make for an appealing presentation on any picnic table. Whether you’re celebrating the 4th of July or just enjoying a sunny day, these stuffed peppers are sure to be a hit!
Tools & Supplies Needed
- Large skillet
- Mixing bowl
- Knife
- Cutting board
- Oven-safe baking dish
- Aluminum foil
Ingredients
- 4 large bell peppers (any color)
- 1 pound ground beef or turkey
- 1 cup cooked rice
- 1 cup BBQ sauce
- 1/2 cup diced onion
- 1 teaspoon garlic powder
- 1 teaspoon smoked paprika
- 1/2 teaspoon salt
- 1/4 teaspoon black pepper
- 1 cup shredded cheese (cheddar or mozzarella)
Instructions
- Preheat the oven to 375°F (190°C).
- Slice the tops off the bell peppers and remove the seeds and membranes. Set aside.
- In a large skillet, cook the ground meat over medium heat until browned. Drain any excess fat.
- Add the diced onion to the skillet and cook until softened, about 3-4 minutes.
- In a mixing bowl, combine the cooked meat, rice, BBQ sauce, garlic powder, smoked paprika, salt, and pepper. Mix well.
- Stuff each bell pepper with the meat mixture, pressing down gently to pack it in.
- Place the stuffed peppers in a baking dish. Cover with aluminum foil and bake for 25 minutes.
- Remove the foil, sprinkle cheese on top of each pepper, and return to the oven for an additional 10-15 minutes, or until the cheese is melted and bubbly.
- Let cool for a few minutes before serving. Enjoy your Smoky BBQ Stuffed Bell Peppers!
Cherry-Glazed Lamb Chops

Cherry-glazed lamb chops are a delightful dish, perfect for your 4th of July picnic. The combination of sweet, tangy cherries with the savory richness of lamb creates a mouthwatering flavor that everyone will love. Plus, they’re fairly easy to prepare, making them an excellent choice for a festive gathering.
These lamb chops are marinated to absorb all the delicious flavors, then grilled to perfection. The cherry glaze adds a glossy finish that not only looks stunning but also enhances the taste of the meat. Serve them with some fresh sides for a meal that’s sure to impress!
Tools & Supplies Needed
- Grill or grill pan
- Mixing bowl
- Whisk
- Meat thermometer
- Serving platter
Ingredients
- 8 lamb chops
- 1 cup fresh cherries, pitted and chopped
- 1/4 cup balsamic vinegar
- 1/4 cup honey
- 2 tablespoons olive oil
- 2 cloves garlic, minced
- Salt and pepper to taste
- Fresh thyme for garnish
Instructions
- Marinate the Lamb: In a mixing bowl, combine chopped cherries, balsamic vinegar, honey, olive oil, minced garlic, salt, and pepper. Add the lamb chops, ensuring they are well-coated. Cover and marinate for at least 1 hour in the refrigerator.
- Preheat the Grill: Get your grill hot and ready for the lamb chops, aiming for medium-high heat.
- Grill the Chops: Remove the lamb from the marinade, reserving the marinade for later. Grill the chops for about 3-4 minutes per side, or until they reach your desired doneness. Use a meat thermometer to check for an internal temperature of 145°F (63°C) for medium-rare.
- Prepare the Glaze: While the chops are grilling, pour the reserved marinade into a small saucepan and bring to a boil. Reduce heat and simmer for about 5 minutes until it thickens slightly.
- Serve: Once the lamb is done, let it rest for a few minutes. Drizzle the cherry glaze over the chops and garnish with fresh thyme before serving.
Grilled Romaine Hearts With Caesar Dressing

Grilled romaine hearts with Caesar dressing is a delightful twist on the classic salad. The grilling process adds a smoky flavor and a nice char, enhancing the crispness of the lettuce. Paired with a creamy Caesar dressing and crunchy croutons, this dish is both simple and refreshing, making it perfect for your summer picnic or 4th of July celebration.
This recipe is easy to whip up, requiring minimal ingredients and preparation time. It’s a fantastic way to impress your guests while keeping things light and healthy!
Ingredients
- 2 romaine hearts, halved lengthwise
- 2 tablespoons olive oil
- 1 cup Caesar dressing
- 1 cup croutons
- Parmesan cheese, for garnish
- Freshly ground black pepper, to taste
Instructions
- Preheat your grill to medium heat.
- Brush the cut sides of the romaine hearts with olive oil and season with salt and pepper.
- Place the romaine on the grill, cut side down. Grill for about 2-3 minutes, until grill marks appear and the lettuce is slightly wilted.
- Remove from the grill and place on a serving platter, cut side up.
- Drizzle with Caesar dressing, sprinkle with croutons and grated Parmesan cheese.
- Serve immediately and enjoy your tasty, grilled salad!
Tools & Supplies Needed
- Grill
- Grilling brush
- Serving platter
- Measuring spoons
- Knife
- Cutting board
Alabama White Sauce Bbq Chicken Wings

Alabama White Sauce BBQ Chicken Wings are a unique twist on traditional BBQ. This tangy, mayonnaise-based sauce brings a creamy, zesty flavor that elevates the classic chicken wing experience. With hints of vinegar and spices, these wings are perfect for a summer picnic or a laid-back gathering.
They’re simple to make, requiring just a few ingredients and a quick prep time. Whether grilled or oven-baked, you can enjoy this crowd-pleasing dish in no time!
Tools & Supplies Needed
- Grill or oven
- Baking tray (if using the oven)
- Mixing bowl
- Whisk
- Meat thermometer
Ingredients
- 2 pounds chicken wings
- 1 cup mayonnaise
- 1/4 cup apple cider vinegar
- 1 tablespoon Dijon mustard
- 1 tablespoon Worcestershire sauce
- 1 teaspoon garlic powder
- 1 teaspoon onion powder
- 1 teaspoon smoked paprika
- Salt and pepper to taste
- Fresh parsley for garnish (optional)
Instructions
- Prepare the Sauce: In a mixing bowl, whisk together the mayonnaise, apple cider vinegar, Dijon mustard, Worcestershire sauce, garlic powder, onion powder, smoked paprika, salt, and pepper until smooth.
- Marinate the Wings: Place the chicken wings in a large bowl and pour half of the white sauce over them, ensuring they’re well-coated. Let them marinate in the refrigerator for at least 1 hour, or overnight for more flavor.
- Cook the Wings: Preheat your grill to medium heat (or preheat your oven to 400°F/200°C). Grill the wings for about 25-30 minutes, turning occasionally, until they reach an internal temperature of 165°F (75°C). If baking, arrange them on a baking tray and bake for 30-35 minutes, flipping halfway through.
- Serve: Once cooked, toss the wings in the remaining white sauce and garnish with chopped parsley if desired. Serve hot and enjoy!
Charred Broccoli With Garlic And Red Pepper

Charred broccoli with garlic and red pepper is a deliciously simple side dish that brings a burst of flavor to your picnic spread. The slight char enhances the natural sweetness of the broccoli, while garlic and red pepper flakes add a wonderful kick. This recipe is not only quick to prepare but also a healthy option that everyone will love.
Perfect for a 4th of July BBQ, this side is vibrant and colorful, making it a great complement to any grilled meats. It’s easy enough for any cook to whip up, and the results are sure to impress your guests!
Tools & Supplies Needed
- Large mixing bowl
- Baking sheet
- Aluminum foil
- Sharp knife
- Cutting board
- Tongs
Ingredients
- 1 lb broccoli, cut into florets
- 3 tablespoons olive oil
- 4 cloves garlic, minced
- 1 teaspoon red pepper flakes
- Salt and pepper to taste
- 1 lemon, for squeezing (optional)
Instructions
- Preheat your grill or oven to high heat.
- In a large mixing bowl, combine broccoli florets, olive oil, minced garlic, red pepper flakes, salt, and pepper. Toss until the broccoli is well-coated.
- Spread the broccoli evenly on a baking sheet lined with aluminum foil or directly on the grill grate.
- Grill for about 10-12 minutes or roast in the oven until the broccoli is tender and charred, stirring halfway through.
- Remove from heat and squeeze fresh lemon juice over the top if desired. Serve warm.
Blackened Cajun Shrimp Skewers

Blackened Cajun Shrimp Skewers are a flavorful twist on traditional barbecue. These skewers pack a punch with a smoky, spiced seasoning that perfectly complements the sweet shrimp. They’re easy to prepare and make for a fantastic addition to any summer gathering, especially for the 4th of July!
With a bit of prep work for marinating and just a few minutes on the grill, you’ll have a delicious dish ready to impress your friends and family. Serve them with a zesty dipping sauce for an extra kick that everyone will love!
Ingredients
- 1 pound large shrimp, peeled and deveined
- 2 tablespoons Cajun seasoning
- 2 tablespoons olive oil
- 1 tablespoon lemon juice
- 1 teaspoon garlic powder
- Salt and pepper to taste
- Fresh cilantro for garnish
- Skewers (soaked in water if wooden)
Instructions
- Marinate the Shrimp: In a bowl, mix together Cajun seasoning, olive oil, lemon juice, garlic powder, salt, and pepper. Add the shrimp and toss to coat. Cover and let marinate in the refrigerator for at least 30 minutes.
- Prepare the Skewers: Thread the marinated shrimp onto skewers, leaving a bit of space between each piece for even cooking.
- Preheat the Grill: Heat your grill to medium-high heat. Oil the grill grates to prevent sticking.
- Grill the Skewers: Place the shrimp skewers on the grill. Cook for about 2-3 minutes per side, or until the shrimp turn pink and are cooked through.
- Serve: Remove from the grill and garnish with fresh cilantro. Serve with your favorite dipping sauce.
Tools & Supplies Needed
- Grill
- Bowl for marinating
- Skewers
- Basting brush (optional)
Grilled Zucchini With Herb-Feta Topping

Grilled zucchini with herb-feta topping is a fresh and flavorful dish perfect for your 4th of July picnic. The smoky taste from the grill complements the creamy feta and vibrant herbs, creating a delightful combination. Plus, it’s super simple to make, making it a go-to recipe for summer gatherings.
This recipe not only satisfies your cravings but also adds a healthy element to your barbecue spread. The herbs bring brightness, while the feta adds a savory twist. Whether you’re a grilling pro or just starting out, this dish is easy to whip up and sure to impress your guests!
Tools & Supplies Needed
- Grill or grill pan
- Cutting board
- Sharp knife
- Mixing bowl
- Spatula
Ingredients
- 2 medium zucchinis, sliced lengthwise
- 2 tablespoons olive oil
- 1 teaspoon salt
- 1/2 teaspoon black pepper
- 1 cup crumbled feta cheese
- 1/4 cup fresh parsley, chopped
- 1/4 cup fresh mint, chopped
- 1 tablespoon lemon juice
Instructions
- Prepare the Zucchini: Preheat the grill to medium-high heat. In a mixing bowl, toss the zucchini slices with olive oil, salt, and black pepper until evenly coated.
- Grill the Zucchini: Place the zucchini slices on the grill and cook for about 4-5 minutes on each side, or until you see nice grill marks and the zucchini is tender.
- Make the Herb-Feta Topping: While the zucchini is grilling, combine feta cheese, chopped parsley, mint, and lemon juice in a bowl. Mix gently to combine.
- Assemble the Dish: Once the zucchini is grilled, remove it from the heat and place it on a serving platter. Top each slice with a generous portion of the herb-feta mixture.
- Serve: Enjoy your grilled zucchini warm as a delightful side dish or appetizer!
Beer-Braised Bbq Beef Cheeks

Beer-braised BBQ beef cheeks are a delightful dish that delivers rich, deep flavors and a melt-in-your-mouth texture. The slow cooking process allows the beef to absorb the unique taste of the beer, creating a savory and slightly sweet profile that’s perfect for summer gatherings.
This recipe is simple to follow and perfect for those who love to impress at BBQs without spending all day in the kitchen. Serve it alongside fresh salads and crunchy veggies for a picnic-ready meal that will have everyone coming back for more!
Tools & Supplies Needed
- Large Dutch oven or heavy-bottomed pot
- Wooden spoon
- Meat thermometer
- Serving platter
Ingredients
- 2 lbs beef cheeks
- 1 onion, diced
- 4 cloves garlic, minced
- 2 cups beer (preferably a stout or brown ale)
- 1 cup beef broth
- 1/4 cup brown sugar
- 1 tablespoon smoked paprika
- 1 teaspoon black pepper
- 1 teaspoon salt
- 1 tablespoon olive oil
- Fresh parsley for garnish
Instructions
- Heat olive oil in a large Dutch oven over medium-high heat. Season beef cheeks with salt and pepper, then sear on all sides until browned. Remove and set aside.
- Add onions and garlic to the pot, cooking until softened. Stir in beer, beef broth, brown sugar, and smoked paprika, scraping up any browned bits from the bottom.
- Return beef cheeks to the pot, ensuring they are submerged in the liquid. Bring to a simmer, then cover and reduce heat to low.
- Cook for 3-4 hours, or until the beef is tender and easily shredded with a fork. Check occasionally and add more broth if needed.
- Once cooked, remove beef cheeks from the pot and let rest for a few minutes before slicing. Serve with the braising liquid drizzled over and garnish with fresh parsley.
Smoked Salt-Crusted Beets

Smoked salt-crusted beets are a unique and simple side dish that packs a punch of flavor. The natural sweetness of beets pairs beautifully with the smoky, salty crust, making them a must-have for any summer gathering or picnic. Plus, they’re easy to prepare, requiring just a few ingredients and minimal hands-on time.
This dish offers a delightful contrast of textures, with the tender beets beneath a crunchy, flavorful exterior. Whether you serve them warm or at room temperature, these beets will impress your guests with their vibrant color and delicious taste.
Ingredients
- 4 medium beets, washed and trimmed
- 1 cup coarse sea salt
- 2 tablespoons smoked paprika
- 1 tablespoon olive oil
- Fresh herbs (like parsley or cilantro) for garnish
Instructions
- Preheat your oven to 400°F (200°C).
- In a bowl, mix the sea salt and smoked paprika together.
- Coat each beet with olive oil and then roll them in the salt mixture until fully covered.
- Place the beets on a baking sheet lined with parchment paper and bake for about 45-60 minutes, or until tender when pierced with a fork.
- Remove from the oven and let cool slightly before cracking the salt crust off. Slice or serve whole, garnished with fresh herbs.
Tools & Supplies Needed
- Oven
- Baking sheet
- Mixing bowl
- Parchment paper
- Knife
Teriyaki Glazed Pork Tenderloin

Teriyaki Glazed Pork Tenderloin is a delicious and simple dish that brings a sweet and savory flavor to your summer picnic. The tenderloin is marinated in a homemade teriyaki sauce, resulting in a juicy and flavorful centerpiece that pairs perfectly with seasonal sides. This dish is not only easy to prepare but also makes for a stunning presentation on your picnic table.
Grilling the pork adds a delightful caramelization that enhances the teriyaki glaze, making each bite a burst of flavor. Whether you’re hosting a gathering or enjoying a family outing, this recipe is sure to make your 4th of July memorable.
Tools & Supplies Needed
- Grill or grill pan
- Measuring cups and spoons
- Mixing bowl
- Whisk
- Meat thermometer
- Cutting board
- Sharp knife
Ingredients
- 1 lb pork tenderloin
- 1/4 cup soy sauce
- 2 tablespoons honey
- 2 tablespoons rice vinegar
- 1 tablespoon grated ginger
- 2 cloves garlic, minced
- 1 tablespoon sesame oil
- 1 teaspoon cornstarch
- 2 green onions, chopped (for garnish)
- Sesame seeds (for garnish)
Instructions
- Marinate the Pork: In a mixing bowl, whisk together soy sauce, honey, rice vinegar, ginger, garlic, sesame oil, and cornstarch. Place the pork tenderloin in a resealable bag and pour the marinade over it. Seal the bag and refrigerate for at least 1 hour, or overnight for best results.
- Preheat the Grill: Preheat your grill to medium-high heat. Remove the tenderloin from the marinade, allowing any excess to drip off.
- Grill the Pork: Place the pork on the grill and cook for about 20-25 minutes, turning occasionally, until the internal temperature reaches 145°F (63°C). Let it rest for 5 minutes before slicing.
- Garnish and Serve: Slice the tenderloin into medallions and sprinkle with chopped green onions and sesame seeds before serving. Enjoy your delicious teriyaki glazed pork tenderloin with your favorite picnic sides!