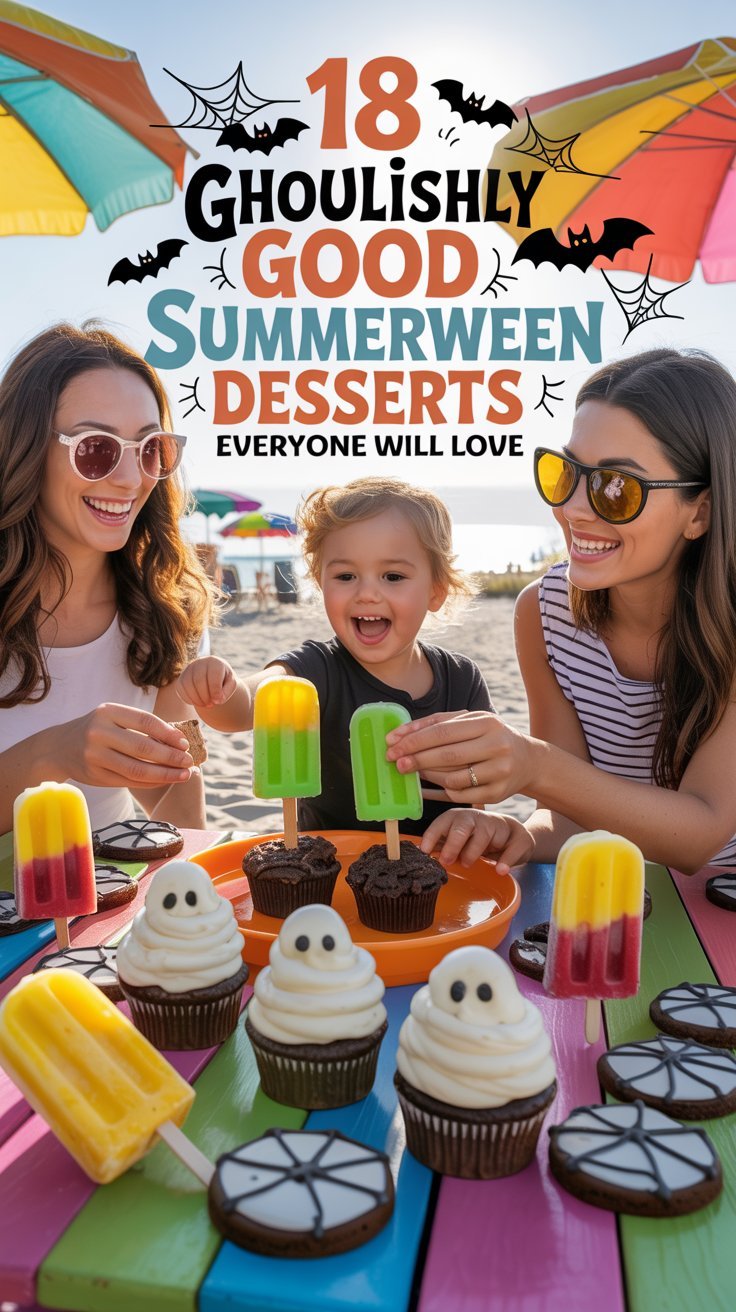
Summerween is the perfect excuse to indulge in deliciously spooky treats! This collection of 18 ghoulishly good summer desserts will satisfy your sweet tooth while embracing the whimsical spirit of the season. From ghostly cupcakes to creepy cookies, each recipe is simple and fun, making it easy for everyone to join in on the fun. Grab your favorite tools and supplies, and let’s spread some summer scare with these delightful confections!
Tools and Supplies Needed (Find @ Amazon):
- Mixing bowls
- Measuring cups and spoons
- Whisk or electric mixer
- Baking sheets
- Parchment paper
- Cake pans (various sizes)
- Cookie cutters
- Piping bags and tips
- Food coloring
- Spatula
- Cooling rack
- Sprinkles and edible decorations
Graveyard Dirt Pudding Cups

Graveyard Dirt Pudding Cups are a fun and delightful treat for any summer celebration. This layered dessert features creamy chocolate pudding, crushed cookies for that dirt-like appearance, and colorful gummy candies that add a playful touch. The flavors blend beautifully, creating a rich and satisfying dessert that’s sure to please everyone. Plus, it’s super easy to whip up, making it perfect for both kids and adults.
These pudding cups are not only visually appealing but also incredibly delicious. The combination of smooth chocolate pudding and crunchy cookie layers makes each spoonful a treat. Get ready to impress your guests with this spooky yet scrumptious dessert!
Tools and Supplies Needed
- Mixing bowls
- Whisk
- Clear cups or glasses
- Spatula
- Cookie crumbles (Oreo or chocolate cookies)
Ingredients
- 2 cups chocolate pudding
- 1 cup crushed Oreo cookies
- 1 cup gummy worms or candy pumpkins
- 4-6 Oreo cookies for topping
Instructions
- Prepare the Pudding: In a mixing bowl, whisk the chocolate pudding according to package instructions. Let it set for about 5 minutes.
- Layer the Cups: In clear cups or glasses, add a layer of chocolate pudding to the bottom. Follow with a layer of crushed Oreo cookies, then repeat until the cups are filled, finishing with a cookie layer on top.
- Add the Toppings: Decorate the top of each cup with gummy worms or candy pumpkins to create a graveyard scene.
- Chill and Serve: Place the cups in the refrigerator for at least 30 minutes before serving. Enjoy your spooky dessert!
Monster Eye Popsicles

Monster Eye Popsicles are a fun and fruity treat perfect for summer festivities. These colorful popsicles are not only delicious but also visually striking, making them a hit at any gathering. They combine various fruit juices and vibrant fruits, giving each popsicle a unique flavor and a playful appearance that kids and adults alike will enjoy.
Making these popsicles is simple and requires no special skills. Just layer your favorite juices and fruits in a mold, freeze, and watch your treats transform into creepy-cute snacks. The combination of flavors is refreshing, and the addition of googly eyes makes them irresistibly fun!
Tools and Supplies Needed
- Popsicle molds
- Popsicle sticks
- Fruit juice (your choice)
- Fresh fruit (strawberries, kiwi, orange slices, etc.)
- Googly eyes (optional for decoration)
Ingredients
- 2 cups fruit juice (choose a mix such as orange, grape, or berry)
- 1 cup assorted fresh fruits, chopped
- Googly eyes (for decoration)
Instructions
- Prepare the Fruit: Chop your chosen fresh fruits into small pieces. Set aside.
- Layer the Ingredients: In each popsicle mold, add a layer of fruit juice followed by a layer of chopped fruits. Repeat until the molds are filled, leaving a little space at the top for expansion as they freeze.
- Add the Sticks: Insert the popsicle sticks into the molds, ensuring they are centered.
- Freeze: Place the molds in the freezer and let them freeze for at least 4-6 hours, or until fully set.
- Unmold and Decorate: To remove the popsicles, run warm water over the outside of the molds for a few seconds. Once removed, stick googly eyes onto the popsicles for added fun!
- Serve and Enjoy: These popsicles are perfect for a hot day or a themed party. Enjoy your Monster Eye Popsicles!
Zombie Beach Parfaits

Zombie Beach Parfaits are a fun twist on traditional desserts, perfect for summer gatherings or Halloween-themed parties. These layered treats combine a creamy texture with a burst of fruity flavors, making them not only eye-catching but also incredibly delicious. Kids and adults alike will love the playful presentation and unique taste.
Making these parfaits is straightforward, requiring just a few simple steps. You can customize the layers and toppings to suit your taste, allowing for creativity in the kitchen. Grab your favorite glasses and get ready to impress with this spooky yet delightful dessert!
Tools and Supplies Needed
- Clear cups or glasses
- Mixing bowls
- Whisk
- Spatula
- Measuring cups and spoons
Ingredients
- 1 cup blue Jell-O, prepared
- 1 cup vanilla yogurt
- 1/2 cup crushed graham crackers
- Red and green candy-coated chocolates (like M&Ms)
- Gummy bears or any cute candy (for decoration)
- 1/2 cup whipped cream (optional)
Instructions
- Prepare the Jell-O according to package instructions and let it set in the refrigerator until firm.
- In a clear cup, layer the bottom with one spoonful of vanilla yogurt.
- Add a layer of the set blue Jell-O on top of the yogurt.
- Sprinkle a layer of crushed graham crackers to mimic sand.
- Repeat the layers, finishing with a dollop of whipped cream on top (if using).
- Decorate with red and green candies and place gummy bears on top to resemble beachgoers.
- Serve immediately and enjoy your Zombie Beach Parfaits!
Jack-O’-Lantern Watermelon

This Jack-O’-Lantern Watermelon is a fun and refreshing treat that perfectly captures the spirit of Summerween. With its vibrant colors and playful design, it’s not only tasty but also simple to make, making it a hit for parties and gatherings. The combination of juicy watermelon and assorted fruits brings a delightful sweetness that everyone will enjoy.
Creating this spooky centerpiece involves some fun carving and a bit of creativity. It’s an interactive dessert that allows for personal touches, whether you opt for classic fruits or seasonal favorites. Perfect for both kids and adults, this Jack-O’-Lantern is sure to be a conversation starter!
Tools and Supplies Needed
- 1 medium watermelon
- Assorted fruits (such as strawberries, blueberries, kiwi, and melon)
- Sharp knife
- Small melon baller (optional)
- Cutting board
- Spoon for scooping
Ingredients
- 1 medium watermelon
- 1 cup strawberries, quartered
- 1 cup blueberries
- 1 cup kiwi, peeled and sliced
- 1 cup cantaloupe or honeydew, diced
Instructions
- Prepare the Watermelon: Start by cutting a thin slice off the bottom of the watermelon to create a flat base, allowing it to stand upright. Next, carefully cut a lid from the top and scoop out the flesh using a spoon, setting the fruit aside for later.
- Carve the Design: Use a sharp knife to carve a Jack-O’-Lantern face into the watermelon. Be creative with the eyes, nose, and mouth to give it a fun or spooky look.
- Fill with Fruit: Combine the scooped watermelon flesh with your assorted fruits in a bowl. Mix well and fill the carved watermelon with this colorful fruit salad.
- Serve: Place the filled Jack-O’-Lantern on a serving platter and enjoy! This refreshing dessert is perfect for a warm Summerween celebration.
Ghost S’Mores Dip
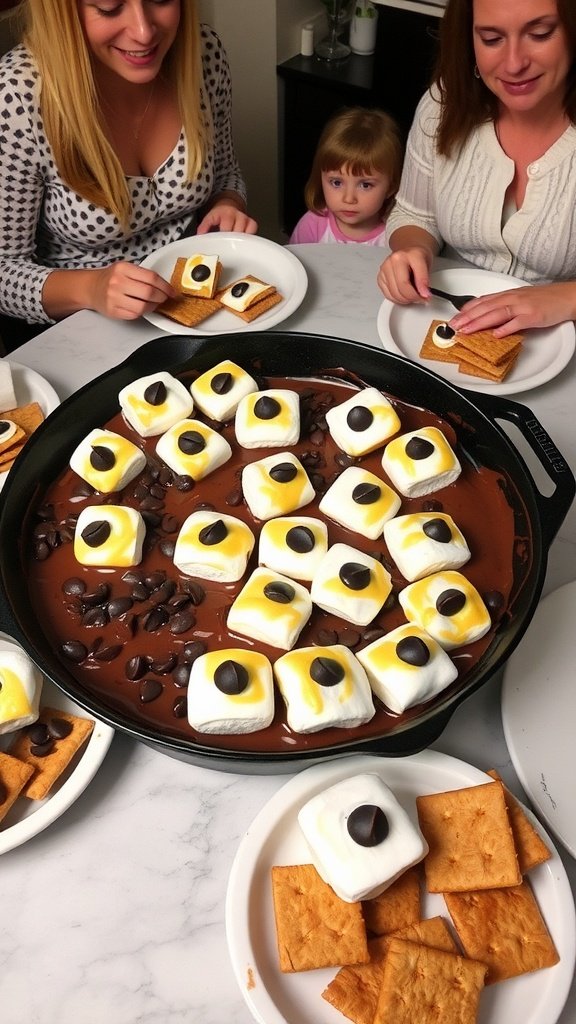
Ghost S’Mores Dip is a fun twist on the classic campfire treat that brings the flavors of chocolate, marshmallow, and graham crackers together in a gooey, shareable dip. It’s perfect for summer gatherings, Halloween parties, or just a cozy night in. The combination of melted chocolate and toasted marshmallows creates a rich and sweet indulgence that everyone will love.
This recipe is straightforward and quick, making it a great choice for those who want an easy yet impressive dessert. Gather around with friends and family, dip your graham crackers, and enjoy this spooky twist on a traditional favorite!
Tools and Supplies Needed
- Oven-safe skillet or baking dish
- Mixing bowl
- Spatula or spoon
- Graham crackers for dipping
- Large marshmallows
- Chocolate chips or chocolate bars
- Chocolate candies for decoration (optional)
Ingredients
- 2 cups chocolate chips (semi-sweet or milk chocolate)
- 2 cups large marshmallows
- 1/2 cup chocolate candies (for eyes, optional)
- Graham crackers (for serving)
Instructions
- Preheat your oven to 400°F (200°C).
- In your oven-safe skillet, evenly spread the chocolate chips across the bottom.
- Top the chocolate chips with the large marshmallows, placing them closely together.
- Bake in the preheated oven for about 10 minutes or until the marshmallows are golden brown and the chocolate is melted.
- Remove from the oven and let it cool for a minute. Add chocolate candies on top of the marshmallows to create ghost eyes.
- Serve warm with graham crackers for dipping and enjoy your spooky treat!
Witch’S Brew Ice Cream Floats

These Witch’s Brew Ice Cream Floats are a fun and spooky twist on the classic ice cream float. Bursting with delightful flavors, they combine fizzy soda and creamy ice cream for a treat that’s perfect for any summer celebration. The vibrant colors and playful presentation make them a hit with both kids and adults, making this dessert not only tasty but also visually appealing.
Making these floats is simple and quick! Just layer your favorite soda with scoops of ice cream, and finish off with a sprinkle of fun toppings. Whether it’s for a summer party or a Halloween-themed gathering, these floats will surely enchant everyone.
Tools and Supplies Needed
- Tall glasses
- Scooper for ice cream
- Straws
- Measuring cup
- Mixing spoon
Ingredients
- 2 cups of your favorite soda (like grape or lime)
- 4 scoops of vanilla ice cream
- Green food coloring (optional)
- Whipped cream (for topping)
- Assorted candy eyeballs and gummy worms (for decoration)
Instructions
- Fill each glass halfway with your chosen soda, allowing it to fizz up.
- Add a few drops of green food coloring if you want a spooky twist.
- Carefully add a scoop of vanilla ice cream to each glass. The ice cream will float on top!
- Top with whipped cream for an extra treat.
- Finish off with candy eyeballs and gummy worms for a festive touch.
- Serve immediately with straws and enjoy the eerie delight!
Bloody Brain Watermelon Sorbet
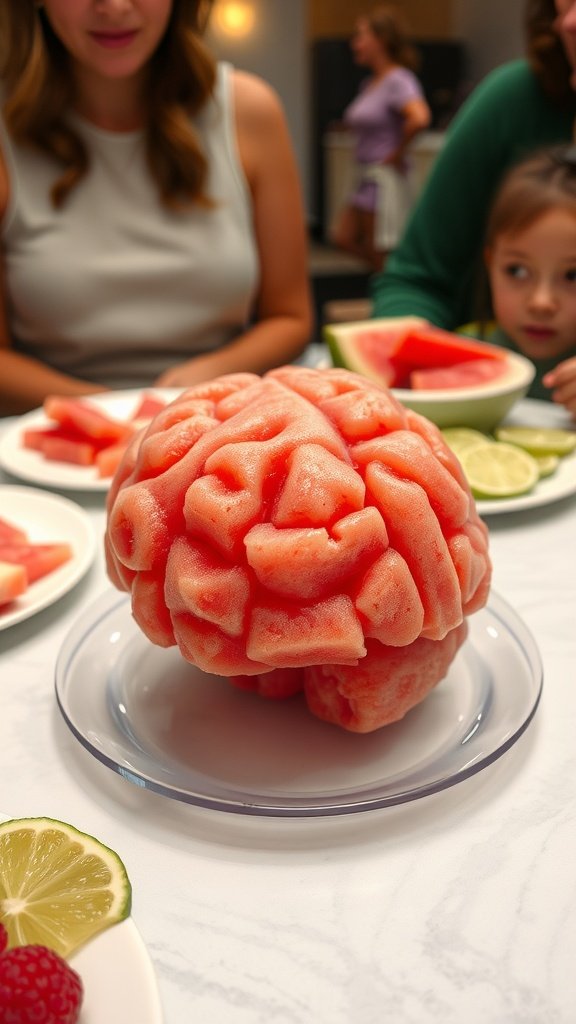
Get ready to chill out with a treat that’s as delicious as it is spooky! This Bloody Brain Watermelon Sorbet is a refreshing and playful way to celebrate Summerween. With its vibrant color and unique shape, it’s sure to be a hit at any gathering. Plus, it’s surprisingly easy to make, requiring just a few ingredients and a little bit of patience.
The sweet taste of ripe watermelon combined with a hint of lime creates a delightful sorbet that is both fruity and fun. Serve it up in playful portions, and watch as it steals the show. Perfect for kids and adults alike, this dessert is a must-try for your summer festivities!
Tools and Supplies Needed
- Blender or food processor
- Watermelon
- Lime juicer
- Freezer-safe mold or bowl
- Ice cream scoop (optional)
Ingredients
- 4 cups watermelon, diced
- 2 tablespoons lime juice
- 1/4 cup granulated sugar (adjust based on sweetness of watermelon)
- 1 tablespoon lime zest
Instructions
- Blend Watermelon: In a blender, combine the diced watermelon, lime juice, and sugar. Blend until smooth.
- Mix in Zest: Stir in the lime zest for an added burst of flavor.
- Freeze: Pour the mixture into a freezer-safe mold or bowl. Cover and freeze for at least 4 hours, or until firm.
- Scoop and Serve: Once frozen, scoop the sorbet into bowls and serve immediately for a fun, spooky dessert!
Spider Web Cookie Pizza

Get ready for a fun and delicious treat that’s perfect for any summerween celebration! This Spider Web Cookie Pizza is a delightful twist on the classic cookie, combining the sweetness of cookie dough with spooky decorations. It’s soft, chewy, and topped with cream cheese frosting, making it a hit for both kids and adults alike.
Making this cookie pizza is simple and engaging, allowing for creativity in decorating. The combination of the creamy frosting and playful spider decorations makes it not just tasty but also visually appealing. Let’s gather your ingredients and dive into this spooky baking adventure!
Tools and Supplies Needed
- Mixing bowl
- Baking sheet
- Parchment paper
- Spatula
- Measuring cups and spoons
- Electric mixer (optional)
Ingredients
- 2 1/2 cups all-purpose flour
- 1 teaspoon baking soda
- 1/2 teaspoon salt
- 1 cup unsalted butter, softened
- 1 cup granulated sugar
- 1 cup brown sugar, packed
- 2 large eggs
- 2 teaspoons vanilla extract
- 2 cups chocolate chips
- 1 cup cream cheese, softened
- 2 cups powdered sugar
- Black food coloring (optional)
- Plastic spiders (for decoration)
- Red candy or cherries (for decoration)
Instructions
- Preheat the oven to 350°F (175°C). Line a baking sheet with parchment paper.
- In a bowl, whisk together flour, baking soda, and salt. Set aside.
- In another bowl, beat the softened butter, granulated sugar, and brown sugar until creamy. Add eggs one at a time, mixing well after each addition, and stir in vanilla.
- Gradually add the dry ingredients to the wet ingredients, mixing until just combined. Fold in chocolate chips.
- Spread the cookie dough onto the prepared baking sheet, shaping it into a large circle. Bake for about 15-20 minutes or until golden brown.
- Let the cookie cool completely. In the meantime, prepare the frosting by beating together cream cheese and powdered sugar until smooth. Add black food coloring if desired, mixing until you reach your preferred color.
- Once the cookie is cool, spread the frosting over the top. Use remaining frosting to create a spider web design.
- Decorate with plastic spiders and red candy or cherries to complete the spooky look. Slice and serve!
Mummy Hand Ice Cream Sandwiches

Mummy Hand Ice Cream Sandwiches are a fun and spooky treat perfect for summer parties or Halloween gatherings. These ice cream sandwiches combine buttery, soft cookies shaped like hands with your favorite ice cream flavors, creating a deliciously creepy dessert. The subtle sweetness of the cookies pairs perfectly with creamy ice cream, making each bite a delightful experience. Plus, this recipe is easy to follow, making it a great activity for kids and adults alike!
Creating these treats is not only simple but also allows for some creativity in decorating. You can use different ice cream flavors and toppings to customize them. Everyone will enjoy the deliciousness and the playful presentation of these mummy-themed desserts!
Tools and Supplies Needed
- Hand-shaped cookie cutter
- Baking sheet
- Parchment paper
- Mixing bowls
- Electric mixer
- Spatula
- Ice cream scooper
Ingredients
- 2 1/2 cups all-purpose flour
- 1 teaspoon baking soda
- 1/2 teaspoon salt
- 1 cup unsalted butter, softened
- 1 cup granulated sugar
- 1 cup brown sugar, packed
- 2 large eggs
- 1 teaspoon vanilla extract
- 1 quart ice cream (any flavor)
- White chocolate melts (for decoration)
- Chocolate chips (for eyes)
Instructions
- Preheat the oven to 350°F (175°C). Line a baking sheet with parchment paper.
- In a bowl, mix together the flour, baking soda, and salt. Set aside.
- In a large mixing bowl, beat the softened butter, granulated sugar, and brown sugar until creamy. Add eggs one at a time, mixing well after each addition. Stir in the vanilla.
- Gradually add the flour mixture to the wet ingredients, mixing until just combined.
- Using a hand-shaped cookie cutter, cut out cookies and place them on the lined baking sheet. Bake for 10-12 minutes or until golden brown. Allow cookies to cool completely.
- Once cooled, scoop a generous amount of ice cream onto the flat side of one cookie, then place another cookie on top to create a sandwich. Press gently to seal.
- Melt the white chocolate in a microwave-safe bowl. Drizzle it over the cookies to create mummy bandages. Add chocolate chips as eyes.
- Freeze the assembled mummy hands for at least 30 minutes before serving.
Poison Apple Popsicles

These Poison Apple Popsicles are a fun and spooky treat perfect for summer celebrations. Combining the tartness of green apples with a touch of sweetness, they create a refreshing dessert that everyone will enjoy. Not only are they delicious, but they’re also super easy to make, making them a great choice for kids and adults alike.
With just a few simple ingredients and some time in the freezer, you can whip up these ghoulishly good popsicles. They’re perfect for parties and can even be customized with different flavors and colors to suit your theme!
Tools and Supplies Needed
- Popsicle molds
- Blender or food processor
- Mixing bowl
- Measuring cups
- Wooden popsicle sticks
Ingredients
- 2 cups green apple juice
- 1 cup water
- 1 tablespoon lemon juice
- 1/4 cup sugar (or to taste)
- Optional: green food coloring
- Fresh fruit chunks (like apple slices) for added texture
Instructions
- Combine the green apple juice, water, lemon juice, and sugar in a mixing bowl. Stir until the sugar is dissolved.
- If you want a more vibrant color, add a few drops of green food coloring and mix well.
- Pour the mixture into the popsicle molds, leaving a little space at the top. You can add chunks of fresh fruit if you like.
- Insert the wooden popsicle sticks and freeze for at least 4-6 hours or until fully solid.
- To release the popsicles, run warm water over the outside of the molds for a few seconds before gently pulling the popsicles out.
Monster Watermelon Jello Cups

These Monster Watermelon Jello Cups are a fun and tasty treat perfect for summer gatherings. They combine the refreshing sweetness of watermelon with the playful colors of Jello, making them a hit with kids and adults alike. Plus, they are super easy to make, so you can whip them up in no time!
Each cup features a spooky monster face created with fruit and candy, adding a touch of creativity to your dessert table. The combination of fruity flavors and vibrant colors not only looks great but tastes amazing too!
Tools and Supplies Needed
- 1 large watermelon
- 2 boxes of flavored Jello (your choice of colors)
- 1 cup boiling water
- 1 cup cold water
- Edible eyes (candy)
- Fruit for decorating (like gummy worms or small candies)
- Knife
- Mixing bowls
- Spoons for serving
Ingredients
- 2 cups Jello mix (flavor of your choice)
- 2 cups boiling water
- 2 cups cold water
- Fresh fruit pieces (for garnish)
Instructions
- Prepare the Watermelon: Cut the watermelon in half lengthwise. Scoop out the flesh and set aside for later. Save the watermelon halves for your Jello cups.
- Make the Jello: In a mixing bowl, dissolve the Jello mix in boiling water, stirring until fully dissolved. Add cold water and mix well.
- Fill the Watermelon: Carefully pour the Jello mixture into the hollowed-out watermelon halves. Place them in the fridge for several hours, or until fully set.
- Add Monster Faces: Once the Jello is firm, use the watermelon flesh and other candies to create playful monster faces on top of the Jello. Add edible eyes for a fun and spooky effect.
- Serve: Cut the watermelon into wedges to serve. Enjoy your refreshing and ghoulish treats!
Frankenstein Rice Krispie Treats

These Frankenstein Rice Krispie Treats are a fun and delicious way to celebrate Summerween. They are chewy, crispy, and bursting with flavor that kids and adults alike will love. With an easy-to-follow recipe, you can whip up these charming treats in no time, making them perfect for gatherings or just a spooky snack at home.
The bright green color and playful monster faces make them visually appealing, while the chocolate accents add a delightful taste that balances the sweetness. These treats are simple to make and are sure to bring smiles all around!
Tools and Supplies Needed
- Large mixing bowl
- Microwave-safe bowl
- Spatula
- 9×9 inch baking dish
- Cooking spray or parchment paper
Ingredients
- 6 cups Rice Krispies cereal
- 1 package (10 oz) marshmallows
- 3 tablespoons unsalted butter
- Green food coloring
- Chocolate candies for hair
- Candy eyes
- Small round candies for noses (like M&Ms or Skittles)
Instructions
- Prepare the Dish: Grease a 9×9 inch baking dish or line it with parchment paper. This will make it easier to remove the treats later.
- Melt the Ingredients: In a microwave-safe bowl, melt the butter and marshmallows together in 30-second intervals, stirring in between, until fully melted and smooth. Mix in green food coloring until you reach your desired shade.
- Add the Cereal: Once the marshmallow mixture is melted, stir in the Rice Krispies cereal until evenly coated.
- Shape the Treats: Pour the mixture into the prepared dish and press it down firmly to create an even layer. Allow it to cool for about 30 minutes.
- Cut and Decorate: Once cooled, cut the Rice Krispie treats into squares. Decorate each square with candy eyes, chocolate candies for hair, and a small round candy for the nose to give them a Frankenstein look.
Ghostly Frozen Banana Pops

Ghostly Frozen Banana Pops are a fun and delicious treat perfect for summer or any festive occasion! These sweet and creamy banana bites are dipped in white chocolate and decorated to resemble adorable little ghosts. They’re simple to make and can be a hit at any gathering, with their tasty appeal satisfying both kids and adults alike.
These pops have a delightful combination of flavors. The sweetness of the banana pairs wonderfully with the rich white chocolate coating. Plus, they can be customized with various toppings to enhance the festive look. Whether you’re hosting a party or just looking for a fun snack, these frozen delights are sure to be a crowd-pleaser!
Tools and Supplies Needed
- Bananas
- White chocolate chips
- Popsicle sticks
- Chocolate candies (for eyes and mouth)
- Microwave-safe bowl
- Parchment paper or baking sheet
Ingredients
- 2 large ripe bananas
- 1 cup white chocolate chips
- Chocolate candies (e.g., Mini M&Ms or chocolate chips for decoration)
- Popsicle sticks
Instructions
- Prep the Bananas: Peel the bananas and cut them in half. Insert a popsicle stick into the cut end of each banana half.
- Make the Chocolate Coat: In a microwave-safe bowl, melt the white chocolate chips in 30-second intervals, stirring in between until smooth.
- Dip the Bananas: Dip each banana half into the melted white chocolate, ensuring they are fully coated. Allow any excess chocolate to drip off.
- Decorate: Place the dipped bananas on a parchment-lined baking sheet. Before the chocolate sets, add chocolate candies for eyes and a mouth to create ghost faces.
- Freeze: Place the baking sheet in the freezer for at least 2 hours, or until the chocolate is hard. Serve frozen and enjoy your spooky treats!
Vampire Bite Strawberry Cups

Vampire Bite Strawberry Cups are a spooky yet delightful treat perfect for any Summerween gathering. These charming little desserts combine fresh strawberries with a creamy filling, all drizzled with a red sauce that looks just like vampire’s blood. The sweet and tart flavor of the strawberries pairs deliciously with the rich filling, making these cups a festive addition to your Halloween-inspired dessert table.
What makes this treat so appealing is how easy it is to make. With just a few simple steps, you can create a stunning dessert that will impress your guests and satisfy their sweet tooth. Plus, they are fun to eat, making them a hit with both kids and adults alike.
Tools and Supplies Needed
- Medium bowl
- Whisk
- Spoon or piping bag
- Knife
- Cutting board
- Serving platter
Ingredients
- 1 pound fresh strawberries
- 1 cup cream cheese, softened
- 1/2 cup powdered sugar
- 1 teaspoon vanilla extract
- 1/2 cup strawberry sauce (store-bought or homemade)
- Mint leaves for garnish (optional)
Instructions
- Prepare the Strawberries: Wash and dry the strawberries. Cut off the tops and hollow out the centers using a small knife. Be careful not to cut through the bottom.
- Make the Filling: In a medium bowl, whisk together the softened cream cheese, powdered sugar, and vanilla extract until smooth and creamy.
- Fill the Cups: Spoon or pipe the cream cheese mixture into each hollowed-out strawberry until filled to the top.
- Add the Sauce: Drizzle the strawberry sauce over the filled strawberries, allowing it to drip down the sides to create a “blood” effect.
- Garnish and Serve: Add a mint leaf on top of each strawberry for a pop of color, then arrange them on a serving platter. Enjoy!
Eyeball Ice Cream Scoops

Eyeball Ice Cream Scoops are a fun and spooky dessert perfect for summerween celebrations. These playful treats combine creamy ice cream with a touch of whimsy, making them a hit for both kids and adults. The combination of flavors is sure to delight, while the ghoulish presentation adds a festive flair to any gathering.
This recipe is simple to make, requiring just a few ingredients. With a bit of creativity, you can transform ordinary ice cream into a spooky delight that will have everyone talking!
Tools and Supplies Needed
- Ice cream scooper
- Wax paper
- Cookie sheet
- Small mixing bowl
- Knives for cutting
Ingredients
- 4 cups vanilla ice cream
- 1 cup white chocolate chips
- 1/2 cup candy eyeballs
- 1/2 cup red candy pieces (like red hots)
- 1/4 cup chocolate chips
Instructions
- Scoop the ice cream into round balls and place them on a cookie sheet lined with wax paper. Freeze for at least 30 minutes until firm.
- Melt the white chocolate chips in a small bowl over low heat, stirring until smooth.
- Dip each frozen ice cream scoop into the melted white chocolate, coating them completely. Return to the cookie sheet and freeze again until set.
- Once the white chocolate is set, add candy eyeballs to the center of each scoop. Use red candy pieces to create veins or other spooky decorations.
- Finally, sprinkle a few chocolate chips around each scoop for added effect. Serve immediately and enjoy your creepy delicious dessert!
Witch’S Fingers Pretzel Rods

Witch’s Fingers Pretzel Rods are a fun and spooky treat perfect for your summerween celebrations! These delicious snacks combine the crunch of pretzel rods with a sweet, green candy coating, resembling creepy witch fingers. The salty-sweet balance makes them irresistible, and they’re super simple to make, even for novice bakers.
Gather your friends and family for a delightful treat that’s sure to impress. Whether for a party or just for fun, these Witch’s Fingers will be a hit with both kids and adults alike!
Tools and Supplies Needed
- Large baking sheet
- Parchment paper
- Small microwave-safe bowl
- Fork or dipping tool
- Chopped almonds (for fingernails)
Ingredients
- 1 bag of pretzel rods
- 1 cup green candy melts
- Chopped almonds (for the nails)
Instructions
- Prepare the Baking Sheet: Line a large baking sheet with parchment paper.
- Melt the Candy: In a small microwave-safe bowl, melt the green candy melts in 30-second intervals, stirring in between until smooth.
- Dip the Pretzels: Dip each pretzel rod into the melted candy, covering about two-thirds of the rod. Allow any excess to drip off.
- Add Fingernails: Before the candy sets, press a chopped almond onto the tip of each pretzel to resemble a fingernail.
- Let Them Set: Place the dipped pretzel rods on the prepared baking sheet and let them cool completely until the candy hardens.
Pumpkin Patch Dirt Cups

Pumpkin Patch Dirt Cups are a fun and festive treat perfect for any summer celebration. These delightful desserts blend the creamy goodness of pumpkin pudding with crunchy chocolate cookies, creating a satisfying texture that everyone will love. The bright orange pumpkin decorations on top add a playful touch, making these cups an eye-catching addition to your dessert table.
Not only do they taste amazing, but they are also simple to make. With just a few ingredients and minimal prep time, you can whip up these treats and impress your friends and family. These cups are sure to bring smiles and satisfy your sweet tooth!
Tools and Supplies Needed
- Mixing bowls
- Whisk
- Cups or small jars for serving
- Spatula
- Measuring cups and spoons
Ingredients
- 1 cup pumpkin puree
- 1 cup vanilla pudding mix
- 2 cups milk
- 1 teaspoon pumpkin spice
- 2 cups crushed chocolate sandwich cookies
- 1 cup whipped topping
- Gummy pumpkins or candy decorations
Instructions
- In a mixing bowl, whisk together the pumpkin puree, vanilla pudding mix, milk, and pumpkin spice until smooth. Let it set for about 5 minutes to thicken.
- In another bowl, fold the whipped topping into the pumpkin mixture until well combined.
- In your serving cups, layer the crushed chocolate cookies at the bottom, followed by a layer of the pumpkin mixture.
- Repeat the layers until the cups are filled, finishing with a layer of crushed cookies on top.
- Top each cup with gummy pumpkins or candy decorations to create your pumpkin patch effect.
- Chill in the refrigerator for at least an hour before serving to ensure everything is nicely set.
Skull Pineapple Fruit Bowls

Get ready for a fun and fruity treat that’s perfect for summer gatherings! Skull pineapple fruit bowls are a delightful blend of spooky and refreshing. These edible bowls are made from fresh pineapples, carved into spooky skull shapes, and brimming with colorful, juicy fruits. They not only look impressive but taste amazing, offering a sweet and tangy flavor that’s sure to please your guests.
Making these fruity skulls is surprisingly easy! It’s a great way to get creative and impress friends at your next Summerween bash. Everyone will love digging into the delicious fruit inside. Plus, it’s a light and healthy dessert option that’s perfect for warm weather!
Tools and Supplies Needed
- 1 ripe pineapple
- Fruits of choice (e.g., strawberries, blueberries, kiwi, mango)
- Sharp knife
- Spoon or melon baller
- Cutting board
Ingredients
- 1 ripe pineapple
- 1 cup strawberries, hulled and halved
- 1 cup blueberries
- 1 cup diced mango
- 1 kiwi, sliced
Instructions
- Prepare the Pineapple: Cut the top off the pineapple and set it aside. Carefully carve out the inside of the pineapple using a sharp knife and spoon, being cautious around the edges.
- Shape the Skull: With the knife, carve a skull face into the front of the pineapple. Make sure to create eye sockets and a mouth for a spooky effect.
- Mix the Fruit: In a bowl, combine strawberries, blueberries, mango, and kiwi. Toss gently to mix.
- Fill the Skull: Pack the carved pineapple skull with the mixed fruits, pressing down slightly to fit them all in.
- Finish: Place the top of the pineapple back on and serve your skull fruit bowl on a platter, or display it as the centerpiece!