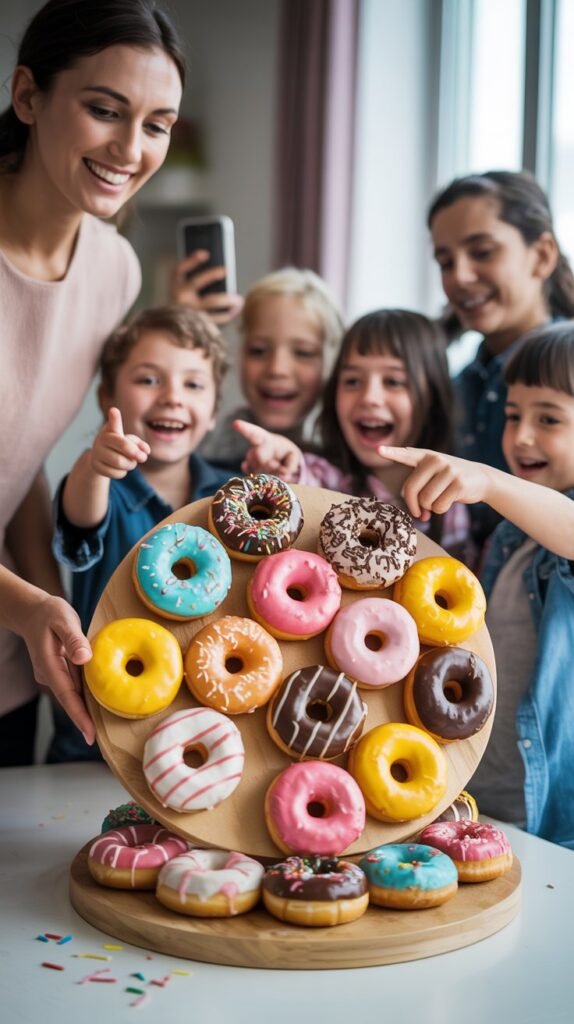
Transform ordinary donuts into extraordinary edible displays that will dazzle young guests and create Instagram-worthy celebration centerpieces! Donut boards are taking children’s parties by storm, offering a fun, customizable alternative to traditional cakes that combines visual impact with interactive snacking. From birthdays to holidays to everyday special moments, these creative arrangements elevate simple treats into memorable experiences that children can’t wait to dive into!
Why Donut Boards Are Perfect for Kid Celebrations
Donut boards offer distinctive advantages that make them perfect for children’s celebrations! These versatile sweet displays combine the fun of custom desserts with practical serving benefits:
Donut Board Benefits:
- Variety Priority: Accommodate multiple preferences without multiple desserts
- Serving Simplicity Focus: Eliminate cutting and serving complexity of traditional cakes
- Visual Impact Enhancement: Create jaw-dropping displays with minimal decorating skills
- Dietary Accommodation Strategy: Easily include options for different allergies and preferences
- Interactive Experience Creation: Allow children to select their own treats for personalized enjoyment
Traditional birthday cakes certainly have their place, but donut boards offer practical advantages that busy parents appreciate! No need for cutting, serving plates, or forks – just grab and enjoy! The individualized portions eliminate concerns about fair slice sizes, while the variety ensures every child finds something they love. Best of all, these showstopping displays often cost less than custom cakes while creating equally memorable photo opportunities!

Essential Supplies for Donut Board Creation
Before diving into specific design concepts, gather these foundational items that will serve you well for any donut board creation:
Basic Donut Board Supplies:
- Large serving board, tray, or platter (wood, melamine, or food-safe material)
- Smaller containers for donut holes, dips, or toppings
- Parchment paper or food-safe liners
- Decorative food picks
- Serving tongs or spatulas
- Cake stands or risers for height variation
- Themed decorative elements (non-edible accents)
- Food-safe markers (for personalized details)
- Decorative paper doilies
- Wet wipes for sticky fingers (practical necessity!)
Pro tip: Invest in a high-quality base board that can be reused for multiple celebrations! Look for boards with slight edges to prevent rolling donuts, food-safe finishes that can be wiped clean, and sufficient size to accommodate your typical gathering. The right foundation makes assembly easier while ensuring your creative designs stay perfectly in place until serving time!
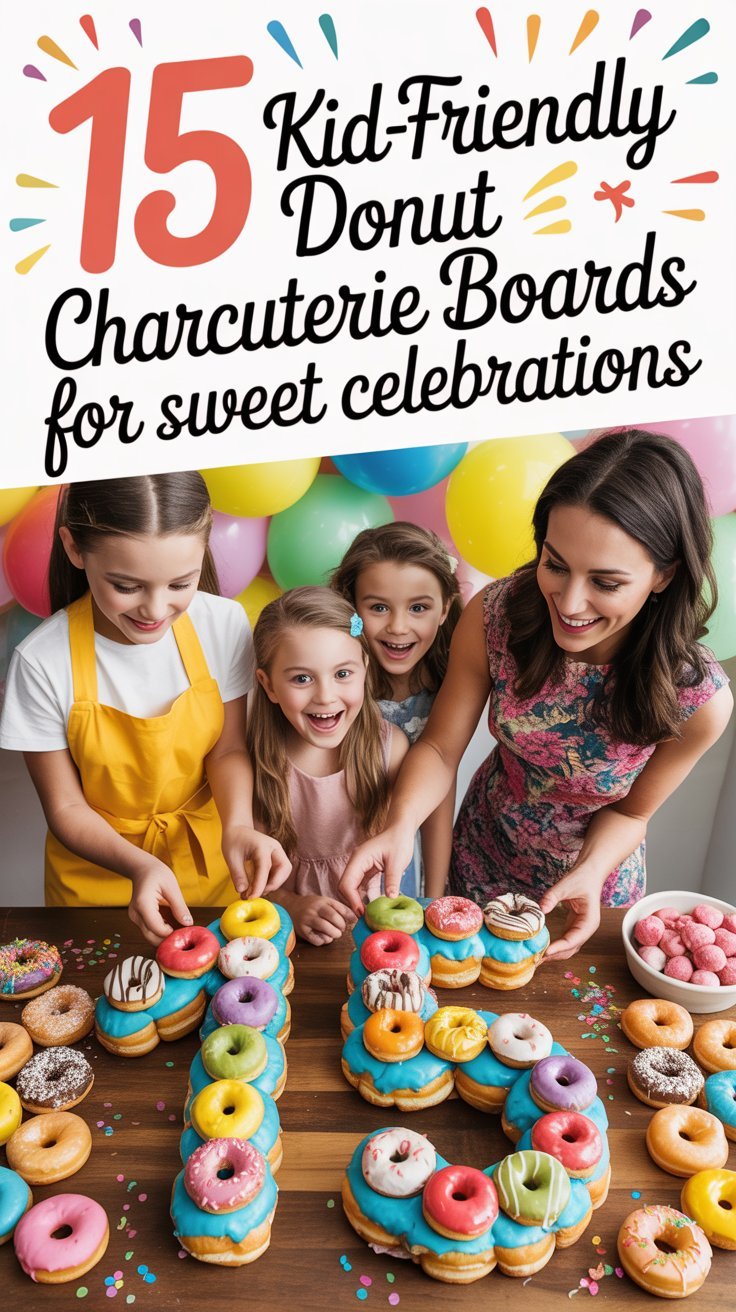
1. Birthday Donut Number Board
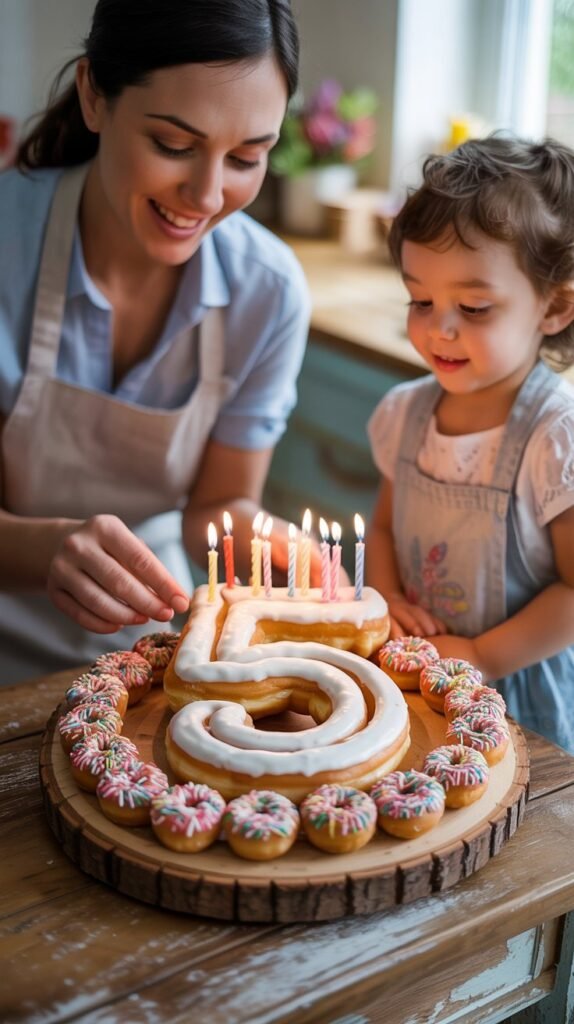
Create a personalized age celebration with donuts arranged in the birthday child’s new number! This interactive display combines cake-alternative functionality with playful presentation that makes the guest of honor feel extra special.
Tools and Supplies Needed:
- Extra-large rectangular serving board
- Number template printed on paper (for arrangement guide)
- Birthday candles
- Personalized name topper or banner
- Coordinating sprinkles in birthday theme colors
- Small bowls for donut holes
- Cake sparklers (optional, adult supervision required)
Birthday Number Board Recipe:
Main Number Donuts (10-15 donuts):
- Glazed or frosted donuts in birthday theme colors
- Consistent sizes for even arrangement
- Chocolate, vanilla, or birthday cake flavors
- Sprinkle-topped varieties for extra festivity
- Special filled donut for the birthday child
Accent Items:
- Donut holes in complementary colors
- Chocolate coins or wrapped chocolates
- Birthday-themed candy like wrapped chocolates
- Candles (number and individual)
- Fresh berries for color and healthier options
- Colorful macarons for luxury touch
Instructions:
- Print a paper template of the number as an arrangement guide.
- Place parchment paper over your serving board and lay the template underneath (visible through the parchment).
- Arrange donuts following the number outline, keeping them touching to maintain the shape.
- Fill any gaps in the arrangement with complementary donut holes.
- Add candles strategically throughout the number (ensure they’re inserted into donut tops securely).
- Surround the number with accent items for added color and variety.
- Add a personalized name pick or banner for the finishing touch.
- For serving, let the birthday child blow out candles, then guests can select donuts from the display.
Pro tip: Create a visual “VIP section” with extra-special donuts designated specifically for the birthday child! Mark their special treats with personalized picks or unique decorations to ensure they get first choice of their favorites. This small touch makes them feel honored while ensuring their preferred flavors don’t disappear before they get a chance to enjoy them!
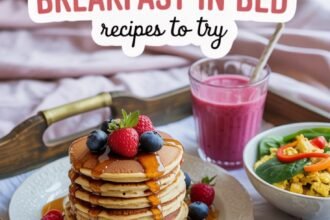
2. Breakfast Pajama Party Donut Board
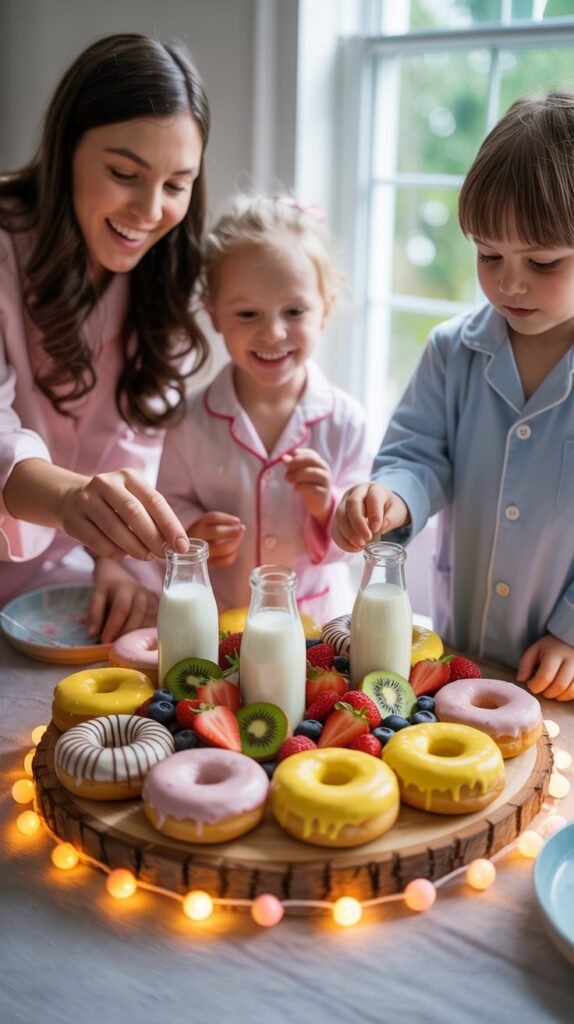
Combine the appeal of breakfast favorites with the joy of donuts for a morning celebration that elevates pajama parties to spectacular levels! This breakfast-inspired creation blends sweet treats with morning classics for a uniquely satisfying spread.
Tools and Supplies Needed:
- Large rectangular serving platter
- Mini milk bottles or shot glasses
- Small bowls for cereal samples
- Yogurt serving cups
- Honey dipper
- Maple syrup dispenser
- Pajama-themed decorative elements
- Tiered stand for visual interest
Breakfast Pajama Party Board Recipe:
Donut Selections (12-15 donuts):
- Maple bacon donuts
- Cinnamon sugar varieties
- Fruity cereal-topped donuts
- Classic glazed options
- Coffee-flavored for adults
- Mini pancake stack donuts
- French toast inspired varieties
Breakfast Accompaniments:
- Mini cereal boxes with small milk bottles
- Fresh berries and sliced fruits
- Yogurt dips in different flavors
- Chocolate hazelnut spread
- Maple syrup for drizzling
- Granola clusters
- Bacon strips for savory balance
Instructions:
- Create distinct “breakfast stations” across your board – donut section, cereal corner, fruit array, and dipping zone.
- Arrange larger donuts as the centerpiece, grouping by flavor profile.
- Set up mini milk bottles with colorful straws in a designated drinking section.
- Create cereal sampling stations with small bowls of different varieties.
- Add fresh fruit strategically for color and healthier options.
- Include dipping options in small containers, ensuring easy access.
- Add breakfast-themed decorative elements like mini spatulas or sunny side up egg picks.
- Consider pajama-pattern napkins or sleepover-themed serving tools to enhance the theme.
Pro tip: Schedule a “donut pajama breakfast picnic” by setting up individual breakfast trays or placemats for each child! Provide small baskets with each guest’s selections from the main board, allowing them to enjoy their personalized breakfast spread while lounging in their PJs. This creates an extra special feel while minimizing the chaos of everyone grabbing from one central board!
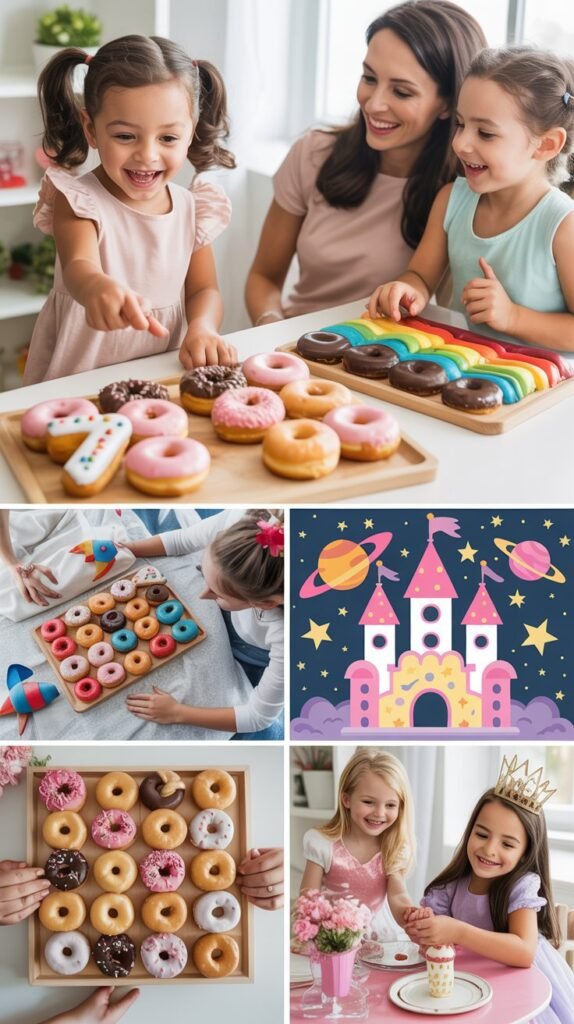
3. Rainbow Donut Dream Board
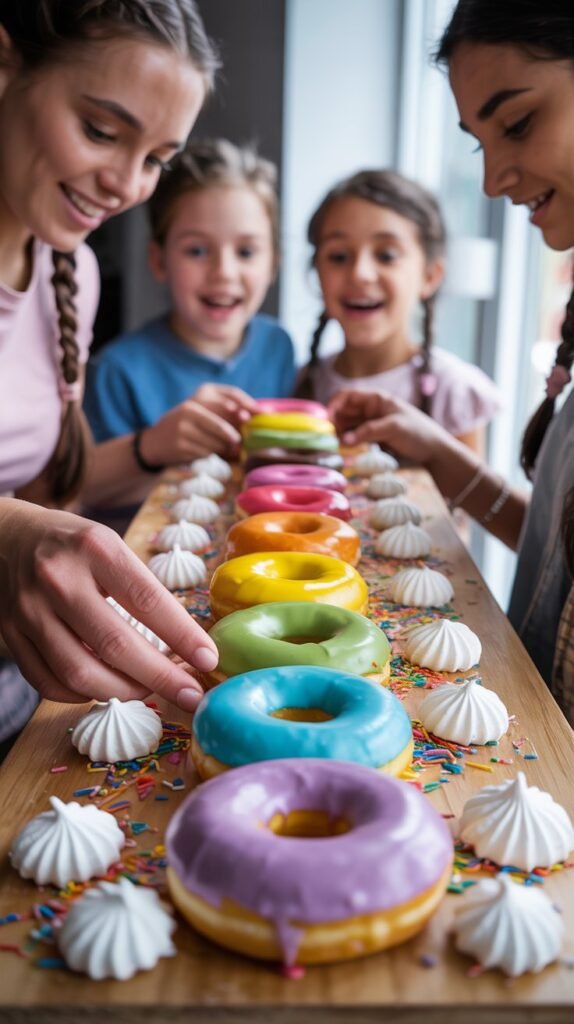
Create a magical color explosion that dazzles young eyes with this visually spectacular arrangement! The rainbow donut board combines vibrant colors in perfect progression to create an unforgettable display that’s as gorgeous as it is delicious.
Tools and Supplies Needed:
- Curved or rectangular large serving board
- White serving dishes (for “cloud” elements)
- Rainbow sprinkles and decorations
- Color-coordinated serving utensils
- Edible glitter or shimmer dust
- Cloud-shaped cookie cutters
- Rainbow candles or picks
- Color-blocked serving sections
Rainbow Donut Dream Board Recipe:
Rainbow Donuts (arrange in ROYGBIV order):
- Red: Strawberry frosted or red velvet
- Orange: Orange glazed or pumpkin spice
- Yellow: Lemon frosted or plain glazed
- Green: Matcha frosted or lime glazed
- Blue: Blueberry glazed or blue frosting
- Indigo/Violet: Purple frosted varieties, blackberry glazed
Rainbow Accompaniments:
- White cloud elements: Whipped cream, yogurt dips, coconut clusters
- Rainbow fruit skewers (strawberry, orange, pineapple, kiwi, blueberry, grape)
- Color-coordinated candies arranged in spectrum
- Frosting dipping cups in rainbow colors
- Rainbow sprinkle medley in separate container
- Gold chocolate coins at rainbow “ends”
- Rainbow sour belt candy strips as decorative elements
Instructions:
- Arrange donuts in curved rainbow formation following ROYGBIV color sequence.
- Place white/cloud elements at each end of the rainbow arc.
- Fill spaces between donuts with color-matching candies and fruits.
- Add height variation by stacking certain donuts or using risers.
- Incorporate rainbow sprinkles as accent decoration throughout.
- Consider adding edible glitter for magical shimmer effect.
- Use cloud-shaped serving dishes for dips and smaller items.
- Add gold chocolate coins at rainbow “ends” for whimsical touch.
Pro tip: Create a “Rainbow Challenge” where children must try at least one item from each color of the rainbow! Provide small rainbow-shaped cards where they can check off each color as they sample it. This encourages adventurous eating while creating a game-like experience. Award special “Rainbow Complete” certificates or small prizes to those who experience the full spectrum of flavors!
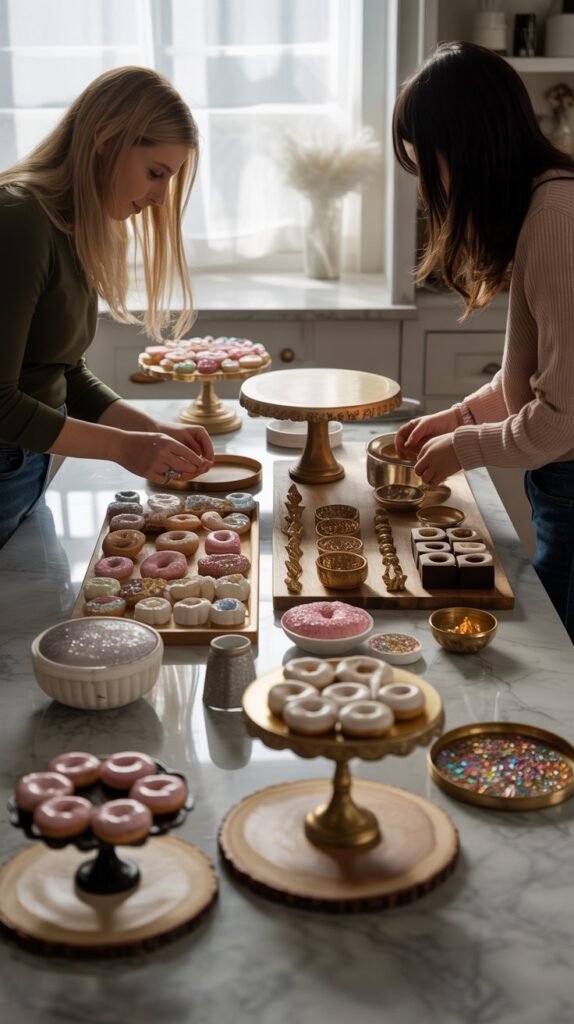
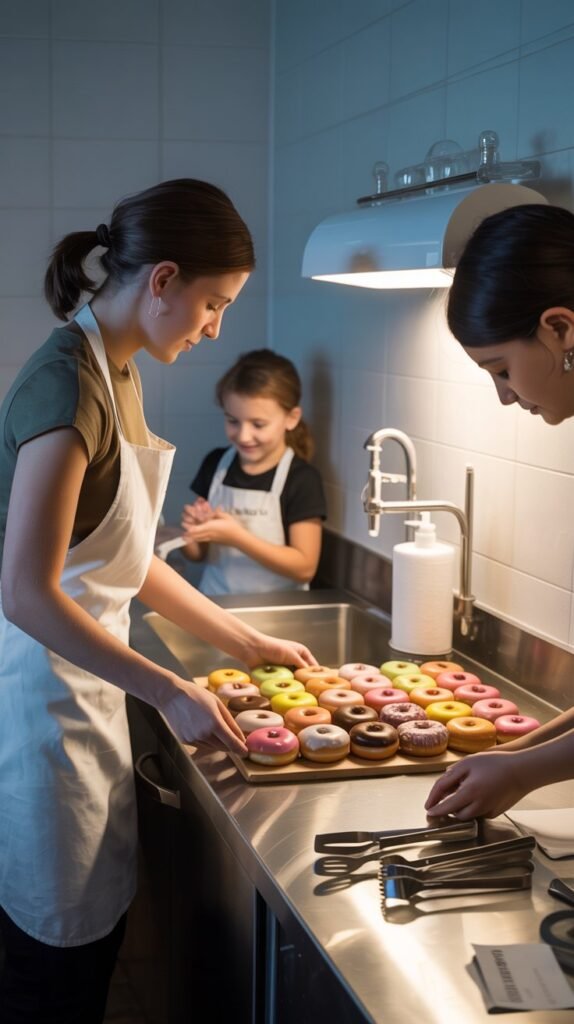
4. Build-Your-Own Donut Decoration Station
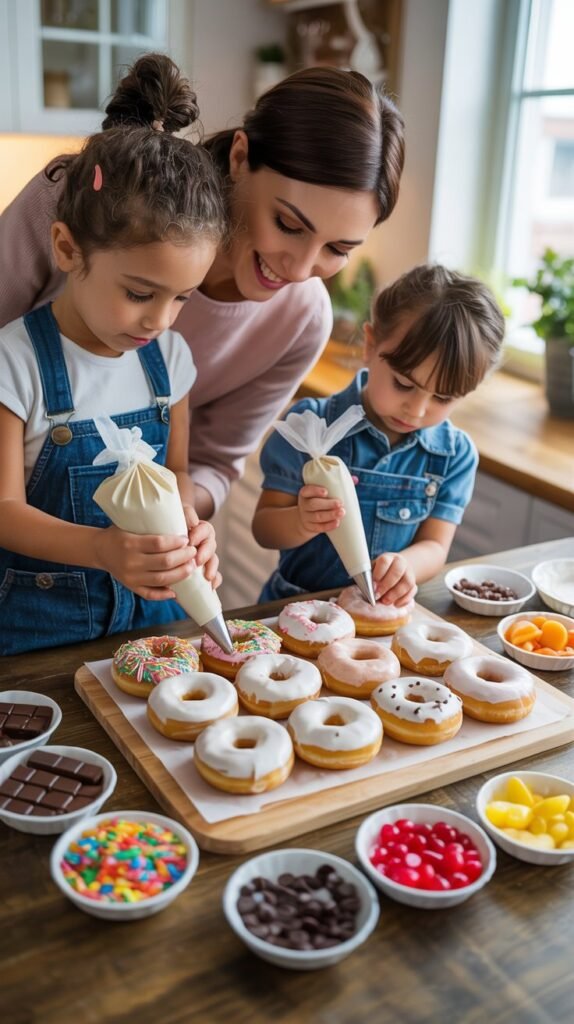
Turn dessert into an interactive activity with this hands-on creation station that lets children become donut artists! This engaging board combines eating with creativity for an unforgettable party experience that entertains as it satisfies sweet cravings.
Tools and Supplies Needed:
- Large round or rectangular serving board with sections
- Small bowls for toppings and decorations
- Squeeze bottles for sauces and glazes
- Plastic knives or spatulas for spreading
- Paper doilies for finished creations
- Decorating instruction cards
- Wet wipes for cleanup
- Aprons or smocks for enthusiastic decorators
- “My Creation” name tags or labels
Build-Your-Own Donut Station Recipe:
Base Donut Options (15-20 donuts):
- Plain cake donuts (variety of sizes)
- Unglazed raised donuts
- Chocolate donuts
- Light-colored plain donuts
- Donut holes for practice decorating
- Mini donuts for smaller appetites
Decorating Elements:
- Frostings: Vanilla, chocolate, strawberry (in piping bags or shallow dishes)
- Glazes: Clear, chocolate, fruit-flavored
- Sprinkles: Rainbow, chocolate, themed colors
- Toppings: Mini chocolate chips, crushed cookies, cereal pieces
- Drizzles: Caramel, chocolate, fruit sauces
- Fresh elements: Sliced strawberries, banana pieces, blueberries
- Special touches: Edible glitter, colored sugar, mini marshmallows
Instructions:
- Create a central display of plain donuts as the foundation for decorating.
- Arrange decorating elements in clearly organized sections around the donuts.
- Set up frosting station with various options in squeeze bottles or piping bags.
- Organize dry toppings in small bowls with serving spoons.
- Include visual instruction cards showing decoration ideas.
- Provide individual plates or doilies for completed creations.
- Consider setting up a “decoration showcase” area for photos before eating.
- Include wet wipes or damp cloths for inevitable sticky fingers.
Pro tip: Host a “Donut Decoration Competition” with fun categories like “Most Colorful,” “Most Creative,” “Best Use of Chocolate,” or “Silliest Face”! Have children present their donut masterpieces before eating, with simple prizes for various categories ensuring everyone feels successful. Take photos of the creations with their proud artists before they’re devoured for lasting memories of their culinary creativity!
5. Seasonal Holiday Donut Board
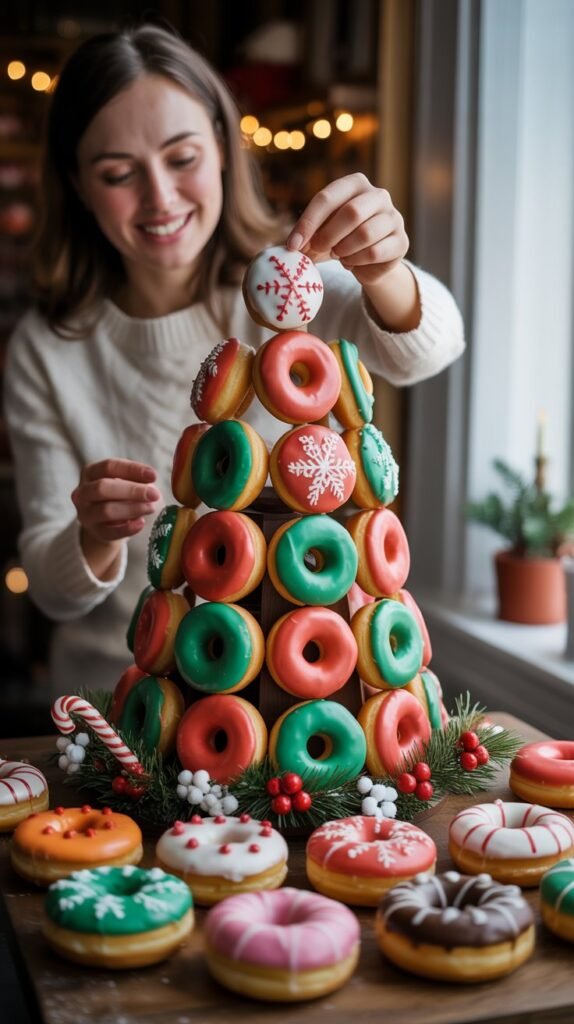
Celebrate special occasions throughout the year with holiday-themed donut displays that bring festive joy to any celebration! These seasonal boards transform simple donuts into holiday magic with themed colors, shapes, and decorations.
Tools and Supplies Needed:
- Holiday-shaped serving platters or standard boards
- Themed decorative elements (non-edible)
- Seasonal colored serving tools
- Holiday-specific cookie cutters
- Themed food picks
- Seasonal sprinkles and decorations
- Battery-operated string lights (for some holidays)
- Holiday character figurines (clean/food-safe)
Seasonal Holiday Board Ideas:
Christmas Donut Board:
- Red and green frosted donuts
- Snowflake sprinkled varieties
- Tree-shaped arrangement
- Candy cane accents
- Golden star donut at tree top
- Mini gingerbread cookies
- White “snow” coconut sprinkles
Halloween Donut Board:
- Orange and black frosted donuts
- Spider web designs
- Monster face decorations
- Purple and green accents
- Candy eyeball toppers
- Witch hat and broom picks
- Gummy worm “crawlers”
Easter Donut Board:
- Pastel colored frosted donuts
- Bunny ear decorations
- Egg-shaped arrangements
- Carrot-shaped treats
- Green “grass” coconut
- Chocolate nest elements
- Jelly bean accents
Valentine’s Day Donut Board:
- Pink and red frosted varieties
- Heart-shaped donuts or arrangements
- Chocolate-dipped with sprinkles
- Conversation heart candies
- Arrow-shaped picks
- Rose petal decorations
- Love letter cookie elements
Instructions:
- Select donuts in appropriate holiday colors and themes.
- Arrange in holiday-specific shape where possible (tree, heart, etc.)
- Add themed decorative elements strategically throughout the board.
- Incorporate holiday candies and treats in coordinating colors.
- Use seasonal picks, cupcake liners, and accessories to enhance theme.
- Consider adding battery-operated lights for extra magic (Christmas, Halloween).
- Add height variation with themed risers or stands.
- Include holiday character elements where appropriate.
Pro tip: Create a “Holiday Countdown” activity with numbered donut holes or mini donuts! For Christmas, arrange 24 small treats in an advent calendar-style display, or for Halloween, create a “13 Days” countdown with spooky-decorated mini donuts. This interactive element adds anticipation while portion-controlling sweeter treats during treat-heavy holiday seasons!
6. Movie Night Donut Theater
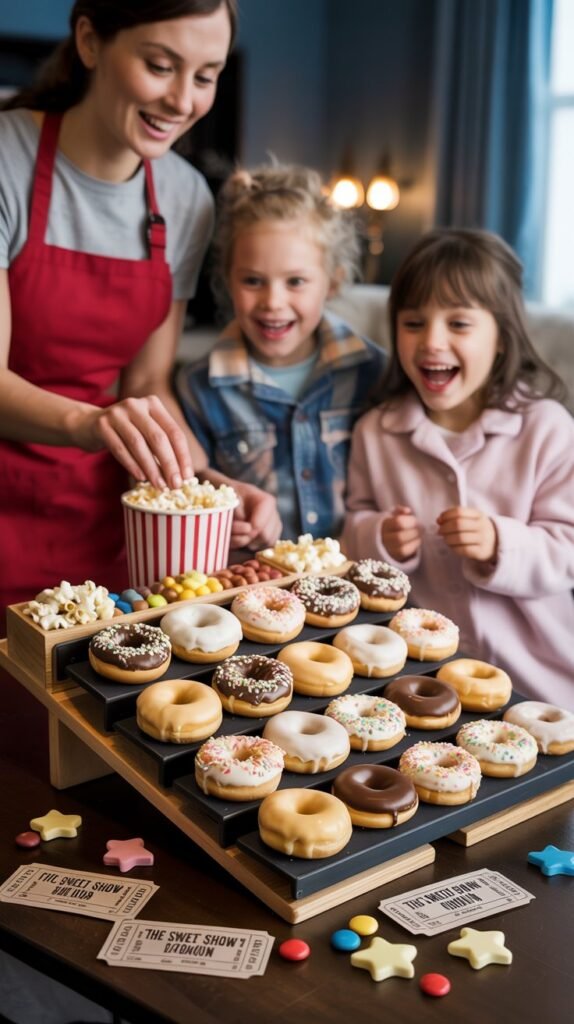
Bring the magic of the movies home with this cinema-inspired donut display perfect for family film nights! This creative arrangement transforms ordinary donuts into a theater experience complete with all the classic movie snack favorites.
Tools and Supplies Needed:
- Tiered serving board or risers for “stadium seating” effect
- Mini popcorn containers
- Empty candy boxes (theater style)
- Movie ticket stubs or printable tickets
- Star-shaped decorative elements
- Red fabric runner (for carpet effect)
- Battery-operated string lights
- Film strip or clapperboard decorations
- Movie character picks (matching your featured film)
Movie Night Donut Theater Recipe:
Feature Presentation Donuts (12-15 donuts):
- Chocolate frosted with various toppings
- Classic glazed varieties
- Character-themed decorations (if matching movie)
- Chocolate drizzled options
- Red and black frosted (theater colors)
- Star-shaped or decorated donuts
- Donut holes as “popcorn” alternative
Cinema Snack Companions:
- Actual popcorn in mini containers
- Theater-style boxed candies
- Chocolate covered raisins or peanuts
- Mini soft pretzel bites
- Chocolate dipped cookie sticks
- Red licorice ropes
- Soda-flavored gummies
Instructions:
- Create “stadium seating” effect using risers or tiered serving pieces.
- Arrange donuts in rows like theater seating, varying types for visual interest.
- Place mini popcorn containers and candy boxes between donut sections.
- Add movie tickets or stub replicas as decorative elements.
- Incorporate star shapes or Hollywood-inspired decorations.
- Use red fabric or paper as a “red carpet” base or runner.
- Consider adding battery-powered string lights for theater ambiance.
- For themed movie nights, include character elements matching your feature film.
Pro tip: Create “Intermission Surprise Bags” with additional movie treats that can be distributed halfway through the film! Include a mix of sweet and salty items in paper bags decorated like vintage cinema concession containers. This mid-movie refreshment break adds excitement while extending the special experience beyond the initial donut board presentation!
7. Sports Team Celebration Donut Board
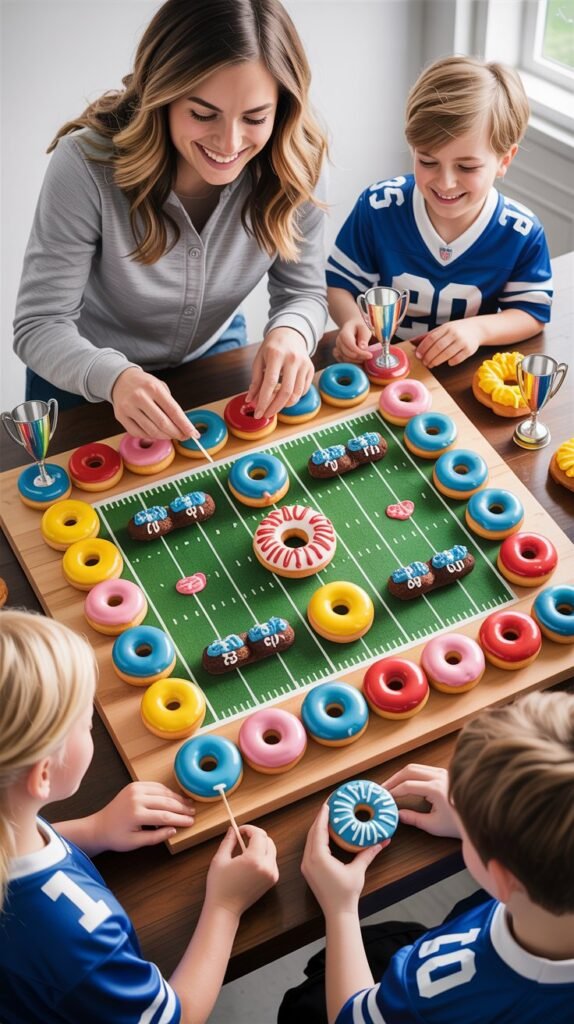
Rally around your favorite team with this spirited display that showcases team pride through color-coordinated treats! This sports-themed arrangement scores big points with young fans while celebrating victories, season kick-offs, or championship watching parties.
Tools and Supplies Needed:
- Rectangular serving board (for field/court layout)
- Team color serving accessories
- Jersey number toothpicks
- Sports ball decorative elements
- Trophy or medal decorations
- Team pennant or flag picks
- Green paper or fabric (for field effect)
- White tape or icing (for field lines)
- Team merchandise items (clean/food-safe)
Sports Team Donut Board Recipe:
Team Spirit Donuts (12-15 donuts):
- Frosted donuts in primary team color
- Frosted donuts in secondary team color
- Team logo colors in alternating pattern
- Special player jersey number donuts
- Championship ring shaped donuts (if available)
- Sport-specific shapes (football, baseball, etc.)
- White-iced donuts for adding team designs
Sideline Snack Additions:
- Team color candies (M&Ms, jellybeans, etc.)
- Chocolate coins as “medals”
- Pretzel “bats” or “hockey sticks”
- Football-shaped cookies or chocolates
- Sport-specific gummies or treats
- Team color fruit options
- Popcorn “crowd” sections
Instructions:
- Design board layout based on the specific sport (football field, basketball court, etc.).
- Create field/court markings using white icing, paper, or tape elements.
- Arrange donuts in strategic team color patterns across the board.
- Add sport-specific decorative elements (balls, jerseys, pennants).
- Incorporate player numbers or team year for personalization.
- Use risers to create “stadium” or dimensional elements.
- Add team merchandise items as decorative elements.
- Consider creating a “scoreboard” section with the team’s most recent victory.
Pro tip: Create a “Pre-Game Prediction” activity where guests select their game-day donuts based on who they think will win! Designate team-colored treats for each side and let everyone choose according to their prediction. After the game, offer “Victory Lap” additional treats in the winning team’s colors. This interactive element adds excitement to game viewing parties while connecting the food experience to the sporting event!
11. Donut Sundae Creation Station
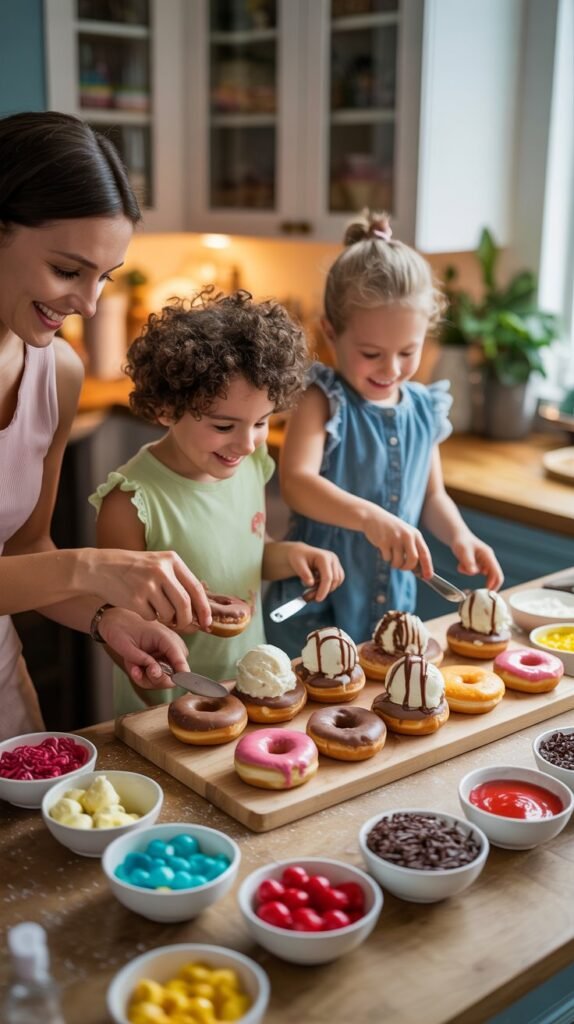
Combine two favorite treats into one spectacular dessert experience with this interactive station that pairs warm donuts with cool ice cream! This creative assembly bar lets children design their own unique donut sundae creations for the ultimate customized sweet treat.
Tools and Supplies Needed:
- Insulated serving board or thermal sections
- Ice cream scoop and bowls
- Donut slicing guides
- Sauce squeeze bottles
- Topping shakers and bowls
- Sundae cups or bowls
- Insulated container for ice cream
- Warming tray for donuts (optional)
- Spoons and napkins
- Assembly instruction cards
Donut Sundae Creation Recipe:
Donut Base Options (10-12 donuts):
- Plain glazed varieties (sliced horizontally)
- Chocolate cake donuts
- Old-fashioned donuts
- Cinnamon sugar varieties
- Long johns or bars (cut into pieces)
- Donut holes (for mini sundaes)
- Specialty flavored bases (red velvet, etc.)
Ice Cream and Topping Elements:
- Vanilla, chocolate, and strawberry ice cream
- Whipped cream
- Chocolate sauce
- Caramel sauce
- Strawberry sauce
- Sprinkles (various types)
- Crushed cookies or candies
- Mini chocolate chips
- Chopped nuts
- Fresh fruit pieces
- Cherries for topping
Instructions:
- Set up a thermal-conscious board with warm zone for donuts and cold zone for ice cream.
- Pre-slice donuts horizontally to create top and bottom “buns” for sundaes.
- Arrange donuts on one side of the board, using warming tray if available.
- Set up ice cream station with scoops in insulated containers.
- Create topping stations with clearly labeled options.
- Provide sauce bottles for easy drizzling.
- Include assembly instruction cards showing how to build sundaes.
- Offer both sundae cups and plates for different serving preferences.
- Consider pre-assembling one “display sundae” as an example.
Pro tip: Create a “Temperature Timeline” to manage this heat-sensitive display! Start with just donuts available for the first 15 minutes of your gathering, then bring out ice cream and set a designated “Sundae Time” period of about 30-45 minutes. This helps prevent melting disasters while creating an exciting “phase two” of your celebration that children will eagerly anticipate. For longer events, consider bringing out small batches of ice cream periodically rather than having it all available at once!
12. Campout Adventure Donut S’mores Board
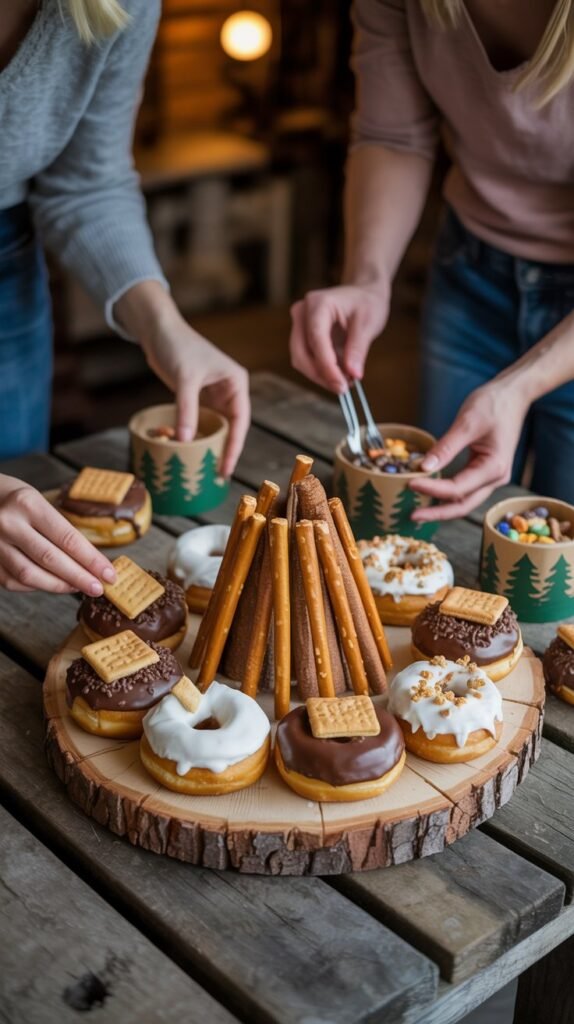
Bring the great outdoors inside with this playful camping-themed display that combines classic donut treats with beloved s’mores flavors! This wilderness-inspired arrangement creates a cozy campout experience complete with all the traditional fireside favorites.
Tools and Supplies Needed:
- Wooden or rustic serving board
- Flameless LED tea lights for “campfire”
- Small twigs or cinnamon sticks (for decoration)
- Tent-shaped food picks or decorations
- Pine tree or forest decorative elements
- Campfire-safe mugs or containers
- Roasting stick props
- Woodland animal figurines (clean/food-safe)
- Green napkins or fabric (for grass effect)
- Pine-scented oil diffuser (optional, nearby not on food)
Campout Donut S’mores Recipe:
Camping-Themed Donuts (12-15 donuts):
- Chocolate frosted (for chocolate s’mores element)
- Graham cracker sprinkled varieties
- Marshmallow-topped donuts
- Chocolate and marshmallow filled
- Maple or brown sugar glazed (for woody flavor)
- Plain donut holes (for “roasting”)
- Cinnamon sugar (campfire smell)
Wilderness Accompaniments:
- Graham cracker pieces
- Chocolate squares or chips
- Marshmallows (mini and regular)
- Trail mix in small containers
- Hot chocolate packets
- Chocolate-dipped pretzel “sticks”
- Bear-shaped graham crackers
- “Fire” colored candies (red, orange, yellow)
Instructions:
- Create a central “campfire” using LED tea lights surrounded by cinnamon sticks or pretzel rods.
- Arrange chocolate and marshmallow donuts in a circle around the fire like campers.
- Set up small tent decorations and woodland figurines around the edges.
- Create trail mix stations in camping-appropriate containers.
- Provide roasting sticks (not for actual roasting, just for play) beside marshmallows.
- Use green fabric or napkins as “grass” under parts of the display.
- Add woodland themed picks and decorations throughout.
- Consider including a battery-operated lantern for enhanced atmosphere.
Pro tip: Include “Campfire Story Cards” with short, kid-friendly tales that can be read aloud while enjoying treats! Create simple cards with 2-3 minute stories about friendly forest creatures, camping adventures, or mild “not-too-spooky” tales. This interactive storytelling element enhances the camping experience while creating natural pauses in treat consumption, extending the enjoyment of your themed display while building memorable moments beyond just the food!
13. Donut Hole Kabob Bar
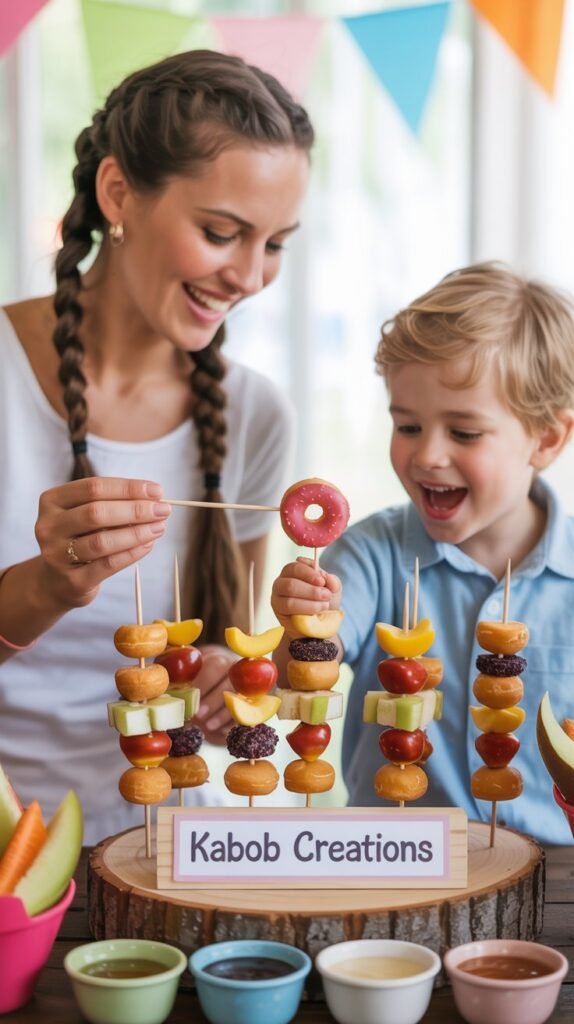
Elevate donut holes from simple popable treats to artistic food sculptures with this interactive skewering station! This engaging display encourages creativity while controlling portion sizes through the fun of design-your-own donut kabobs.
Tools and Supplies Needed:
- Vertical skewer stand or holders
- Food-safe wooden skewers
- Small sauce cups or containers
- Sectioned serving trays
- Donut hole tongs or picks
- Napkins or small plates
- Pattern suggestion cards
- Fruit cutting guides
- Decorative food picks
- Drip trays or mats
Donut Hole Kabob Recipe:
Donut Hole Varieties (48-60 holes):
- Glazed (classic)
- Chocolate frosted
- Powdered sugar
- Cinnamon sugar
- Sprinkle covered
- Jelly filled
- Specialty flavors (seasonal)
- Birthday cake or funfetti
Complementary Skewer Items:
- Fresh fruit pieces (strawberries, banana, pineapple)
- Marshmallows
- Brownie bites
- Cookie pieces
- Pound cake cubes
- Rice krispie treat squares
- Waffle pieces
- Pretzel balls
Dipping Sauces:
- Chocolate
- Vanilla glaze
- Strawberry
- Caramel
- Cream cheese frosting
- Nutella
- Fruit coulis
- White chocolate
Instructions:
- Set up vertical skewer holders in center of display for easy access.
- Arrange donut holes by type in sectioned containers around the holders.
- Place complementary skewer items in separate sections nearby.
- Create a sauce station with various dipping options in small containers.
- Provide pattern suggestion cards showing different design ideas.
- Include blank “design cards” where children can draw their planned pattern.
- Ensure skewers are accessible and age-appropriate.
- Consider providing small plates or napkins for completed kabobs.
Pro tip: Host a “Kabob Pattern Challenge” where you provide visual patterns for children to recreate with their donut hole skewers! Create simple pattern cards using colored circles (e.g., “chocolate, glazed, chocolate, strawberry, glazed”) that children can follow to create their kabobs. This adds a playful pattern-recognition educational element while ensuring a mix of items on each skewer. Award special recognition for most creative original designs to encourage artistic thinking!
Practical Donut Board Tips for Success
Before diving into your donut board creation, consider these practical tips that will help ensure your sweet display is as successful as it is spectacular! These real-world strategies address common challenges while maximizing both safety and visual impact:
Transportation and Display Strategies:
- Advance Assembly Priority: Prepare board base and non-perishable elements the night before
- Transport Security Focus: Use rimmed baking sheets or pizza boxes for moving completed boards
- Display Location Planning: Select stable, accessible surfaces away from direct sunlight or heat
- Protective Boundary Creation: Consider clear acrylic shields for public displays (science fair, school events)
- Temperature Management Consideration: Keep boards in air-conditioned spaces on hot days
Food Safety Essentials:
- Clean Hands Protocol: Provide hand sanitizer or wipes before self-serve interaction
- Serving Tool Integration: Include tongs, spatulas, or picks for hygienic serving
- Time Limitation Awareness: Display perishable items for no more than 2 hours at room temperature
- Individual Portion Consideration: Pre-plate some options for younger children to minimize touching
- Allergy Awareness Implementation: Clearly label or separate items containing common allergens
Budget-Friendly Implementation:
- Wholesale Purchase Strategy: Buy donuts in bulk from warehouse clubs or with bakery advance orders
- DIY Decoration Focus: Create themed elements yourself rather than purchasing specialty items
- Multi-Use Investment Planning: Select serving pieces that work for multiple themes and occasions
- Seasonal Sale Opportunity: Purchase themed decorations during after-holiday clearance sales
- Dollar Store Resource Utilization: Source many non-food decorative elements from discount stores
Remember that the joy of donut boards comes from their creative presentation and interactive elements – not necessarily from expensive specialty donuts or elaborate serving pieces. Even simple grocery store varieties can become magical through thoughtful arrangement and thematic additions! The most successful displays focus on the experience rather than perfection, creating memorable moments that children will talk about long after the last sprinkle has been eaten.
Conclusion: Sweet Celebrations Made Simple Yet Spectacular!
With these 15 creative donut board concepts, you’re fully equipped to transform ordinary store-bought donuts into extraordinary, memorable celebrations that will delight children and impress other parents! The versatility of donut boards makes them perfect for virtually any occasion, from birthdays and holidays to everyday moments worthy of a little extra sweetness.
For maximum impact with minimal stress, select themes that align with your available time and resources. Not every board needs to be an elaborate production – even simple number shapes or rainbow arrangements can create special moments with minimal effort. Start with more straightforward concepts for your first attempts, then gradually tackle more complex designs as your confidence grows.
Most importantly, involve children in the creation process when appropriate! Their joy in contributing to the magic creates even more meaningful memories than just viewing the finished product. Whether they help arrange donuts, sprinkle toppings, or simply assist with selecting the theme, this collaboration makes the experience truly special for everyone involved.