Summer days call for delicious ice cream, especially when you’re planning a picnic! Here are 20 easy recipes that will keep you cool and satisfied. From classic flavors to unique twists, these recipes require simple ingredients and don’t demand a lot of time.
Plus, we’ll share some essential tools and supplies to make your ice cream-making experience a breeze. Let’s whip up some frozen treats that are perfect for sharing in the sunshine!
Lemon Blueberry Ice Cream

Lemon Blueberry Ice Cream is the perfect blend of tart and sweet, making it a refreshing treat for those warm summer days. The zesty lemon flavor stands out beautifully, complemented by bursts of juicy blueberries. It’s simple to whip up and requires minimal ingredients, making it great for both experienced home cooks and those new to the kitchen.
This recipe is not only delicious but also a great way to enjoy fresh summer fruits. Whether you’re hosting a picnic or just want to cool down, this ice cream will surely impress. Let’s gather our supplies and get started!
Ingredients
- 2 cups heavy cream
- 1 cup whole milk
- 3/4 cup granulated sugar
- 1/4 cup freshly squeezed lemon juice
- 1 tablespoon lemon zest
- 1 teaspoon vanilla extract
- 1 cup fresh blueberries
Tools and Supplies Needed
Instructions
- In a mixing bowl, whisk together the heavy cream, whole milk, sugar, lemon juice, lemon zest, and vanilla extract until the sugar is fully dissolved.
- Chill the mixture in the refrigerator for at least 1 hour to enhance the flavors.
- Pour the chilled mixture into your ice cream maker and churn according to the manufacturer’s instructions until it reaches a soft-serve consistency.
- Gently fold in the fresh blueberries.
- Transfer the ice cream to a freezer-safe container and freeze for at least 4 hours or until firm.
- Serve in bowls or cones, and enjoy your homemade Lemon Blueberry Ice Cream!
Coconut Lime Ice Cream

Coconut Lime Ice Cream is the perfect treat for those hot summer days. This recipe brings together the creamy richness of coconut with the refreshing zing of lime, creating a delightful balance of flavors. Plus, it’s super simple to whip up!
With just a few ingredients and a little bit of time, you’ll have a delicious homemade ice cream that’s sure to impress at any picnic. The tropical notes will transport you to a beach getaway with every bite!
Tools and Supplies Needed
- Mixing bowl
- Whisk
- Ice cream maker (or a freezer-safe container)
- Measuring cups and spoons
Ingredients
- 2 cups coconut milk
- 1 cup heavy cream
- 3/4 cup granulated sugar
- 1/2 cup fresh lime juice (about 4-5 limes)
- Zest of 2 limes
- 1 teaspoon vanilla extract
Instructions
- Combine Ingredients: In a mixing bowl, whisk together coconut milk, heavy cream, sugar, lime juice, lime zest, and vanilla extract until the sugar is dissolved.
- Chill Mixture: Cover the bowl and refrigerate the mixture for at least 2 hours or overnight to allow the flavors to meld.
- Churn: Pour the chilled mixture into an ice cream maker and churn according to the manufacturer’s instructions until it reaches a soft-serve consistency.
- Freeze: Transfer the ice cream to a freezer-safe container and freeze for at least 4 hours or until firm.
- Serve: Scoop out the ice cream and enjoy, garnished with lime slices if desired.
Mint Chocolate Chip Ice Cream

Mint Chocolate Chip Ice Cream is a refreshing summer treat that combines the coolness of mint with rich chocolate chips. The bright green color signals a fun and vibrant dessert, perfect for picnics or backyard gatherings. Plus, it’s super easy to make at home!
This ice cream is creamy, sweet, and just the right amount of minty. If you love mint and chocolate together, this recipe is a must-try. Grab your ice cream maker and let’s get started!
Tools and Supplies Needed
- Ice cream maker
- Mixing bowls
- Whisk
- Measuring cups and spoons
- Spatula
Ingredients
- 2 cups heavy cream
- 1 cup whole milk
- 3/4 cup granulated sugar
- 1 teaspoon pure peppermint extract
- 1/2 teaspoon green food coloring (optional)
- 1 cup mini chocolate chips
- Pinch of salt
Instructions
- Mix the Base: In a large mixing bowl, whisk together the heavy cream, whole milk, sugar, peppermint extract, and salt until the sugar is fully dissolved.
- Add Color: If using, stir in the green food coloring until the desired color is achieved.
- Chill: Cover the mixture and refrigerate for at least 2 hours or until thoroughly chilled.
- Churn: Pour the chilled mixture into your ice cream maker and churn according to the manufacturer’s instructions, usually about 20-25 minutes.
- Add Chocolate Chips: In the last few minutes of churning, add the mini chocolate chips so they get evenly distributed.
- Freeze: Transfer the ice cream to an airtight container and freeze for at least 4 hours to firm up before serving.
Strawberry Basil Sorbet
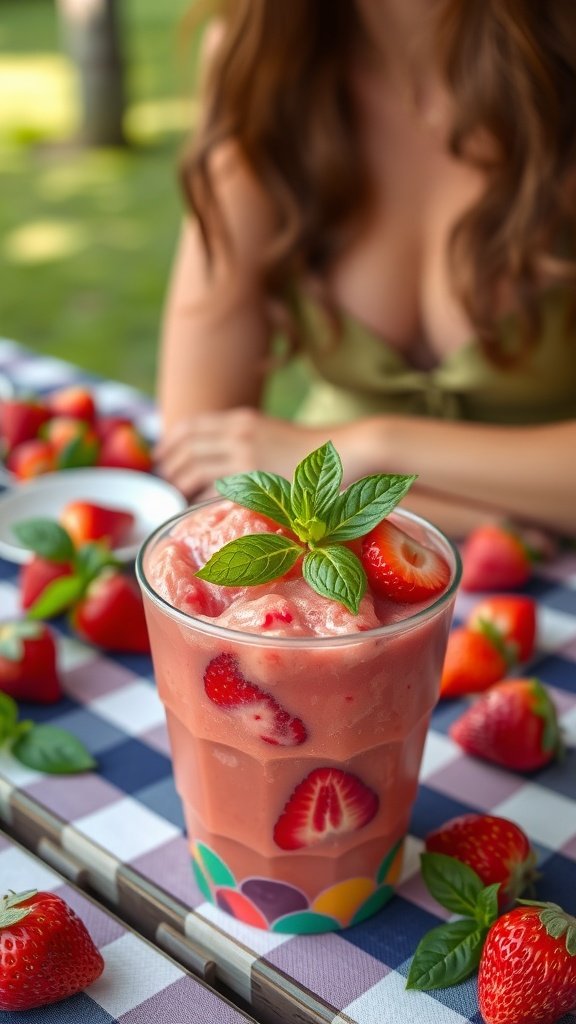
Strawberry Basil Sorbet is a refreshing treat that perfectly captures the essence of summer. The sweetness of ripe strawberries pairs beautifully with the aromatic notes of fresh basil, creating a delightful balance of flavors. This sorbet is not only easy to make, but it also requires only a few simple ingredients, making it a perfect addition to any picnic.
The bright, fruity taste of strawberries combined with the herbal touch of basil offers a unique twist that’s sure to impress your friends and family. With minimal effort, you can whip up this sorbet and enjoy a cool, homemade dessert on a warm day!
Tools and Supplies Needed
- Blender or food processor
- Mixing bowl
- Ice cream maker (optional)
- Spoon or spatula
- Freezer-safe container
Ingredients
- 4 cups fresh strawberries, hulled and sliced
- 1/2 cup granulated sugar
- 1/4 cup fresh basil leaves, chopped
- 1 tablespoon lemon juice
- 1 cup water
Instructions
- Blend the Strawberries: In a blender or food processor, combine the sliced strawberries, sugar, chopped basil, lemon juice, and water. Blend until smooth.
- Chill the Mixture: Transfer the mixture to a bowl and refrigerate for about 1 hour to cool.
- Churn the Sorbet: If using an ice cream maker, pour the chilled mixture into it and churn according to the manufacturer’s instructions until it reaches a soft-serve consistency. If you don’t have an ice cream maker, pour the mixture into a freezer-safe container.
- Freeze: If using a container, freeze the sorbet for about 3-4 hours, stirring every 30 minutes to break up ice crystals until it reaches your desired consistency.
- Serve: Once ready, scoop the sorbet into bowls, garnish with additional basil leaves, and enjoy!
Chocolate Peanut Butter Swirl

Chocolate Peanut Butter Swirl ice cream is a delightful treat that brings together the rich flavors of chocolate and creamy peanut butter in every bite. This recipe is not only simple to make, but it also allows you to customize the sweetness to your liking. The combination of smooth chocolate ice cream swirled with luscious peanut butter creates a taste sensation that’s perfect for summer picnics.
This recipe is great for both kids and adults alike. The best part? You can whip it up with just a few ingredients and a little bit of time. So grab your favorite ice cream maker and get ready to enjoy this sweet, nutty delight!
Tools and Supplies Needed
- Ice cream maker
- Mixing bowl
- Measuring cups and spoons
- Spatula
- Freezer-safe container
Ingredients
- 2 cups heavy cream
- 1 cup whole milk
- 3/4 cup granulated sugar
- 1 teaspoon vanilla extract
- 1/2 cup unsweetened cocoa powder
- 1/2 cup creamy peanut butter
- 1/4 cup chocolate syrup (optional)
Instructions
- In a mixing bowl, whisk together the heavy cream, whole milk, granulated sugar, and vanilla extract until the sugar is fully dissolved.
- Divide the mixture into two bowls. In one bowl, add the cocoa powder and mix until well combined to make the chocolate base.
- In the second bowl, add the peanut butter and stir until smooth.
- Chill both mixtures in the refrigerator for about 30 minutes.
- Pour the chocolate mixture into the ice cream maker and churn according to the manufacturer’s instructions.
- Once the chocolate ice cream is ready, transfer it to a freezer-safe container and layer it with spoonfuls of the peanut butter mixture, creating swirls. Drizzle chocolate syrup if desired.
- Cover and freeze for at least 4 hours or until firm.
- Serve and enjoy your homemade chocolate peanut butter swirl ice cream!
Raspberry Lemonade Sorbet

Raspberry Lemonade Sorbet is a refreshing treat that’s perfect for summer picnics. Its bright, tart flavor combines the sweetness of ripe raspberries with the zesty kick of lemonade, making it a delightful palate cleanser on hot days. Plus, this sorbet is incredibly easy to whip up, requiring just a few ingredients and minimal effort.
Perfect for impressing your friends and family, this sorbet is not only visually stunning but also packed with fruity flavor. You can make it ahead of time and keep it in the freezer until you’re ready to serve, making it an ideal dessert for any outdoor gathering!
Ingredients
- 2 cups fresh raspberries
- 1 cup granulated sugar
- 1 cup water
- 1/2 cup fresh lemon juice (about 3 lemons)
- 1 tablespoon lemon zest
- 1/4 cup fresh mint leaves (optional, for garnish)
Instructions
- Prepare the Simple Syrup: In a small saucepan, combine the sugar and water. Heat over medium heat, stirring until the sugar dissolves completely. Allow the syrup to cool.
- Blend the Raspberries: In a blender, combine the fresh raspberries, lemon juice, lemon zest, and cooled simple syrup. Blend until smooth.
- Strain the Mixture: Pour the blended mixture through a fine mesh strainer into a bowl to remove the seeds. Press with a spatula to extract as much liquid as possible.
- Freeze: Pour the strained mixture into a shallow dish and place it in the freezer. Every 30 minutes, stir the sorbet with a fork to break up any ice crystals. Repeat until the sorbet is firm, about 2-3 hours.
- Serve: Scoop the sorbet into bowls or glasses. Garnish with fresh mint leaves if desired. Enjoy this refreshing summer treat!
Peach Melba Ice Cream

Peach Melba Ice Cream combines fresh peaches, sweet raspberries, and creamy vanilla ice cream for a delightful summer treat. The flavors blend perfectly, giving you a refreshing dessert that’s both fruity and indulgent. Plus, it’s simple to whip up, making it a great choice for any picnic.
This recipe is not only easy to follow but also allows you to customize it based on your taste preferences. The natural sweetness of the peaches and the tangy raspberries come together in a way that’s sure to impress your friends and family.
Tools and Supplies Needed
- Ice cream maker
- Blender or food processor
- Mixing bowls
- Measuring cups and spoons
- Spatula
- Freezer-safe container
Ingredients
- 4 ripe peaches, peeled and diced
- 1 cup fresh raspberries
- 1 cup granulated sugar
- 2 cups heavy cream
- 1 cup whole milk
- 1 tablespoon vanilla extract
- 1 tablespoon lemon juice
Instructions
- Prepare the Peach Mixture: In a bowl, combine diced peaches, 1/2 cup of sugar, and lemon juice. Let it sit for about 10 minutes until the peaches release their juices.
- Blend the Base: In a separate bowl, whisk together the heavy cream, whole milk, remaining sugar, and vanilla extract until well combined.
- Combine: Fold the peach mixture into the cream mixture gently. Pour the entire mixture into your ice cream maker and churn according to the manufacturer’s instructions.
- Mix in Raspberries: Once the ice cream has thickened, fold in the fresh raspberries carefully to avoid breaking them up too much.
- Freeze: Transfer the ice cream to a freezer-safe container and freeze for at least 4 hours or until firm.
- Serve: Scoop the Peach Melba Ice Cream into bowls and enjoy on a sunny day!
Vanilla Bean Ice Cream Sandwiches

These Vanilla Bean Ice Cream Sandwiches are the perfect treat for a warm summer day. With creamy vanilla bean ice cream nestled between two soft cookies, they offer a wonderful balance of flavor and texture. Not only are they delicious, but they are also simple to make, making them a go-to dessert for picnics and gatherings.
The rich vanilla flavor and the subtle sweetness of the cookies create a delightful experience in every bite. Plus, you can customize the cookies to your liking, whether you prefer chocolate chip, oatmeal, or classic sugar cookies. Get ready to impress your friends and family with these easy-to-make ice cream sandwiches!
Tools and Supplies Needed
- Mixing bowls
- Whisk
- Baking sheet
- Parchment paper
- Spoons or ice cream scoop
- Plastic wrap or wax paper (for storing sandwiches)
Ingredients
- 1 cup unsalted butter, softened
- 1 cup granulated sugar
- 1 cup brown sugar, packed
- 2 large eggs
- 1 teaspoon vanilla extract
- 2 1/2 cups all-purpose flour
- 1 teaspoon baking soda
- 1/2 teaspoon salt
- 1 pint vanilla bean ice cream
Instructions
- Preheat the oven to 350°F (175°C). Line a baking sheet with parchment paper.
- In a large mixing bowl, cream together the softened butter, granulated sugar, and brown sugar until light and fluffy. Beat in the eggs one at a time, then stir in the vanilla extract.
- In another bowl, whisk together the all-purpose flour, baking soda, and salt. Gradually add the dry ingredients to the wet mixture, mixing until just combined.
- Drop spoonfuls of cookie dough onto the prepared baking sheet, spacing them about 2 inches apart. Bake for 10-12 minutes or until the edges are lightly golden.
- Remove from the oven and let the cookies cool on the baking sheet for a few minutes before transferring them to a wire rack to cool completely.
- Once the cookies are cool, scoop a generous amount of vanilla bean ice cream onto the flat side of one cookie, then top with another cookie. Press gently to create a sandwich. Wrap each sandwich in plastic wrap or wax paper and freeze until firm.
Chocolate Chip Cookie Dough Ice Cream

Chocolate Chip Cookie Dough Ice Cream is a delightful treat that combines the classic flavors of cookie dough with creamy, sweet ice cream. The taste is a perfect balance of rich chocolate chips and the buttery sweetness of the cookie dough, making it a favorite for both kids and adults. Plus, it’s surprisingly easy to make at home!
This recipe is straightforward, requiring minimal ingredients and kitchen tools. You can whip up a batch in no time, making it an ideal option for summer picnics or casual gatherings. Everyone will love the indulgent combination, and you might find it hard to resist sneaking a few spoonfuls before serving!
Tools and Supplies Needed
- Mixing bowl
- Whisk
- Ice cream maker or a freezer-safe container
- Measuring cups and spoons
- Spatula
Ingredients
- 2 cups heavy cream
- 1 cup whole milk
- 3/4 cup granulated sugar
- 1 teaspoon vanilla extract
- 1/2 cup mini chocolate chips
- 1/2 cup cookie dough (store-bought or homemade)
Instructions
- Prepare the Ice Cream Base: In a mixing bowl, whisk together the heavy cream, whole milk, sugar, and vanilla extract until the sugar is fully dissolved.
- Chill the Mixture: Place the mixture in the refrigerator for about 30 minutes to chill.
- Churn the Ice Cream: Pour the chilled mixture into an ice cream maker and churn according to the manufacturer’s instructions until it reaches a soft serve consistency.
- Add Chocolate Chips and Cookie Dough: Gently fold in the mini chocolate chips and pieces of cookie dough with a spatula, ensuring they are evenly distributed throughout the ice cream.
- Freeze: Transfer the mixture to a freezer-safe container and freeze for at least 4 hours, or until firm. Serve and enjoy!
Coffee Almond Fudge Ice Cream

Looking for a delightful treat to beat the summer heat? Coffee Almond Fudge Ice Cream is the perfect blend of rich coffee flavor, crunchy almonds, and a swirl of fudge. It’s an easy recipe that will impress your friends and family at any picnic!
This ice cream is creamy and flavorful, making it a fantastic choice for coffee lovers. You’ll love the way the chocolate fudge complements the almond crunch, creating a satisfying dessert that’s both refreshing and indulgent. Plus, it’s surprisingly simple to make, so you can whip it up without a fuss!
Ingredients
- 2 cups heavy cream
- 1 cup whole milk
- 3/4 cup granulated sugar
- 1 tablespoon instant coffee granules
- 1 teaspoon vanilla extract
- 1/2 cup chopped almonds
- 1/2 cup fudge sauce
Instructions
- In a mixing bowl, combine heavy cream, whole milk, granulated sugar, instant coffee granules, and vanilla extract. Whisk until the sugar and coffee are fully dissolved.
- Pour the mixture into an ice cream maker and churn according to the manufacturer’s instructions until it reaches a soft-serve consistency.
- During the last few minutes of churning, add in the chopped almonds and fudge sauce, allowing them to swirl throughout.
- Transfer the ice cream to an airtight container and freeze for at least 4 hours or until firm.
- Scoop and enjoy your homemade Coffee Almond Fudge Ice Cream!
Tools and Supplies Needed: Ice cream maker, mixing bowls, whisk, airtight container for freezing.
Tropical Fruit Sorbet
Tropical fruit sorbet is a refreshing treat that captures the essence of summer in every scoop. Bursting with flavors from fruits like mango, pineapple, and coconut, this sorbet is both light and satisfying. It’s incredibly easy to make at home, making it a perfect addition to any picnic spread.
This recipe is not only a hit with kids but also with adults who appreciate a healthy, fruity dessert. With just a few simple ingredients and minimal effort, you can whip up a batch that will impress your friends and family!
Ingredients
- 2 cups ripe mango, peeled and diced
- 1 cup pineapple, peeled and diced
- 1 cup coconut water
- 1/4 cup lime juice
- 1/4 cup honey or agave syrup (adjust for sweetness)
Instructions
- Blend the Ingredients: In a blender, combine the mango, pineapple, coconut water, lime juice, and honey. Blend until smooth.
- Taste and Adjust: Taste the mixture and add more honey if you prefer it sweeter, then blend again.
- Freeze the Mixture: Pour the blended mixture into a shallow baking dish and spread it evenly. Place it in the freezer for about 2-3 hours or until solid.
- Scoop and Serve: Once frozen, use a fork to scrape the mixture into fluffy sorbet. Serve immediately for a delightful treat!
Caramel Swirl Ice Cream with Sea Salt

Caramel Swirl Ice Cream with Sea Salt is a summer treat that combines creamy sweetness with a touch of salty goodness. This recipe is easy to whip up, making it perfect for hot days when you want to impress your friends and family at a picnic.
With rich caramel blended throughout the smooth ice cream, every bite offers a delightful contrast that’s hard to resist. Plus, the sprinkle of sea salt enhances the flavors, creating a truly indulgent experience!
Ingredients
- 2 cups heavy cream
- 1 cup whole milk
- 3/4 cup granulated sugar
- 1 teaspoon vanilla extract
- 1/2 cup caramel sauce
- 1 teaspoon sea salt (plus more for topping)
Tools and Supplies Needed
- Mixing bowl
- Whisk or electric mixer
- Ice cream maker
- Storage container
Instructions
- In a mixing bowl, combine heavy cream, whole milk, sugar, and vanilla extract. Whisk until the sugar is fully dissolved.
- Pour the mixture into your ice cream maker and churn according to the manufacturer’s instructions until it reaches a soft-serve consistency.
- Drizzle in the caramel sauce while the machine is still running, allowing it to swirl through the ice cream.
- Transfer the ice cream to a storage container, and sprinkle a pinch of sea salt on top.
- Freeze for at least 4 hours, or until firm, before serving.
S’mores Ice Cream
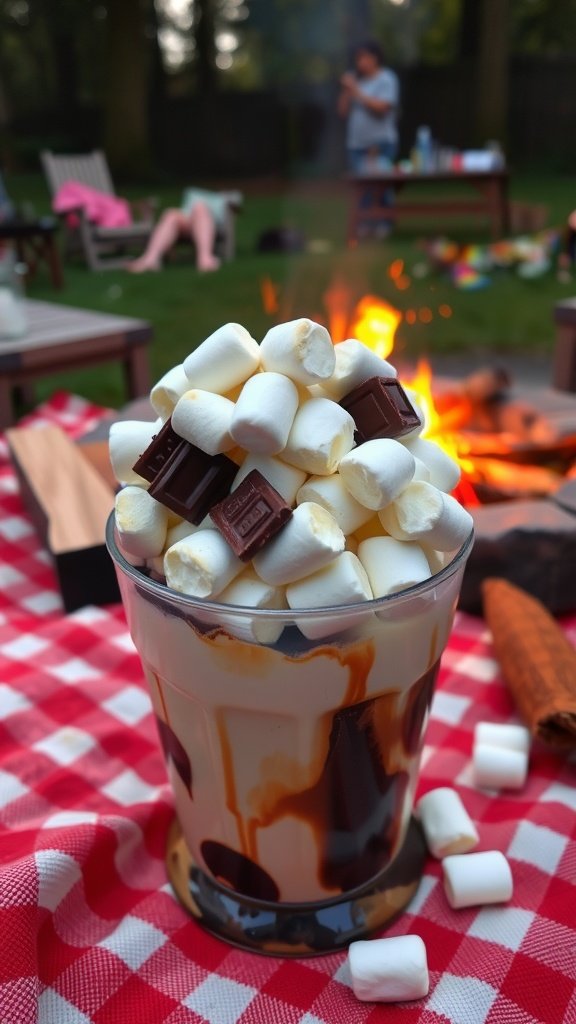
S’mores ice cream combines the classic campfire treat into a delightful frozen dessert. It’s creamy, smooth, and packed with the flavors of toasted marshmallows, rich chocolate, and crunchy graham crackers. This recipe is simple and fun to make, perfect for cooling off on a hot summer day.
With just a few ingredients, you can create this dreamy treat that will impress your friends at any picnic. It’s a great way to bring a nostalgic vibe to your outdoor gathering. Let’s get started!
Tools and Supplies Needed
- Ice cream maker
- Mixing bowl
- Whisk
- Spatula
- Freezer-safe container
Ingredients
- 2 cups heavy cream
- 1 cup whole milk
- 3/4 cup granulated sugar
- 1 teaspoon vanilla extract
- 1 cup mini marshmallows
- 1/2 cup chocolate chips
- 1/2 cup crushed graham crackers
- 1/4 cup chocolate syrup (optional, for drizzling)
Instructions
- Mix the Base: In a mixing bowl, combine the heavy cream, whole milk, sugar, and vanilla extract. Whisk until the sugar is dissolved.
- Chill: Cover the mixture and let it chill in the refrigerator for at least 2 hours.
- Churn: Pour the chilled mixture into the ice cream maker and churn according to the manufacturer’s instructions, usually about 20-30 minutes.
- Add Mix-Ins: In the last few minutes of churning, add the mini marshmallows, chocolate chips, and crushed graham crackers to the ice cream.
- Freeze: Transfer the ice cream to a freezer-safe container. If desired, drizzle chocolate syrup on top before sealing. Freeze for at least 4 hours or until firm.
- Serve: Scoop into bowls or cones, and enjoy your homemade s’mores ice cream!
Banana Split Ice Cream

Banana split ice cream is a delightful twist on the classic treat, combining rich flavors and colorful toppings that make it a hit during warm weather. It features creamy vanilla ice cream, fresh bananas, and a drizzle of chocolate or strawberry syrup. This recipe is simple to make, perfect for a picnic, and will satisfy your sweet tooth!
Creating your own banana split ice cream at home allows for customization with your favorite toppings. Whether you prefer crushed nuts, whipped cream, or maraschino cherries, this dish can be tailored to suit any taste. Grab your friends and family and enjoy this frozen delight in no time!
Ingredients
- 4 cups vanilla ice cream
- 2 ripe bananas, sliced
- 1/4 cup chocolate syrup
- 1/4 cup strawberry syrup
- 1/2 cup whipped cream
- 1/4 cup crushed nuts (peanuts or walnuts)
- 4 maraschino cherries
Instructions
- Scoop the vanilla ice cream into serving bowls or a large dish.
- Layer the sliced bananas over the ice cream.
- Drizzle the chocolate and strawberry syrups on top.
- Top with whipped cream, crushed nuts, and a maraschino cherry.
- Serve immediately and enjoy your refreshing banana split ice cream!
Matcha Green Tea Ice Cream

Matcha green tea ice cream is a refreshing treat that brings a unique twist to your summer picnics. Its creamy texture combined with the earthy flavor of matcha creates a delightful experience that’s perfect for cooling off on a warm day. Simple to make, this ice cream is an excellent choice for any dessert lover.
You don’t need fancy equipment or techniques to whip up this delicious dessert. With just a few ingredients, you’ll have a rich and creamy ice cream that will impress your friends and family. Enjoy the harmonious balance of sweetness and the subtle bitterness of matcha, making it a perfect palate cleanser after a hearty picnic meal.
Ingredients
- 2 cups heavy cream
- 1 cup whole milk
- 3/4 cup granulated sugar
- 1/4 cup matcha green tea powder
- 1 teaspoon vanilla extract
- A pinch of salt
Instructions
- Mix Ingredients: In a large bowl, whisk together the heavy cream, whole milk, granulated sugar, matcha powder, vanilla extract, and salt until well combined and smooth.
- Chill Mixture: Cover the bowl and place it in the refrigerator for at least 2 hours to chill thoroughly.
- Churn Ice Cream: Pour the chilled mixture into an ice cream maker and churn according to the manufacturer’s instructions until it reaches a soft-serve consistency.
- Freeze: Transfer the ice cream to an airtight container and freeze for at least 4 hours or until firm.
- Serve: Scoop into bowls and enjoy your homemade matcha green tea ice cream!
Tools and Supplies Needed: Ice cream maker, whisk, mixing bowl, airtight container, spatula.
Honey Lavender Ice Cream

Honey lavender ice cream is a delightful treat that captures the essence of summer in every scoop. The floral notes of lavender beautifully complement the sweetness of honey, creating a creamy, aromatic dessert that’s both refreshing and unique. It’s surprisingly simple to whip up, making it a perfect choice for picnics or backyard gatherings.
This recipe requires minimal ingredients and can be made without an ice cream maker if you’re feeling adventurous. Just imagine enjoying this sweet, fragrant ice cream on a warm day, surrounded by good company!
Ingredients
- 2 cups heavy cream
- 1 cup whole milk
- 3/4 cup honey
- 1 tablespoon dried culinary lavender
- 1 teaspoon vanilla extract
- 1/4 teaspoon salt
Instructions
- Heat Ingredients: In a saucepan over medium heat, combine the heavy cream, whole milk, and honey. Stir until the honey is fully incorporated and the mixture is warm, not boiling.
- Add Lavender: Remove from heat and stir in the dried lavender. Cover and let steep for about 15-20 minutes to infuse the flavor.
- Strain the Mixture: After steeping, strain the mixture through a fine mesh sieve to remove the lavender buds. Stir in vanilla extract and salt.
- Chill: Refrigerate the mixture for at least 2 hours, or until completely chilled.
- Churn: If using an ice cream maker, churn the mixture according to the manufacturer’s instructions. If not, pour it into a shallow dish and freeze for about 1-2 hours. Stir every 30 minutes until it reaches a creamy consistency.
- Serve: Once the ice cream is ready, scoop into bowls and enjoy! You can garnish with a few lavender sprigs for a lovely touch.
Cinnamon Roll Ice Cream

Cinnamon Roll Ice Cream is a delightful treat that combines the warm, comforting flavors of cinnamon rolls with the coolness of ice cream. This creamy dessert is sweet and slightly spiced, making it a perfect addition to any summer picnic. Plus, it’s simple to whip up, requiring no special equipment—just a few everyday ingredients!
This ice cream is sure to impress your friends and family. It has swirls of cinnamon sugar and a rich creaminess that will remind you of fresh cinnamon rolls right out of the oven. Perfect for those hot days, it’s an easy recipe that will keep everyone coming back for more!
Berry Cheesecake Ice Cream

Berry Cheesecake Ice Cream is a delightful summer treat that combines the creamy richness of cheesecake with the vibrant flavors of fresh berries. This ice cream is not just refreshing but also incredibly satisfying, making it perfect for a picnic. The combination of tangy cream cheese and sweet berries creates a burst of flavor in every scoop.
Making this ice cream at home is surprisingly easy! You don’t need an ice cream maker; just a few simple ingredients and some mixing will do the trick. It’s a fun recipe you can whip up quickly and enjoy with family and friends under the sun.
Ingredients
- 2 cups heavy cream
- 1 cup cream cheese, softened
- 1 cup powdered sugar
- 1 teaspoon vanilla extract
- 1 cup mixed berries (strawberries, blueberries, raspberries)
- 1/2 cup graham cracker crumbs
Instructions
- In a large bowl, beat the softened cream cheese until smooth. Gradually add the powdered sugar and vanilla extract, mixing until creamy.
- In another bowl, whip the heavy cream until soft peaks form. Gently fold the whipped cream into the cream cheese mixture until well combined.
- In a separate bowl, mash the mixed berries slightly to release their juices. Fold the berries into the ice cream mixture.
- Pour half of the ice cream mixture into a freezer-safe container, sprinkle with half of the graham cracker crumbs, and layer the remaining ice cream on top. Finish with the rest of the graham cracker crumbs.
- Cover and freeze for at least 4 hours or until firm. Scoop and serve on a hot day!
Tools and Supplies Needed:Mixing bowls, hand mixer or whisk, measuring cups, spatula, freezer-safe container.
Nutella Strawberry Ice Cream

Nutella Strawberry Ice Cream is the perfect summer treat that combines the rich, creamy flavor of Nutella with the fresh sweetness of strawberries. This delightful recipe is simple to make, requiring no special skills or equipment. Your taste buds will thank you for this deliciously indulgent dessert that’s ideal for picnics or lazy afternoons at home.
The combination of chocolate hazelnut and strawberries creates a flavor explosion that is both satisfying and refreshing. As you scoop into this creamy delight, you’ll enjoy the smooth texture and vibrant taste of fresh strawberries mixed with the beloved chocolate spread. Plus, it’s a fantastic way to use those ripe, juicy strawberries from the market!
Ingredients
- 2 cups heavy cream
- 1 cup whole milk
- 3/4 cup granulated sugar
- 1/2 cup Nutella
- 1 cup fresh strawberries, hulled and sliced
- 1 teaspoon vanilla extract
Instructions
- In a mixing bowl, whisk together the heavy cream, whole milk, and granulated sugar until the sugar is dissolved.
- Add in the Nutella and vanilla extract, mixing until well combined and smooth.
- Gently fold in the sliced strawberries, ensuring they are evenly distributed.
- Pour the mixture into an ice cream maker and churn according to the manufacturer’s instructions until it reaches a soft-serve consistency.
- Transfer the ice cream to a lidded container and freeze for at least 4 hours or until firm.
Enjoy your homemade Nutella Strawberry Ice Cream on its own or topped with extra strawberries and a drizzle of chocolate sauce for a delightful treat!
Cherry Vanilla Ice Cream

Cherry vanilla ice cream is a delightful treat that perfectly combines sweet and creamy flavors. The rich vanilla base is complemented by bursts of juicy cherry, creating a refreshing dessert ideal for summer picnics. Plus, it’s simple to make at home with just a few ingredients!
This recipe is not only delicious but also fun to prepare. You can customize the amount of cherry swirl to your liking, making it as fruity or as subtle as you prefer. Get your ice cream maker ready for a cool, sweet indulgence!
Tools and Supplies Needed
- Ice cream maker
- Mixing bowl
- Whisk
- Saucepan
- Measuring cups and spoons
Ingredients
- 2 cups heavy cream
- 1 cup whole milk
- 3/4 cup granulated sugar
- 1 tablespoon pure vanilla extract
- 1 cup fresh or frozen cherries, pitted and halved
- 1/4 cup cherry syrup or puree
Instructions
- Combine Ingredients: In a mixing bowl, whisk together the heavy cream, whole milk, granulated sugar, and vanilla extract until the sugar is dissolved.
- Prepare the Cherries: If using fresh cherries, pit and halve them. For frozen cherries, thaw and drain any excess liquid.
- Chill the Mixture: Cover the mixture and refrigerate for at least 2 hours, or until completely chilled.
- Churn in Ice Cream Maker: Pour the chilled mixture into your ice cream maker and churn according to the manufacturer’s instructions until it reaches a soft-serve consistency.
- Add Cherries: Gently fold in the halved cherries and cherry syrup or puree. Transfer the ice cream into an airtight container.
- Freeze: Freeze for at least 4 hours or until firm before serving.