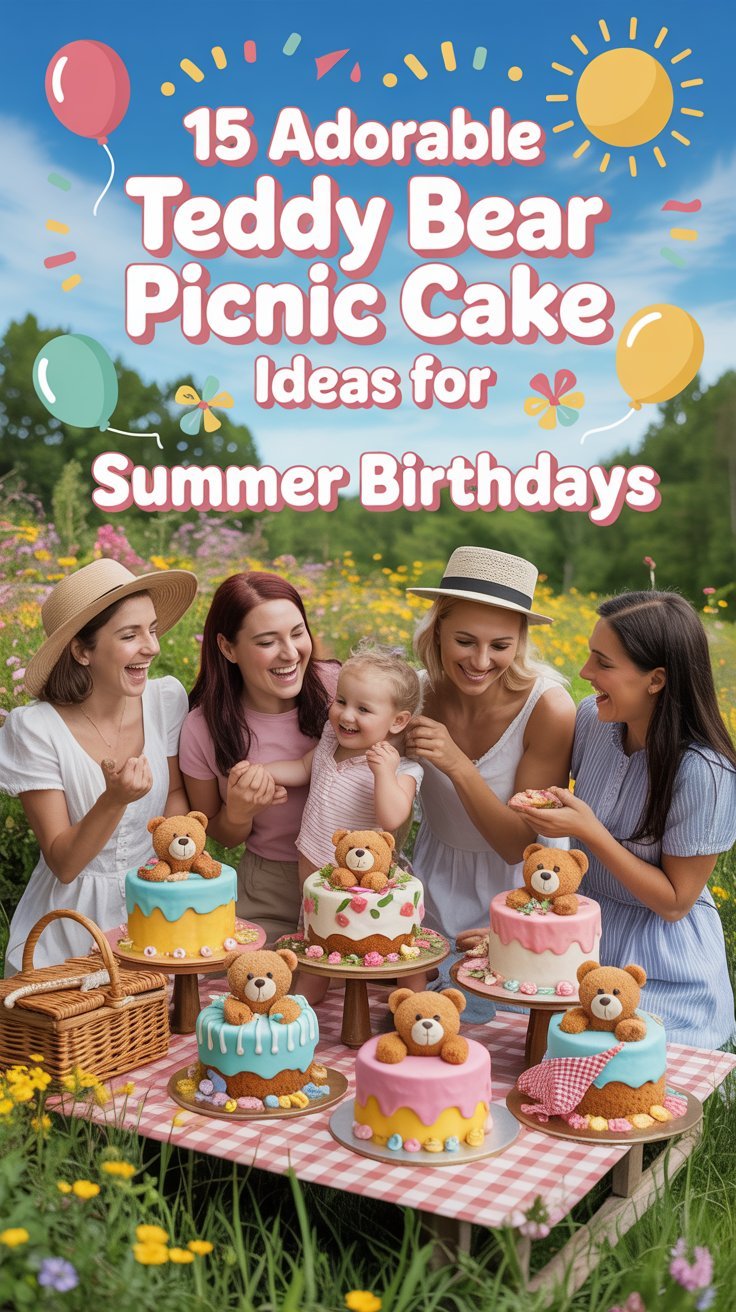
Summer birthdays call for fun and creativity, and what better way to celebrate than with adorable teddy bear picnic cakes? These delightful cake ideas bring a charming twist to your party, making every bite as sweet as the memories you’ll create. From fluffy bear designs to playful picnic settings, let’s jump right into 15 cake inspirations that are perfect for your sunny celebrations!
Tools and Supplies Needed:
- Cake pans (round and rectangular)
- Cake decorating tools (spatula, fondant smoother)
- Food coloring (for icing and decorations)
- Fondant or modeling chocolate (for teddy bear details)
- Icing tips and bags
- Edible glitter or sprinkles (for decoration)
- Serving platter
- Cooling rack
- Knife and cake server
- Candy decorations (for picnic items)
**Teddy In The Meadow Cake**

This delightful Teddy In The Meadow Cake is perfect for summer birthdays, bringing a fun and whimsical touch to any celebration. The combination of fluffy cake and rich buttercream creates a deliciously sweet treat that will impress both kids and adults alike. With its playful bear centerpiece and colorful flower decorations, it’s also a visual delight.
Making this cake is simple and enjoyable, especially if you involve the little ones in the decorating process. They’ll love adding flowers and getting creative with the frosting. Plus, it’s a fantastic way to celebrate those sunny days!
Tools and Supplies Needed
- 2 9-inch round cake pans
- Mixing bowl
- Electric mixer
- Offset spatula
- Buttercream piping bags and tips
- Cake board or serving platter
- Flowers and teddy bear decorations
Ingredients
- 2 cups all-purpose flour
- 1 ½ cups granulated sugar
- ½ cup unsalted butter, softened
- 1 cup whole milk
- 3 large eggs
- 2 ½ teaspoons baking powder
- 1 teaspoon vanilla extract
- Pinch of salt
- Green food coloring
- Various edible flowers for decoration
Instructions
- Preheat your oven to 350°F (175°C). Grease and flour the cake pans.
- In a mixing bowl, cream together the softened butter and sugar until light and fluffy. Add eggs one at a time, mixing well after each addition.
- Stir in vanilla extract, then add flour, baking powder, and salt. Mix well while gradually adding milk until the batter is smooth.
- Divide the batter evenly between the two prepared pans. Bake for 25-30 minutes or until a toothpick inserted in the center comes out clean.
- Allow the cakes to cool in the pans for 10 minutes, then transfer them to a wire rack to cool completely.
- Once cooled, frost the top of one cake layer with buttercream, place the second layer on top, and cover the entire cake with a green buttercream to create a grassy effect.
- Decorate with edible flowers and place the teddy bear in the center. Enjoy your charming creation!
**Honey Pot Surprise Cake**

The Honey Pot Surprise Cake is a charming dessert that perfectly embodies the sweetness of summer birthday celebrations. With a fluffy vanilla cake base and a delightful honey buttercream icing, this cake is not only visually appealing but also deliciously satisfying. The layers hide a sweet surprise in the middle, making each slice a fun revelation for your guests.
This recipe is simple to make, even for beginner bakers. The combination of honey and cake creates a light, sweet flavor that’s perfect for warm days, making it an ideal choice for a teddy bear picnic theme. So, let’s get started on creating this delightful treat!
Tools and Supplies Needed
- Round cake pans
- Mixing bowls
- Electric mixer
- Spatula
- Measuring cups and spoons
- Cake board or serving platter
- Piping bag and tips
Ingredients
- 2 cups all-purpose flour
- 1 ½ cups granulated sugar
- ½ cup unsalted butter, softened
- 1 cup milk
- 3 large eggs
- 1 tablespoon baking powder
- ½ teaspoon salt
- 1 cup honey
- 2 cups powdered sugar
- 1 tablespoon vanilla extract
Instructions
- Preheat the Oven: Preheat your oven to 350°F (175°C). Grease and flour two round cake pans.
- Mix the Batter: In a large bowl, cream together the softened butter and sugar until light and fluffy. Beat in the eggs one at a time, then stir in the vanilla.
- Add Dry Ingredients: In another bowl, combine the flour, baking powder, and salt. Gradually add to the creamed mixture alternately with milk, mixing until just combined.
- Add Honey: Gently fold in the honey until well incorporated.
- Bake the Cakes: Divide the batter between the prepared pans and bake for 25-30 minutes, or until a toothpick inserted in the center comes out clean. Allow to cool in pans for 10 minutes before transferring to wire racks to cool completely.
- Prepare the Frosting: In a mixing bowl, beat together the powdered sugar, honey, and a splash of milk until smooth and creamy.
- Assemble the Cake: Once the cakes are completely cooled, place one layer on a serving platter. Spread a layer of frosting on top, then add the second layer. Frost the top and sides of the cake.
- Decorate: Use any extra frosting to pipe decorations on the cake, and consider adding small edible bees or flowers for a festive touch.
**Bear Blanket Picnic Cake**
The Bear Blanket Picnic Cake is a delightful treat that captures the essence of summer fun and teddy bear companionship. This cake is fluffy and moist, layered with delicious flavors that combine sweet and fruity elements, making it a hit at any birthday celebration. Simple to make, it’s perfect for baking with kids or as a fun weekend project!
The cake can be decorated to resemble a picnic spread, complete with a festive checkered blanket made from fondant or icing. Adorn it with teddy bear figurines, colorful flowers, and even tiny treats for a playful vibe. It’s not just a feast for the eyes but also a yummy dessert that will delight guests of all ages.
Tools and Supplies Needed
- Round cake pans
- Mixing bowls
- Whisk
- Spatula
- Rolling pin
- Fondant or icing tools
- Cake turntable (optional)
Ingredients
- 2 cups all-purpose flour
- 1 1/2 cups granulated sugar
- 1/2 cup unsalted butter, softened
- 1 cup whole milk
- 3 large eggs
- 2 teaspoons baking powder
- 1 teaspoon vanilla extract
- Pinch of salt
- Colored fondant for decoration
- Teddy bear cake toppers
- Fresh fruit or edible flowers for garnish
Instructions
- Prepare the Batter: In a large mixing bowl, cream together the softened butter and sugar until light and fluffy. Add the eggs one at a time, mixing well after each addition. Stir in the vanilla extract.
- Combine Dry Ingredients: In another bowl, whisk together the flour, baking powder, and salt. Gradually add the dry ingredients to the wet mixture, alternating with the milk. Mix until just combined.
- Bake the Cake: Preheat your oven to 350°F (175°C). Pour the batter evenly into the prepared cake pans. Bake for 25-30 minutes or until a toothpick inserted in the center comes out clean. Let the cakes cool completely.
- Decorate: Once the cakes have cooled, level the tops if necessary. Stack the layers with frosting in between. Roll out colored fondant to create a picnic blanket pattern and cover the cake. Use fondant tools to add details, and place teddy bear toppers around the cake.
- Serve: Garnish with fresh fruit or edible flowers for a whimsical touch. Slice and enjoy this adorable Bear Blanket Picnic Cake!
**Cuddly Cub Layer Cake**
The Cuddly Cub Layer Cake is a delightful treat that combines fun with flavor. This charming cake features layers of moist vanilla or chocolate cake, beautifully frosted with a creamy buttercream. The playful bear decoration on top makes it perfect for a summer birthday picnic, offering a delicious balance of sweetness and a soft, melt-in-your-mouth texture.
Making this cake is surprisingly simple, even for novice bakers. With just a few steps and some patience, you can create a stunning centerpiece that will impress both kids and adults alike. Gather your friends and family for an enjoyable baking session, and soon you’ll have a charming cake that’s sure to become a favorite!
Tools and Supplies Needed
- 3 8-inch round cake pans
- Mixing bowls
- Electric mixer
- Spatula
- Measuring cups and spoons
- Cooling rack
- Piping bags and tips for decoration
- Cake stand or serving platter
Ingredients
- 2 ½ cups all-purpose flour
- 2 ½ teaspoons baking powder
- ½ teaspoon salt
- 1 cup unsalted butter, softened
- 2 cups granulated sugar
- 4 large eggs
- 1 tablespoon vanilla extract
- 1 cup milk
- 4 cups buttercream frosting (store-bought or homemade)
- Food coloring (for decoration)
- Marzipan or fondant for bear decoration
Instructions
- Preheat your oven to 350°F (175°C). Grease and flour the cake pans.
- In a mixing bowl, whisk together flour, baking powder, and salt. Set aside.
- In another bowl, cream the softened butter and sugar using an electric mixer until light and fluffy. Add eggs one at a time, mixing well after each addition. Stir in the vanilla extract.
- Gradually add the dry ingredients to the butter mixture, alternating with the milk. Mix until just combined.
- Divide the batter evenly among the prepared cake pans. Bake for 25-30 minutes or until a toothpick inserted into the center comes out clean.
- Allow the cakes to cool in the pans for 10 minutes before transferring them to a cooling rack to cool completely.
- Once cooled, level the tops of the cakes if necessary. Place one layer on a cake stand, spread frosting on top, and repeat with the second layer. Top with the third layer and frost the entire cake.
- Decorate with buttercream, food coloring, and your bear decoration using marzipan or fondant.
- Slice and enjoy your Cuddly Cub Layer Cake at your summer picnic!
**Forest Friends Cake**

The Forest Friends Cake is a delightful treat that brings the charm of the outdoors right to your table. This cake combines rich chocolate layers with a smooth frosting, creating a deliciously sweet experience. It’s perfect for summer birthdays, especially for those who adore nature and whimsical themes.
This recipe is straightforward, making it a fun project for bakers of all skill levels. With playful decorations like edible trees and a cute teddy bear, this cake is sure to be a hit at any picnic or birthday celebration!
Tools and Supplies Needed
- 2 round cake pans
- Mixing bowls
- Electric mixer
- Offset spatula
- Cake stand or serving plate
- Decorating tools (piping bags, small fondant tools)
Ingredients
- 2 cups all-purpose flour
- 2 cups granulated sugar
- 3/4 cup unsweetened cocoa powder
- 1 1/2 teaspoons baking powder
- 1 1/2 teaspoons baking soda
- 1 teaspoon salt
- 2 large eggs
- 1 cup whole milk
- 1/2 cup vegetable oil
- 2 teaspoons vanilla extract
- 1 cup boiling water
- 3 cups chocolate buttercream icing
- Edible decorations (mini trees, mushrooms, teddy bear, etc.)
Instructions
- Preheat the oven to 350°F (175°C) and grease the cake pans.
- In a large bowl, combine flour, sugar, cocoa powder, baking powder, baking soda, and salt. Mix well.
- Add eggs, milk, oil, and vanilla to the dry ingredients. Beat on medium speed for 2 minutes until smooth. Stir in the boiling water until well combined.
- Pour the batter evenly into the prepared pans. Bake for 30-35 minutes, or until a toothpick inserted in the center comes out clean.
- Let the cakes cool in the pans for 10 minutes, then remove and cool completely on a wire rack.
- Once cool, place one layer on a cake stand. Spread a layer of chocolate buttercream icing on top. Add the second cake layer and frost the top and sides of the cake.
- Decorate with edible trees, mushrooms, and a teddy bear on top to create a playful forest scene.
**Sunshine Bear Smash Cake**

Get ready for a delightful treat that will brighten up any summer birthday! The Sunshine Bear Smash Cake is a playful and charming dessert that combines a soft vanilla cake with a light and fluffy lemon buttercream. This cake not only looks adorable but also brings a refreshing zing to the party, making it a crowd favorite among kids and adults alike.
Making this cake is a breeze, even for those new to baking! The simple steps and fun decorations make it an enjoyable project to tackle over the weekend. Gather your ingredients and let your creativity shine as you create this sweet sunshine bear that’s perfect for smashing into at any summer celebration!
Tools and Supplies Needed
- Cake pans (6-inch round)
- Mixing bowls
- Electric mixer
- Spatula
- Piping bags
- Baking paper
- Offset spatula
- Measuring cups and spoons
- Cooling rack
Ingredients
- 1 ½ cups all-purpose flour
- 1 cup granulated sugar
- ½ cup unsalted butter, softened
- 2 large eggs
- 1 teaspoon vanilla extract
- ½ cup milk
- 1 ½ teaspoons baking powder
- ¼ teaspoon salt
- 2 cups powdered sugar
- 1 cup unsalted butter, softened (for frosting)
- 3 tablespoons lemon juice
- Yellow food coloring
- Black fondant (for eyes and nose)
- Orange fondant (for nose)
Instructions
- Preheat your oven to 350°F (175°C). Grease and line the cake pans with baking paper.
- In a large bowl, cream together the softened butter and granulated sugar until light and fluffy. Add the eggs one at a time, mixing well after each addition, then stir in the vanilla extract.
- In another bowl, combine the flour, baking powder, and salt. Gradually add this dry mixture to the wet mixture, alternating with the milk. Mix until just combined.
- Pour the batter evenly into the prepared pans and bake for 25-30 minutes or until a toothpick inserted in the center comes out clean. Allow the cakes to cool in the pans for 10 minutes before transferring them to a cooling rack.
- While the cakes cool, prepare the lemon buttercream. In a bowl, beat the softened butter until creamy. Gradually add the powdered sugar and lemon juice, mixing until smooth. Add yellow food coloring to achieve your desired shade.
- Once the cakes are completely cool, frost the top of one layer before stacking the other on top. Use the remaining lemon buttercream to cover the entire cake smoothly.
- To decorate, use fondant to create the bear’s face, adding the eyes and nose. Use a piping bag to add a decorative border at the base of the cake.
- Serve at room temperature and watch the joy unfold as everyone takes a slice of this adorable bear cake!
**Berry Patch Teddy Cake**

The Berry Patch Teddy Cake is a delightful treat that captures the joy of summer birthdays. This cake is light, fluffy, and bursting with fresh berry flavors, creating a refreshing dessert perfect for outdoor celebrations. The combination of sweet strawberries, tart raspberries, and creamy frosting makes it irresistible, particularly for kids who love the adorable teddy bear decorations!
This recipe is simple to follow, making it a fun baking project for both seasoned bakers and beginners. With layers of soft cake, whipped cream, and a medley of berries, it’s not only a feast for the palate but also a visual delight. Everyone will love digging into this charming cake at your next picnic birthday party!
Tools and Supplies Needed
- Two 8-inch round cake pans
- Mixing bowls
- Hand mixer or stand mixer
- Spatula
- Cooling rack
- Measuring cups and spoons
- Fresh strawberries and raspberries
- Teddy bear cake toppers (optional)
Ingredients
- 2 cups all-purpose flour
- 1 ½ cups granulated sugar
- 1 tablespoon baking powder
- ½ teaspoon salt
- ½ cup unsalted butter, softened
- 1 cup whole milk
- 3 large eggs
- 1 teaspoon vanilla extract
- 2 cups heavy whipping cream
- 2 cups mixed fresh berries (strawberries and raspberries)
- 2 tablespoons powdered sugar (for whipped cream)
- Mint leaves for garnish (optional)
Instructions
- Preheat your oven to 350°F (175°C). Grease and flour the cake pans.
- In a mixing bowl, combine flour, sugar, baking powder, and salt. Add the softened butter and mix until crumbly.
- In another bowl, whisk together milk, eggs, and vanilla. Gradually add this mixture to the dry ingredients, mixing until smooth.
- Divide the batter evenly between the two prepared pans and bake for 25-30 minutes or until a toothpick inserted in the center comes out clean. Let the cakes cool in the pans for 10 minutes, then turn them out onto cooling racks.
- Once the cakes are completely cool, whip the heavy cream with powdered sugar until soft peaks form.
- To assemble, place one cake layer on a serving platter. Spread a layer of whipped cream and top with fresh berries. Add the second cake layer and repeat the process, finishing with whipped cream and a decorative arrangement of berries on top. Add teddy bear toppers if desired.
- Garnish with mint leaves for an extra touch before serving.
**Teddy Bear Carousel Cake**

This adorable Teddy Bear Carousel Cake is perfect for summer birthdays, bringing a delightful charm to any celebration. With its combination of sweet flavors and whimsical decorations, it’s sure to be a hit among kids and adults alike. The cake is not overly complicated to make, making it a fun project for bakers of all levels.
Picture layers of fluffy vanilla or chocolate cake, frosted with smooth buttercream and adorned with cute teddy bear figurines. The vibrant colors and playful elements like pinwheels and flowers add to its festive appeal.
Tools and Supplies Needed
- Cake pans (two 8-inch round)
- Mixing bowl
- Electric mixer
- Spatula
- Offset spatula for frosting
- Wilton buttercream icing
- Piping bags
- Teddy bear figurines
- Colorful decorations (like pinwheels and edible flowers)
- Cake board
Ingredients
- 2 cups all-purpose flour
- 1 1/2 cups granulated sugar
- 1/2 cup unsalted butter, softened
- 1 cup milk
- 3 large eggs
- 2 1/2 teaspoons baking powder
- 1 teaspoon vanilla extract
- 1/4 teaspoon salt
Instructions
- Preheat the oven to 350°F (175°C) and grease the cake pans.
- In a mixing bowl, combine softened butter and sugar, beating until light and fluffy. Add eggs one at a time, followed by vanilla.
- In another bowl, mix flour, baking powder, and salt. Gradually add this mixture to the butter mixture, alternating with milk, until just combined.
- Pour the batter evenly into the prepared cake pans and smooth the tops. Bake for 25-30 minutes, or until a toothpick comes out clean.
- Let the cakes cool in the pans for 10 minutes, then transfer to wire racks to cool completely.
- Once cool, frost the layers with buttercream icing. Decorate with teddy bear figurines and colorful accents to create a carousel effect.
**Teddy’S Watermelon Picnic Cake**

Teddy’s Watermelon Picnic Cake is a delightful and refreshing dessert perfect for summer birthdays. This cake combines the sweetness of vanilla sponge and the juiciness of watermelon, creating a fun and playful treat. The cake is not only visually appealing with its colorful layers, but it also offers a light and fruity flavor that everyone will love.
Making this cake is simple and enjoyable, making it a great project to do with kids or friends. The combination of frosting and fondant mimics the look of a watermelon, topped with an adorable teddy bear for a whimsical touch. It’s sure to be a hit at any summer gathering!
Tools and Supplies Needed
- 2 round cake pans (8-inch)
- Mixing bowls
- Electric mixer
- Spatula
- Cooling rack
- Rolling pin
- Parchment paper
- Knife for trimming
Ingredients
- 2 cups all-purpose flour
- 1 ½ cups granulated sugar
- ½ cup unsalted butter, softened
- 1 cup milk
- 3 large eggs
- 2 teaspoons baking powder
- 1 teaspoon vanilla extract
- ½ teaspoon salt
- Green and pink fondant
- Chocolate chips (for decoration)
- Marzipan or fondant teddy bear (optional)
- Fresh fruits (strawberries, etc., for garnish)
Instructions
- Preheat the oven to 350°F (175°C). Grease and line the cake pans with parchment paper.
- In a mixing bowl, cream together the softened butter and sugar until light and fluffy. Add the eggs one at a time, mixing well after each addition.
- In another bowl, combine the flour, baking powder, and salt. Gradually add the dry ingredients to the wet mixture, alternating with milk. Stir in the vanilla extract.
- Divide the batter evenly between the two prepared pans and smooth the tops. Bake for 25-30 minutes, or until a toothpick inserted in the center comes out clean. Let the cakes cool in the pans for 10 minutes, then transfer to a cooling rack.
- Once cooled, level the tops of the cakes if necessary. Place one layer on a serving plate and spread a layer of frosting on top. Add the second layer and frost the entire cake.
- Roll out the green fondant and cover the sides of the cake to create a watermelon rind effect. Use the pink fondant for the top and decorate with chocolate chips to resemble watermelon seeds.
- Place the teddy bear on top and add fresh fruits around the base for a cute picnic look. Enjoy!
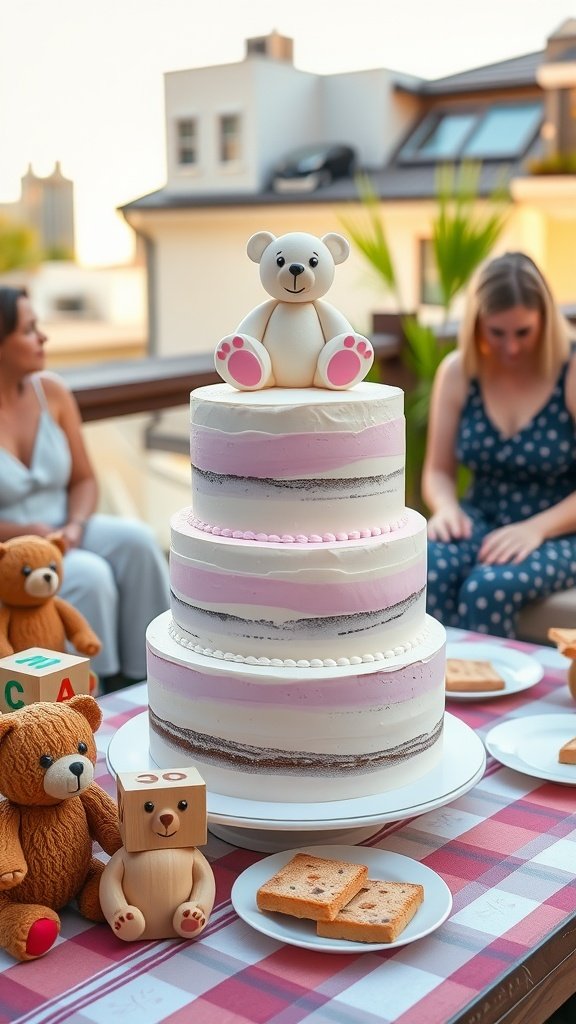
**Vintage Bear Birthday Cake**

The Vintage Bear Birthday Cake is a delightful way to celebrate a special occasion, especially for little ones who adore cuddly bears! This cake is moist and flavorful, boasting layers of buttery vanilla or chocolate sponge, enveloped in a rich buttercream frosting. It’s not just tasty; it also brings a nostalgic charm that warms the hearts of both kids and adults alike.
Making this cake is a fun and straightforward process. Even if you’re not a baking expert, with a bit of patience and creativity, you’ll have a show-stopping cake perfect for summer picnics and birthday parties.
Tools and Supplies Needed
- Baking pans (two 8-inch round)
- Mixing bowls
- Electric mixer
- Spatula
- Measuring cups and spoons
- Cooling rack
- Offset spatula
- Piping bags and tips (for decoration)
Ingredients
- 2 cups all-purpose flour
- 1 1/2 cups granulated sugar
- 1/2 cup unsalted butter, softened
- 1 cup milk
- 3 1/2 teaspoons baking powder
- 1 teaspoon vanilla extract
- 1/2 teaspoon salt
- 4 large eggs
- 4 cups buttercream frosting (store-bought or homemade)
- Food coloring (optional, for decoration)
- Decorative items (fondant bears, edible flowers, etc.)
Instructions
- Preheat your oven to 350°F (175°C). Grease and flour the baking pans.
- In a large mixing bowl, cream together the softened butter and sugar until light and fluffy. Add eggs, one at a time, mixing well after each addition.
- In another bowl, combine flour, baking powder, and salt. Gradually add this to the creamed mixture, alternating with milk and vanilla, and mix until just combined.
- Pour the batter evenly into the prepared pans and smooth the tops. Bake for 25-30 minutes or until a toothpick inserted in the center comes out clean.
- Allow the cakes to cool in the pans for 10 minutes before transferring them to a cooling rack to cool completely.
- Once cooled, level the tops of the cakes if necessary. Place one layer on a serving plate, spread a layer of buttercream frosting on top, and place the second layer on top.
- Frost the top and sides of the cake with the remaining buttercream. Use decorative items to create a charming vintage bear theme.
- Chill the cake for a bit to set the frosting, then slice and serve at your picnic!
**Garden Party Bear Cake**

The Garden Party Bear Cake is a delightful and whimsical dessert perfect for summer celebrations. This cake features a charming teddy bear design that is not only visually appealing but also deliciously moist and sweet. It combines the flavors of vanilla or chocolate cake with a silky buttercream frosting, making it a hit among both kids and adults.
Making this cake is straightforward, allowing even beginner bakers to create something magical. The cake’s layers, decorated with fresh flowers and a cute bear face, bring a touch of nature into your gathering, making it the star of any picnic or garden party.
Tools and Supplies Needed
- 2 round cake pans
- Mixing bowls
- Electric mixer
- Spatula
- Cake board
- Piping bags
- Flower cutters (optional)
- Offset spatula
- Cooling rack
Ingredients
- 2 cups all-purpose flour
- 1 1/2 cups granulated sugar
- 1/2 cup unsalted butter, softened
- 1 cup milk
- 3 large eggs
- 2 teaspoons baking powder
- 1 teaspoon vanilla extract
- 1/4 teaspoon salt
- Buttercream frosting (store-bought or homemade)
- Edible flowers for decoration
- Fondant for bear face (optional)
Instructions
- Preheat the oven to 350°F (175°C). Grease and flour the round cake pans.
- In a large mixing bowl, cream together the softened butter and sugar until light and fluffy. Add in the eggs, milk, and vanilla, mixing until well combined.
- In a separate bowl, whisk together the flour, baking powder, and salt. Gradually add the dry ingredients to the wet mixture, stirring until just combined.
- Divide the batter evenly between the prepared pans. Bake for 25-30 minutes or until a toothpick comes out clean.
- Allow the cakes to cool in the pans for 10 minutes, then turn them out onto a cooling rack to cool completely.
- Once cool, stack the layers with buttercream frosting in between. Frost the entire cake with a smooth layer of buttercream.
- For decoration, use edible flowers to create a garden look around the base of the cake and shape fondant into a bear face for the top.
**Teddy Camper Cake**

Get ready for a delightful treat with the Teddy Camper Cake! This dessert captures the essence of summer picnics and camping trips, making it perfect for birthday celebrations. With its sweet flavor and charming design, this cake is a hit with both kids and adults. Plus, it’s easier to make than you might think, allowing you to spend more time enjoying the party!
The Teddy Camper Cake is not only visually appealing but also offers a lovely combination of flavors. You’ll love the soft cake paired with creamy frosting and fun decorations, like teddy bear figures and edible trees. It’s a whimsical way to bring the outdoors to your dessert table!
Tools and Supplies Needed
- 9-inch round cake pans
- Mixing bowls
- Electric mixer
- Offset spatula
- Decorating tips
- Piping bags
- Fondant or modeling chocolate
- Food coloring
- Serving platter
Ingredients
- 2 ½ cups all-purpose flour
- 2 ½ teaspoons baking powder
- ½ teaspoon salt
- 1 cup unsalted butter, softened
- 2 cups granulated sugar
- 4 large eggs
- 1 teaspoon vanilla extract
- 1 cup milk
- Buttercream frosting (store-bought or homemade)
- Fondant for decoration
- Edible decorations (teddy bear, trees, etc.)
Instructions
- Preheat your oven to 350°F (175°C). Grease and flour your cake pans.
- In a mixing bowl, combine flour, baking powder, and salt. Set aside.
- In another bowl, beat together the softened butter and sugar until light and fluffy. Add the eggs one at a time, mixing well after each addition. Stir in vanilla.
- Gradually add the flour mixture to the wet ingredients, alternating with milk. Mix until just combined.
- Divide the batter evenly between the prepared cake pans. Bake for 25-30 minutes or until a toothpick inserted in the center comes out clean. Allow to cool.
- Once cooled, layer the cakes with buttercream frosting in between. Frost the entire cake and smooth it out.
- Use fondant to create the camper design and other decorations. Assemble them onto the cake, adding edible trees and your teddy bear for that perfect picnic vibe.
- Serve and enjoy your delightful Teddy Camper Cake!
**Teddy Bear Tea Party Cake**

The Teddy Bear Tea Party Cake is a charming dessert perfect for summer birthdays. This delightful cake brings smiles with its cute teddy bear decorations and whimsical tea party setup. It combines a moist, fluffy cake with the sweetness of buttercream frosting, making it a treat that both kids and adults will love.
This cake is not overly complicated to make, making it a great choice for bakers of all skill levels. With its fun design and delicious taste, it’s sure to be the centerpiece of any celebration.
Tools and Supplies Needed
- 8-inch round cake pans
- Mixing bowls
- Electric mixer
- Offset spatula
- Rolling pin
- Fondant tools (for decorations)
- Cake board
- Piping bags
- Cake leveler (optional)
Ingredients
- 2 cups all-purpose flour
- 1 1/2 cups granulated sugar
- 1/2 cup unsalted butter, softened
- 1 cup milk
- 3 large eggs
- 2 1/2 teaspoons baking powder
- 1 teaspoon vanilla extract
- 1/2 teaspoon salt
- Buttercream frosting (for filling and decorating)
- Brown fondant (for teddy bears)
- White fondant (for the teapot)
- Colored fondant (for tea cups and flowers)
Instructions
- Preheat the oven to 350°F (175°C). Grease and flour the cake pans.
- In a mixing bowl, cream the softened butter and sugar until light and fluffy. Add in the eggs one at a time, mixing well after each addition.
- Sift together the flour, baking powder, and salt. Gradually add this to the butter mixture, alternating with the milk. Stir in the vanilla extract.
- Divide the batter evenly between the prepared pans and bake for 25-30 minutes, or until a toothpick inserted in the center comes out clean. Let them cool completely.
- Once cooled, level the cakes if necessary. Place one layer on a cake board and spread a layer of buttercream on top. Add the second layer and frost the entire cake with a thin layer of buttercream to crumb coat it.
- Roll out the white fondant and cover the cake smoothly. Use brown fondant to create the teddy bears and place them on top, holding tiny tea cups made from colored fondant.
- Finish with additional decorations like edible flowers made from fondant, and enjoy your delightful Teddy Bear Tea Party Cake!
**Rainbow Picnic Teddy Cake**

This Rainbow Picnic Teddy Cake is as delightful to look at as it is to eat! Layers of vibrant, colorful cake bring a cheerful touch to any summer birthday party. The sweet, fluffy texture combined with creamy frosting makes for a delicious treat that both kids and adults will adore. Plus, it’s simple enough to create even if you’re not a baking expert!
Perfect for a picnic setting, this cake can be made with various flavors or colors to match your theme. Grab your favorite teddy bear for decoration, and you’re set for a fun celebration!
Ingredients
- 2 cups all-purpose flour
- 1 1/2 cups granulated sugar
- 2 1/2 teaspoons baking powder
- 1/2 teaspoon salt
- 1 cup unsalted butter, softened
- 4 large eggs
- 1 cup milk
- 1 teaspoon vanilla extract
- Food coloring (various colors)
- 4 cups buttercream frosting
- Sprinkles for decoration
Instructions
- Preheat your oven to 350°F (175°C) and grease and flour your cake pans.
- In a large bowl, mix flour, sugar, baking powder, and salt. Add the softened butter, eggs, milk, and vanilla extract. Beat on medium speed until well combined.
- Divide the batter evenly into separate bowls, and add food coloring to each to create your rainbow layers.
- Pour each colored batter into the prepared pans and bake for 25-30 minutes, or until a toothpick inserted in the center comes out clean.
- Let the cakes cool for about 10 minutes, then remove them from the pans and allow them to cool completely on a wire rack.
- Once cooled, stack the layers with a generous amount of frosting in between each layer. Frost the top and sides of the cake as desired and add sprinkles for a festive touch.
**Ice Cream Cone Bear Cake**

This Ice Cream Cone Bear Cake is a delightful summer treat, perfect for birthdays or picnics! The combination of a fluffy cake with the fun of ice cream cones makes it a hit with kids and adults alike. It’s an easy recipe that doesn’t require advanced baking skills, making it a great choice for any home baker.
The cake is layered with creamy frosting and topped with adorable ice cream cones. With a sweet vanilla flavor and colorful fruit toppings, it’s not just tasty but also a feast for the eyes. This cake is sure to bring smiles and create lasting memories!
Tools and Supplies Needed
- Mixing bowls
- Electric mixer
- Rubber spatula
- 9-inch round cake pans
- Parchment paper
- Cooling rack
- Icing spatula
- Ice cream cones
- Decorative fruits (strawberries, blueberries, etc.)
Ingredients
- 2 cups all-purpose flour
- 1 ½ cups granulated sugar
- 1 tablespoon baking powder
- ½ teaspoon salt
- 1 cup unsalted butter, softened
- 4 large eggs
- 1 cup whole milk
- 2 teaspoons vanilla extract
- 2 cups whipped frosting
- Ice cream cones (3 per cake)
- Colored sprinkles for decoration
- Assorted fruits for decoration
Instructions
- Preheat the oven to 350°F (175°C). Grease and line two 9-inch round cake pans with parchment paper.
- In a mixing bowl, combine flour, sugar, baking powder, and salt. Add softened butter, eggs, milk, and vanilla extract. Beat with an electric mixer on medium speed until well combined.
- Divide the batter evenly between the prepared cake pans. Bake for 25-30 minutes, or until a toothpick inserted into the center comes out clean. Let the cakes cool in the pans for 10 minutes before transferring to a cooling rack.
- Once cooled, frost the top of one cake layer with whipped frosting and place the second layer on top. Frost the sides and top of the entire cake.
- Insert three ice cream cones into the top of the cake to create the bear’s ears. Decorate with colored sprinkles and assorted fruits to complete the look.
- Slice and serve your Ice Cream Cone Bear Cake, and enjoy the smiles it brings!