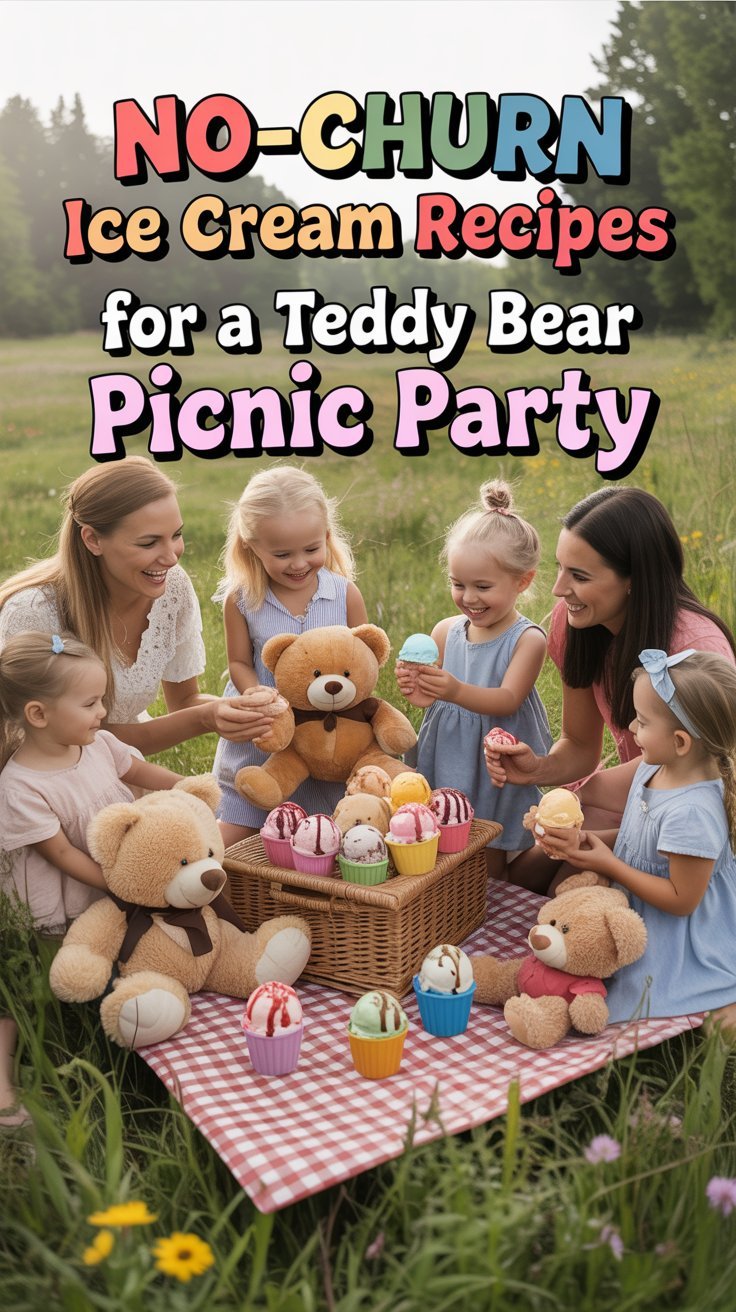
Escape the heat with these delightful no-churn ice cream recipes, perfect for your next Teddy Bear Picnic Party! Treat your beloved plush companions and yourself to creamy, dreamy flavors without the need for an ice cream maker. Just a few simple ingredients and your freezer are all you need to whip up a cool, tasty dessert that will make your picnic memorable.
Tools and Supplies Needed:
- Mixing bowls
- Whisk or electric mixer
- Measuring cups and spoons
- Spatula
- Freezer-safe container
- Serving scoops
**Honey Swirl Bear Cream**

Honey Swirl Bear Cream is a delightful no-churn ice cream that brings the sweet essence of honey right to your picnic table. It’s creamy, smooth, and has a lovely honey swirl that adds a touch of whimsy to every scoop. Plus, it’s super easy to make with just a few simple ingredients!
This ice cream is perfect for a teddy bear picnic. Its subtly sweet flavor, complemented by crunchy bits of your favorite cookies or graham crackers, makes it a hit with kids and adults alike. With no ice cream maker required, you can whip it up in no time and keep the fun rolling!
Tools and Supplies Needed
- Mixing bowl
- Whisk or electric mixer
- Freezer-safe container
- Spatula
Ingredients
- 2 cups heavy cream
- 1 can (14 oz) sweetened condensed milk
- 1/2 cup honey
- 1 teaspoon vanilla extract
- 1 cup crushed graham crackers (for topping)
Instructions
- In a mixing bowl, whip the heavy cream until stiff peaks form. This will give your ice cream a light and airy texture.
- In another bowl, combine the sweetened condensed milk, honey, and vanilla extract. Mix until smooth.
- Gently fold the whipped cream into the condensed milk mixture until well combined.
- Pour half of the mixture into a freezer-safe container. Drizzle some honey over it, then layer the remaining mixture on top. Swirl a bit more honey on the surface for an added touch.
- Cover and freeze for at least 6 hours, or until firm. Serve with crushed graham crackers sprinkled on top for that extra crunch and enjoy your teddy bear picnic!
**Strawbeary Shortcake Ice Cream**

This Strawbeary Shortcake Ice Cream is a delightful treat that perfectly combines the sweetness of strawberries with creamy ice cream and biscuit crumbles. Ideal for a picnic, this no-churn recipe is both simple and fun to make. With its refreshing taste, it’s bound to be a hit among kids and adults alike, making it the perfect addition to your teddy bear picnic.
With just a few ingredients, you can whip up this delicious dessert without any special equipment. Plus, the layering of strawberries and shortcake gives it a charming look, ready to impress your picnic guests!
Tools and Supplies Needed
- Mixing bowl
- Spoon or spatula
- Mason jar or serving dish
- Freezer-safe container
Ingredients
- 2 cups heavy cream
- 1 cup sweetened condensed milk
- 1 teaspoon vanilla extract
- 2 cups fresh strawberries, sliced
- 1 cup shortcake or pound cake, crumbled
- Optional: additional strawberries for topping
Instructions
- In a large mixing bowl, whip the heavy cream until stiff peaks form.
- In a separate bowl, combine sweetened condensed milk and vanilla extract. Gently fold the whipped cream into this mixture until well combined.
- Layer the bottom of your mason jar or serving dish with crumbled shortcake, followed by a layer of sliced strawberries, and then add a layer of the ice cream mixture.
- Repeat the layering process until the jar is filled, finishing with a layer of ice cream on top.
- Cover and freeze for at least 4 hours or until fully set. Serve with additional strawberries on top if desired.
**Banana Hug Pudding Ice Cream**
This delightful Banana Hug Pudding Ice Cream is a creamy, dreamy treat that’s perfect for any picnic. With the rich flavor of ripe bananas blended smoothly into a sweet pudding base, every bite feels like a warm hug. Plus, it’s a no-churn recipe, making it super easy to whip up!
The combination of banana and vanilla gives a nostalgic taste that brings smiles all around. Whether you’re sharing it at a teddy bear picnic or enjoying it at home, this ice cream is sure to be a hit!
Tools and Supplies Needed
- Mixing bowl
- Electric mixer or whisk
- Spatula
- Freezer-safe container
- Measuring cups and spoons
Ingredients
- 2 ripe bananas, mashed
- 1 cup heavy cream
- 1 cup sweetened condensed milk
- 1 teaspoon vanilla extract
- 1 packet instant vanilla pudding mix (3.4 oz)
Instructions
- Mix the Base: In a large mixing bowl, combine the mashed bananas, sweetened condensed milk, vanilla extract, and instant pudding mix. Stir until well blended.
- Whip the Cream: In another bowl, whip the heavy cream until soft peaks form. This should take about 2-3 minutes with an electric mixer.
- Fold Together: Gently fold the whipped cream into the banana mixture until combined. Be careful not to deflate the cream.
- Freeze: Pour the mixture into a freezer-safe container and smooth the top. Cover and freeze for at least 4-6 hours, or until solid.
- Serve: Once fully frozen, scoop the Banana Hug Pudding Ice Cream into bowls or cones and enjoy!
**Chocolate Honeycomb Cub Cream**

This Chocolate Honeycomb Cub Cream is a delightful treat that brings together rich chocolate flavors and the light crunch of honeycomb. It’s perfect for a fun picnic with friends and family. Plus, it’s super easy to whip up, making it an excellent choice for those who want a sweet treat without the fuss of traditional ice cream making.
With its creamy texture and satisfying sweetness, this dessert is sure to please chocolate lovers of all ages. You can customize it with your favorite toppings or enjoy it just as is. Let’s dive into the simple steps to create this delicious no-churn ice cream!
Tools and Supplies Needed
- Mixing bowl
- Hand mixer or whisk
- Spatula
- Freezer-safe container
Ingredients
- 2 cups heavy cream
- 1 cup sweetened condensed milk
- 1/2 cup unsweetened cocoa powder
- 1 teaspoon vanilla extract
- 1 cup honeycomb pieces
- 1/4 cup chocolate chips (optional)
Instructions
- In a mixing bowl, whip the heavy cream until soft peaks form.
- In another bowl, combine the sweetened condensed milk, cocoa powder, and vanilla extract. Mix until well combined.
- Gently fold the whipped cream into the chocolate mixture until fully incorporated.
- Add in the honeycomb pieces and chocolate chips if using, folding them in carefully.
- Transfer the mixture to a freezer-safe container and smooth the top. Cover and freeze for at least 4-6 hours or until solid.
- Once set, scoop and serve your Chocolate Honeycomb Cub Cream, enjoying it with extra honeycomb or chocolate drizzles if desired!
**Peanut Butter Picnic Swirl**

This Peanut Butter Picnic Swirl ice cream is a tasty treat that combines the creamy goodness of peanut butter with sweet swirls of chocolate. It’s rich, satisfying, and perfect for a picnic party! Plus, you won’t need an ice cream maker to whip this up, making it a breeze to prepare.
With its delightful texture and bold flavors, this no-churn ice cream is sure to be a hit with everyone at your teddy bear picnic. The combination of peanut butter and chocolate chips creates a delicious contrast that will keep you coming back for more.
Tools and Supplies Needed
- Mixing bowl
- Hand mixer or whisk
- Rubber spatula
- Loaf pan or airtight container
- Measuring cups and spoons
Ingredients
- 2 cups heavy whipping cream
- 1 cup sweetened condensed milk
- 1/2 cup creamy peanut butter
- 1 teaspoon vanilla extract
- 1/2 cup mini chocolate chips
Instructions
- In a mixing bowl, whip the heavy cream until stiff peaks form, using a hand mixer or whisk.
- In another bowl, mix together the sweetened condensed milk, peanut butter, and vanilla extract until smooth.
- Gently fold the whipped cream into the peanut butter mixture until combined.
- Stir in the mini chocolate chips.
- Pour the mixture into a loaf pan or airtight container, smoothing the top with a spatula.
- Freeze for at least 6 hours or until solid. Serve and enjoy your Peanut Butter Picnic Swirl!
**Berry Bear Tracks Ice Cream**

Berry Bear Tracks Ice Cream is a delightful and creamy treat that captures the essence of summer picnics. Bursting with the sweetness of mixed berries and a hint of chocolate, this no-churn ice cream is not only easy to make but also incredibly satisfying. You can whip it up in no time, making it a perfect addition to any outdoor gathering.
The combination of fresh berry flavors with creamy swirls makes every scoop a delightful experience. Plus, you don’t need an ice cream maker, so it’s simple enough for anyone to try. This dessert is sure to bring smiles to all ages, especially when enjoyed with friends and family!
Tools and Supplies Needed
- Mixing bowl
- Whisk
- Spatula
- Freezer-safe container
- Measuring cups and spoons
Ingredients
- 2 cups heavy whipping cream
- 1 cup sweetened condensed milk
- 1 cup mixed berries (strawberries, blueberries, raspberries)
- 1/4 cup chocolate syrup
- 1 teaspoon vanilla extract
Instructions
- In a large mixing bowl, whip the heavy cream until stiff peaks form.
- In another bowl, mix the sweetened condensed milk, vanilla extract, and half of the mixed berries, mashing them slightly to release their juices.
- Gently fold the whipped cream into the berry mixture until well combined.
- Drizzle in the chocolate syrup and swirl it gently through the mixture, being careful not to overmix.
- Pour the mixture into a freezer-safe container. Sprinkle the remaining berries on top for decoration.
- Cover and freeze for at least 6 hours, or until firm. Scoop and enjoy your Berry Bear Tracks Ice Cream!
**Maple Teddy Crunch Ice Cream**

Maple Teddy Crunch Ice Cream is a delightful treat that brings the sweetness of maple syrup and the crunch of teddy graham crackers together in a creamy, no-churn base. It’s simple to whip up, making it perfect for any picnic or family gathering. The rich maple flavor paired with the crispy texture of the crunch adds a fun twist that both kids and adults will love.
This ice cream is a sweet way to celebrate your teddy bear picnic. It’s not just delicious; it’s also a breeze to make, requiring no ice cream maker. Just mix, freeze, and serve!
Tools and Supplies Needed
- Mixing bowl
- Whisk
- Spatula
- Freezer-safe container
- Measuring cups and spoons
Ingredients
- 2 cups heavy whipping cream
- 1 cup sweetened condensed milk
- 1/2 cup pure maple syrup
- 1 teaspoon vanilla extract
- 1 cup teddy graham crackers, crushed
- 1/2 cup chopped walnuts (optional)
Instructions
- In a mixing bowl, whisk the heavy whipping cream until soft peaks form.
- In another bowl, combine sweetened condensed milk, maple syrup, and vanilla extract. Stir until well mixed.
- Gently fold the whipped cream into the maple mixture until combined.
- Add in the crushed teddy graham crackers and walnuts, folding them in carefully.
- Transfer the mixture into a freezer-safe container and smooth the top with a spatula.
- Cover and freeze for at least 6 hours or until solid.
- Before serving, let the ice cream sit at room temperature for about 10 minutes to soften, then scoop and enjoy!
**Blueberry Picnic Pop Ice Cream**

This Blueberry Picnic Pop Ice Cream is a delightful treat perfect for a sunny picnic with friends or family. With its creamy texture and bursts of fresh blueberry flavor, it’s sure to bring smiles all around. Plus, it’s super easy to whip up, requiring no ice cream maker!
The combination of sweet blueberries and rich cream creates a refreshing dessert that’s both satisfying and light. Not only does it taste amazing, but it also looks beautiful, making it an ideal choice for your teddy bear picnic party.
Tools and Supplies Needed
- Mixing bowl
- Whisk or electric mixer
- Spatula
- Freezer-safe container
- Ice cream scoop
Ingredients
- 2 cups fresh blueberries
- 1 cup heavy cream
- 1 cup sweetened condensed milk
- 1 teaspoon vanilla extract
- 1 tablespoon lemon juice
- 1/4 cup powdered sugar (optional)
Instructions
- Prepare the Blueberries: In a bowl, mash the fresh blueberries with a fork until they are somewhat pureed but still have some texture. Set aside.
- Mix the Base: In a separate bowl, whisk together the heavy cream, sweetened condensed milk, vanilla extract, and lemon juice until well combined. If you want it sweeter, add the powdered sugar to taste.
- Combine: Gently fold the mashed blueberries into the cream mixture until everything is evenly incorporated.
- Freeze: Transfer the mixture to a freezer-safe container and spread it out evenly. Cover with a lid or plastic wrap and freeze for at least 4-6 hours or until completely solid.
- Serve: Scoop the ice cream into bowls or cones and enjoy your tasty blueberry creation at the picnic!
**Apple Pie Cub Cream**

Apple Pie Cub Cream is a delightful twist on traditional ice cream that captures the warm, comforting flavors of apple pie. This creamy treat combines the sweetness of apples with a hint of cinnamon, creating a taste that’s perfect for a picnic. Best of all, it’s incredibly simple to make without any churning required!
With a rich, velvety texture and layers of flavor, this no-churn ice cream is sure to impress your picnic guests. It pairs beautifully with crunchy graham crackers and fresh apple slices, making each scoop a delicious bite of nostalgia.
Tools and Supplies Needed
- Mixing bowl
- Whisk or electric mixer
- Spatula
- Loaf pan or container for freezing
- Measuring cups and spoons
Ingredients
- 2 cups heavy whipping cream
- 1 cup sweetened condensed milk
- 1 cup apple pie filling
- 1 teaspoon vanilla extract
- 1 teaspoon ground cinnamon
- 1/2 cup crushed graham crackers
Instructions
- Whip the Cream: In a mixing bowl, beat the heavy whipping cream until soft peaks form.
- Mix Ingredients: In another bowl, combine the sweetened condensed milk, apple pie filling, vanilla extract, and ground cinnamon. Stir until well mixed.
- Fold Mixtures: Gently fold the whipped cream into the apple mixture until just combined. Be careful not to deflate the cream.
- Add Crushed Crackers: Fold in the crushed graham crackers for added texture and flavor.
- Freeze: Pour the mixture into a loaf pan or container. Cover and freeze for at least 4-6 hours, or until firm.
- Serve: Scoop the apple pie cub cream into bowls and enjoy with additional graham crackers or fresh apple slices!
**Coconut Snow Bear Ice Cream**

This Coconut Snow Bear Ice Cream is a delightful treat for your teddy bear picnic. It’s creamy, sweet, and full of coconut flavor, making it a perfect dessert for sunny days. Plus, the best part is that you don’t need an ice cream maker to whip it up, so it’s super simple to make!
With just a few ingredients, you can create a fluffy and refreshing ice cream that is sure to impress your friends and cuddly companions. The combination of coconut and chocolate chips adds a fun twist that everyone will love. Let’s get started!
Tools and Supplies Needed
- Mixing bowl
- Hand mixer or whisk
- Spatula
- Freezer-safe container
- Measuring cups and spoons
Ingredients
- 2 cups heavy cream
- 1 cup sweetened condensed milk
- 1 cup shredded coconut
- 1 teaspoon vanilla extract
- 1/2 cup chocolate chips
Instructions
- In a mixing bowl, whip the heavy cream with a hand mixer until soft peaks form.
- In another bowl, combine the sweetened condensed milk, shredded coconut, and vanilla extract. Gently fold this mixture into the whipped cream until well incorporated.
- Stir in the chocolate chips evenly throughout the mixture.
- Transfer the mixture to a freezer-safe container and smooth the top with a spatula. Cover and freeze for at least 4 hours, or until solid.
- Once frozen, scoop the Coconut Snow Bear Ice Cream into bowls and enjoy at your picnic!
**Teddy S’Mores Ice Cream**

This Teddy S’Mores Ice Cream is a delightful twist on the classic campfire treat. Imagine creamy chocolate ice cream swirled with fluffy marshmallow and crunchy graham cracker bits, all topped off with adorable teddy bear cookies. It’s an easy, no-churn recipe that captures the fun of a s’mores picnic in every spoonful!
With its rich chocolate flavor and the satisfying crunch of graham crackers, this ice cream is sure to be a hit at any teddy bear picnic party. Plus, it’s super simple to whip up, making it perfect for a fun family activity.
Tools and Supplies Needed
- Mixing bowl
- Electric mixer or whisk
- Freezer-safe container
- Spatula
Ingredients
- 2 cups heavy cream
- 1 cup sweetened condensed milk
- 1/2 cup cocoa powder
- 1 teaspoon vanilla extract
- 1 cup mini marshmallows
- 1 cup crushed graham crackers
- Teddy bear cookies for topping
Instructions
- Mix the Base: In a large mixing bowl, combine heavy cream, sweetened condensed milk, cocoa powder, and vanilla extract. Use an electric mixer or whisk to blend until smooth and creamy.
- Add Mix-Ins: Gently fold in the mini marshmallows and crushed graham crackers, ensuring they are evenly distributed throughout the mixture.
- Freeze: Pour the mixture into a freezer-safe container, smoothing the top with a spatula. Cover and freeze for at least 6 hours or until solid.
- Serve: Scoop the ice cream into bowls, topping each serving with additional mini marshmallows and teddy bear cookies. Enjoy your Teddy S’Mores Ice Cream!
**Sunshine Lemonade Cream**

Sunshine Lemonade Cream is a refreshing treat perfect for a sunny picnic. This no-churn ice cream recipe combines the tangy zest of lemons with a creamy base, making every bite a burst of citrusy delight. It’s easy to whip up, requiring just a few simple ingredients, and no ice cream maker is needed!
The flavors are bright and cheerful, reminiscent of warm days and laughter with friends. This ice cream is a delightful addition to any picnic spread, sure to please both kids and adults alike. Grab your ingredients and let’s get started on this sunshine-inspired dessert!
Tools and Supplies Needed
- Mixing bowl
- Hand mixer or whisk
- Measuring cups
- Measuring spoons
- Ice cream containers or cups
Ingredients
- 2 cups heavy whipping cream
- 1 cup sweetened condensed milk
- 1/2 cup freshly squeezed lemon juice
- Zest of 2 lemons
- 1 teaspoon vanilla extract
Instructions
- In a large mixing bowl, beat the heavy whipping cream until stiff peaks form.
- In another bowl, mix together the sweetened condensed milk, lemon juice, lemon zest, and vanilla extract.
- Gently fold the whipped cream into the lemon mixture until well combined.
- Transfer the mixture into ice cream containers or cups and smooth the top.
- Freeze for at least 4 hours or until firm. Scoop and serve with lemon slices for a cheerful touch!