Transform ordinary snack time into an extraordinary culinary adventure with a colorful, creative food display designed specifically with young eaters in mind! Kid-friendly charcuterie boards offer a fresh approach to serving balanced, varied foods in a way that encourages exploration, independence, and enjoyment. Unlike their sophisticated adult counterparts with aged cheeses and cured meats, these playful arrangements feature accessible flavors, interactive elements, and eye-catching presentations that make healthy eating irresistibly fun!
Understanding Kid Food Preferences and Considerations
Successful kid-friendly boards start with understanding exactly what appeals to young eaters at different developmental stages! Creating truly enticing displays requires thoughtful consideration of children’s unique preferences, limitations, and eating behaviors:
Age-Appropriate Considerations:
- Toddlers (1-3 years): Focus on small, soft pieces that are easy to grasp and chew. Avoid hard, round items that pose choking hazards. Emphasize finger foods that support developing self-feeding skills.
- Preschoolers (3-5 years): Embrace playful presentations with recognizable shapes and characters. Introduce more varied textures and mild flavor combinations. Support growing independence with easily managed portions.
- School-Age (6-12 years): Incorporate more sophisticated flavor pairings while maintaining kid-appeal. Create interactive elements that encourage food exploration. Balance familiar favorites with gentle introductions to new options.
Flavor Profile Fundamentals:
Children generally prefer foods that are:
- Mild rather than intense or spicy
- Slightly sweet over bitter or sour
- Simple rather than heavily seasoned
- Recognizable and identifiable
- Separated rather than mixed together
Texture Considerations:
Many children have strong texture preferences, so successful boards should include variety:
- Crunchy elements (crackers, crisp vegetables)
- Soft options (soft fruits, mild cheeses)
- Smooth components (dips, spreads)
- Chewy selections (dried fruits, certain breads)
Visual Appeal Factors:
Children eat first with their eyes, responding strongly to:
- Bright, vibrant colors
- Recognizable shapes and characters
- Organized, separated arrangements
- Appropriately sized pieces
- Interactive, dippable components
Understanding these fundamental preferences helps you create boards that genuinely appeal to children rather than simply miniaturizing adult concepts. Remember that individual preferences vary widely—what delights one child might not appeal to another. Building boards with variety accommodates these differences while encouraging gentle exploration beyond comfort zones.
Pro tip: Create a simple “Food Favorites” survey for your specific children before designing your board! Ask about preferred fruits, vegetables, proteins, and treats. This personalized information ensures your creation includes enough familiar favorites to encourage confidence while strategically incorporating new options for exploration. Even very young children can participate by pointing to pictures of foods they like!


Essential Equipment and Supplies

Creating kid-friendly food displays starts with having the right tools designed for both safety and visual appeal! These essential supplies make assembly easier while enhancing the finished presentation:
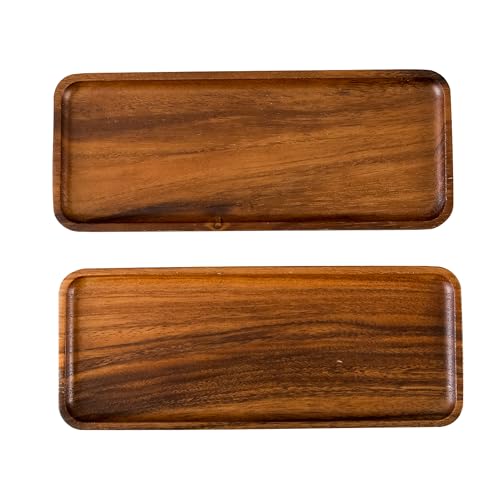
Board Selection:
The foundation of your display deserves careful consideration:
- Material Options: Food-safe wooden boards, melamine platters, or slate surfaces that are easily cleaned
- Size Considerations: 9″x12″ works well for 1-2 children, while 12″x18″ accommodates group servings
- Edge Features: Slightly raised edges help prevent food from sliding off during enthusiastic selection
- Shape Varieties: Beyond rectangles, consider round, animal-shaped, or themed boards for added fun
- Cleaning Requirements: Select non-porous surfaces that can be thoroughly sanitized between uses
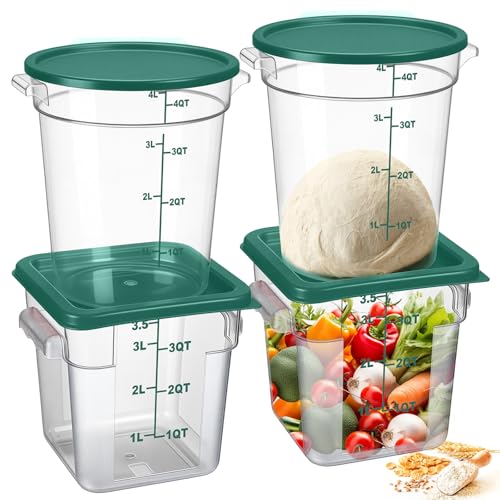
Serving Vessels:
Small containers create organization while adding color:
- Silicone Cupcake Liners: Perfect for holding small portions of loose items like berries or crackers
- Tiny Dip Cups: 2-3oz containers ideal for hummus, ranch, or other dips
- Small Bowls: For items that might be messy or need containment
- Divided Containers: Help maintain separation for children who prefer foods not touching
- Themed Containers: Character cups or shaped vessels that enhance your theme
Child-Friendly Serving Tools:
Safety meets practicality with these specialized implements:
- Small Tongs: Easy for children to manage when selecting items
- Kid-Sized Serving Spoons: Appropriately scaled for small hands
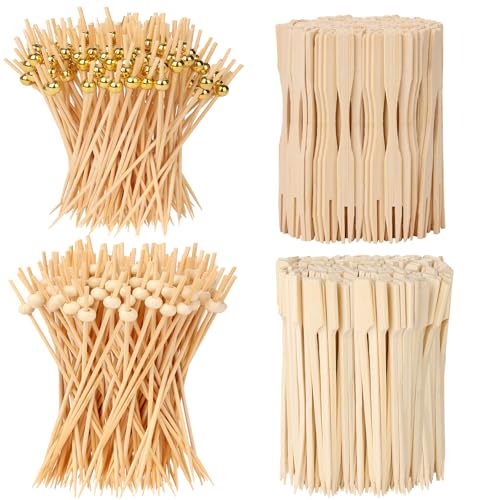
- Colorful Food Picks: Make selection fun while minimizing finger-touching of shared items
- Spreading Tools: Short, wide spreaders for applying dips safely
- Cheese Knives: Plastic or dulled options for independent cheese cutting (for older children)
Decorative Elements:
Enhance visual appeal with these food-safe decorations:
- Themed Food Picks: Animal toppers, character flags, or seasonal decorations
- Silicone Separators: Decorative dividers that create distinct sections
- Cookie Cutters: For creating shaped cheese, fruits, or sandwiches
- Edible Decorations: Herb sprigs, edible flowers, or decorative sprinkles
- Non-Edible Accents: Small toys or figures (thoroughly cleaned) to enhance themes
Practical Necessities:
Don’t forget these essential support items:
- Hand Wipes: Positioned nearby for quick clean-up
- Napkins: Colorful options that complement your theme
- Individual Plates: For children to collect their selections
- Food Labels: Identifying unfamiliar items or noting allergen information
- Serving Mat: Washable placement beneath board for easier cleanup
Pro tip: Create a dedicated “Charcuterie Board Kit” storage bin that keeps all your specialized supplies in one place! Stock it with reusable items like silicone cups, child-friendly serving tools, and decorative elements, organized in compartments for easy access. This ready-to-go collection makes spontaneous food board creation simple, whether for after-school snacks or impromptu playdates!

Food Selection Guide

The heart of any successful kid charcuterie board is thoughtful food selection that balances nutrition with visual appeal and child-friendly flavors! These category-specific recommendations help you select items that work beautifully together:
Kid-Approved Proteins:
These filling options provide staying power while appealing to young palates:
- Cheese Varieties: Mild cheddar, mozzarella sticks or pearls, cream cheese (shaped or in spreadable form), Colby, and string cheese
- Meat Options: Thinly sliced turkey, ham rolls, mini pepperoni, small meatballs, rotisserie chicken cubes
- Non-Meat Proteins: Hummus, hard-boiled egg slices or quarters, edamame, yogurt dips, nut or seed butters
- Presentation Tips: Cut cheeses into fun shapes, roll meats into “scrolls,” or thread onto colorful picks for easy grabbing
Fruit Selections:
Bring natural sweetness and vibrant color with these kid-favorites:
- Berries: Strawberries (halved for safety), blueberries, raspberries, blackberries
- Sliced Fruits: Apple slices (brushed with lemon juice to prevent browning), pear sections, melon pieces
- Grapes: Sliced lengthwise for young children or left whole for older kids
- Citrus: Mandarin orange segments, small tangerine pieces
- Tropical Options: Pineapple chunks, mango slices, kiwi rounds
- Presentation Tips: Arrange by color for rainbow effect, cut into shapes using cookie cutters, or create patterns and designs
Vegetable Options:
Make veggies approachable with these kid-friendly choices:
- Raw Classics: Carrot sticks, cucumber rounds, bell pepper strips, snap peas, cherry tomatoes (halved for safety)
- Slightly Sweeter Choices: Sugar snap peas, yellow bell peppers, baby corn
- Preparation Techniques: Cut into uniform sticks, create shapes with small cutters, or present in colorful cups
- Enhancement Options: Serve alongside favorite dips to increase appeal
- Blanched Possibilities: Briefly cooked broccoli florets, green beans, or asparagus tips for improved texture
Grain-Based Components:
These satisfying options provide pleasing crunch and familiar comfort:
- Crackers: Buttery rounds, graham crackers, animal shapes, cheese varieties, whole grain options
- Breads: Small pita triangles, pretzel rods, breadsticks, mini bagels, waffle pieces
- Crispy Additions: Rice cakes, popcorn (for older children), granola pieces, cereal elements
- Homemade Touches: Mini muffins, tiny sandwich triangles, quesadilla pieces
- Presentation Tips: Stand items vertically in cups, create patterns, or use as “platforms” for other foods
Dips and Spreads:
These favorites encourage vegetable consumption while adding interactive fun:
- Savory Options: Ranch dip, hummus (plain or flavored), guacamole, mild salsa, cream cheese spreads
- Sweet Choices: Yogurt dip, fruit salsa, honey, apple butter, chocolate hazelnut spread (as a treat)
- Serving Strategy: Present in small individual cups to prevent double-dipping
- Enhancement Ideas: Add color with herbs, create swirl patterns, or shape spreadable options
Sweet Treats:
Complete your board with a few carefully chosen sweets:
- Healthier Options: Yogurt-covered pretzels, dark chocolate pieces, homemade energy bites
- Tiny Indulgences: Mini cookies, chocolate-dipped fruit, small rice crispy treats
- Fresh Choices: Chocolate-dipped strawberries, frozen yogurt drops, apple slices with cinnamon
- Portion Control: Keep sweet elements small and limited to one section of your board
- Visual Impact: Use treats strategically for color pops and special interest points
Pro tip: Create a “try something new” system that encourages gentle exploration! For every three familiar favorites included on your board, introduce one new item positioned strategically nearby. This 3:1 ratio creates confidence through familiar options while gradually expanding palates. Consider labeling new items with fun “adventure food” flags or star markers that create positive associations with trying something different!
Assembly Techniques and Visual Appeal

Transform ordinary ingredients into extraordinary edible art with these professional assembly techniques that create irresistible visual appeal! The presentation strategy is what elevates random snacks into a cohesive, attractive display that children can’t wait to explore:
Color Strategies That Captivate Kids:
Thoughtful color use creates immediate visual impact:
- Rainbow Arrangements: Organize foods in ROYGBIV color order for a pleasing spectrum effect
- Color Blocking: Create distinct sections of single-colored foods grouped together
- Contrasting Combinations: Position complementary colors next to each other for vibrant pop
- Color Themes: Build around specific color palettes (team colors, seasonal hues, favorite shades)
- Visual Pathways: Use color to create natural flow that guides the eye around your board
Fun Patterns and Shapes:
These arrangements create structure while delighting young eyes:
- Geometric Designs: Arrange circular elements in flower patterns or rectangular items in grids
- Character Creations: Position foods to form simple faces, animals, or recognizable shapes
- Letter Formations: Spell out initials, names, or relevant words (like “YUM” or “FUN”)
- Radial Patterns: Arrange items in sunburst patterns emanating from central points
- Linear Designs: Create rows, columns, or zig-zag arrangements with strong visual lines
Height Variation Techniques:
Dimensional displays create professional-looking presentations:
- Stacking Method: Layer crackers, cheese slices, or fruit pieces in small towers
- Container Elevation: Use inverted cups under your board cloth to create hidden hills
- Vertical Elements: Stand breadsticks, pretzel rods, or vegetable sticks in cups
- Tiered Serving Pieces: Incorporate small cake stands or stepped serving dishes
- Folded Elements: Rolled meats or folded tortillas create natural height variation
Spacing and Organization Principles:
Strategic arrangement ensures both beauty and functionality:
- Grouping Strategy: Keep similar items together in intuitive collections
- Accessibility Focus: Position popular items where they can be easily reached from multiple angles
- Finger Space Allowance: Leave small gaps between items for easy grasping
- Flow Creation: Arrange items in curved patterns that guide serving movement
- Balance Approach: Distribute colors and textures evenly across the entire board
Themed Arrangement Ideas:
Unified concepts create memorable presentations:
- Animal Shapes: Arrange foods to create butterflies, fish, bears, or other creatures
- Landscape Scenes: Form simple garden, ocean, or forest scenes using colored foods
- Seasonal Displays: Design holiday-specific arrangements or seasonal themes
- Story Elements: Recreate simple scenes from favorite books or movies
- Special Occasion Concepts: Birthday numbers, celebration symbols, or achievement themes
Pro tip: Document your creation process by taking photos at three stages—empty board with planned sections, half-completed arrangement, and finished display! This visual reference helps you refine your technique for future boards while creating a record of your creative process. For extra learning, note which arrangements were most popular with children and which areas remained untouched, providing valuable feedback for your next creation!
Dietary Considerations and Modifications
Create inclusive food experiences that ensure every child can safely enjoy your beautiful creation! These thoughtful adaptations address common dietary needs while maintaining the visual appeal and fun factor:
Common Childhood Allergies and Alternatives:
Navigate food sensitivities with these smart substitutions:
- Nut Allergies: Replace nut butters with sunflower seed butter, use seed-based crackers instead of almond flour options, and ensure no cross-contamination with nutty items
- Dairy Concerns: Substitute dairy-free cheese alternatives, use coconut-based yogurts for dips, and offer allergen-free chocolate options
- Gluten Sensitivities: Include rice crackers, corn tortilla chips, or gluten-free pretzels alongside traditional grain options
- Egg Restrictions: Choose egg-free baked goods, use hummus instead of egg-based dips, and select deli meats without egg binders
- Multiple Allergies: Create dedicated “allergy-safe zones” on your board or prepare separate mini-boards for severely allergic children
Vegetarian and Vegan Adaptations:
Plant-based options can be just as appealing and protein-rich:
- Protein Alternatives: Hummus, bean dips, edamame, tofu cubes, or plant-based cheese alternatives
- Complete Proteins: Combinations like beans with rice or corn to provide balanced nutrition
- Satisfying Textures: Focus on offering varied textures to replicate sensory appeal of meat options
- Visual Similarity: Cut plant-based options in similar shapes and sizes to their traditional counterparts
- Flavor Enhancement: Use mild seasonings, dips, or marinades to increase acceptance
Gluten-Free Board Sections:
Beyond basic substitutes, create truly appealing gluten-free options:
- Base Elements: Rice cakes, gluten-free crackers, corn tortilla chips, potato options
- Cross-Contamination Prevention: Use separate serving utensils and clearly designated areas
- Complete Experience: Ensure gluten-free options for each category (proteins, grains, sweets)
- Labeling Strategy: Use subtle but clear identification systems that don’t stigmatize
- Equivalent Appeal: Ensure gluten-free selections look equally colorful and interesting
Low-Sugar Variations:
Reduce sugar while maintaining kid appeal:
- Natural Sweetness: Emphasize naturally sweet fruits over processed sweet items
- Reduced Quantity: Incorporate small amounts of sweeter elements rather than eliminating entirely
- Strategic Placement: Position sweeter items between more nutritious options
- Visual Enhancement: Make healthier items visually exciting through creative cutting and arrangement
- Dip Strategy: Create yogurt-based fruit dips with minimal added sweetener
Picky Eater Accommodation:
Welcome reluctant eaters with these proven strategies:
- Familiar Gateway: Always include several “safe” foods they already enjoy
- Gentle Introduction: Position new foods directly adjacent to accepted favorites
- Preparation Consistency: Maintain preferred preparation methods (i.e., no sauce touching)
- Involvement Technique: Have picky eaters help arrange their preferred items
- Choice Provision: Create options within parameters—”Would you like the cucumber slices or the bell pepper strips?”
Pro tip: Create a discreet but effective “Dietary Decoder” system for mixed groups where allergies or preferences may not be known to everyone! Design small food flags or picks in different colors that indicate different considerations (blue for dairy-free, green for gluten-free, etc.) with a small legend card available nearby. This allows children with restrictions to easily identify safe options without drawing attention to differences, creating a more inclusive, worry-free experience for everyone!
Interactive Elements to Enhance Engagement
Elevate your board from passive snacking to active engagement with interactive elements that make healthy eating an exciting activity! These creative additions transform food exploration into playful experiences:
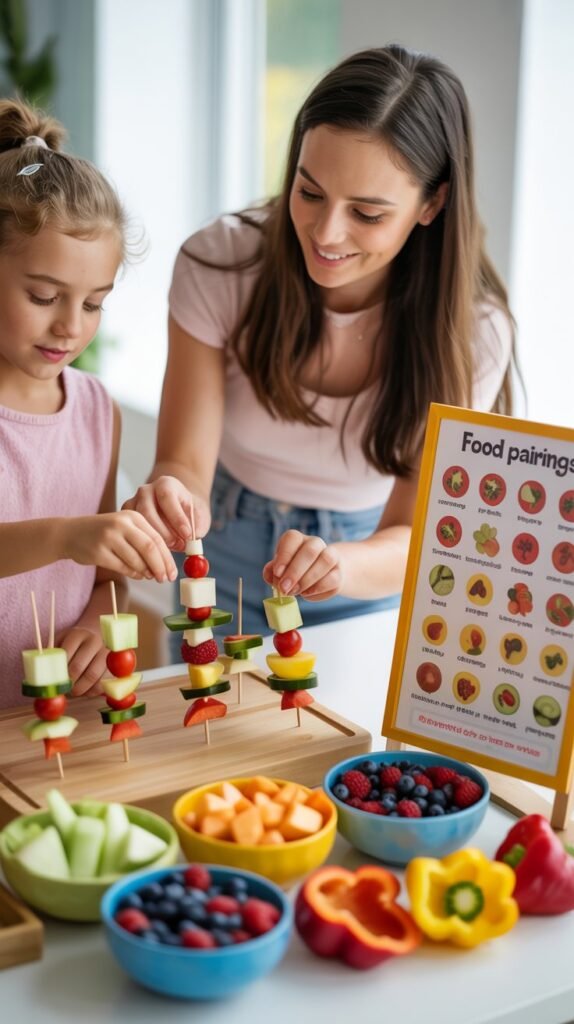
DIY Assembly Stations:
Invite hands-on participation with build-your-own sections:
- Mini Kabob Bar: Provide small skewers and various ingredients for creating personalized combinations
- Stackable Challenges: Encourage building towers with sturdy items like cucumber rounds and cheese squares
- Make-A-Face Station: Arrange circular base items with various toppings for creating edible faces
- Dip Customization: Offer plain yogurt or hummus with mix-in options for creating custom flavors
- Sandwich Assembly: Provide mini bread rounds with various toppings for personalized creations
Food Pairing Suggestions:
Guide new taste experiences with intentional combinations:
- Flavor Combination Cards: Create simple cards suggesting complementary pairings (“Try apple with cheese!”)
- Tasting Flights: Arrange progressive tastings from mild to more adventurous options
- “Perfect Pairs” Positioning: Place naturally complementary foods adjacent to each other
- Numbered Sequence Suggestions: Number items to suggest specific tasting order
- Dip Recommendation Tags: Label which dips pair best with specific items
Educational Components:
Incorporate learning opportunities through food presentation:
- Counting Elements: Arrange items in specific numbers or patterns for counting practice
- Color Categorization: Create distinct color sections for identification and sorting activities
- Shape Recognition: Cut foods into basic geometric shapes for educational identification
- Alphabet Integration: Include letter-shaped foods or arrange items to form letters
- Pattern Creation: Start patterns with alternating items that children can continue
Game Elements:
Add playful challenges that encourage interaction:
- Food Bingo: Create edible bingo cards where children eat items to mark spaces
- Treasure Hunt: Hide special items throughout the board for discovery
- Color Challenge: Encourage trying at least one food from each color group
- “I Spy” Prompts: Provide clues for finding specific items on the board
- Progressive Challenges: Create leveled food exploration challenges from easy to adventurous
Dipping and Stacking Opportunities:
Leverage children’s love of food manipulation:
- Multiple Dip Options: Offer variety of healthy dips in separate containers
- Stackable Food Shapes: Include items that can be stacked into towers
- Scoop-Friendly Sections: Provide foods that work well for scooping other items
- Spreading Stations: Include soft spreads with appropriate bases for child-led application
- Food Construction Materials: Select items that can be built into structures before eating
Pro tip: Create “Challenge Cards” that guide interactive exploration for different age groups! Design simple cards with age-appropriate activities like “Can you find three red foods?” for younger children or “Create a rainbow pattern using at least five different foods” for older kids. These prompts transform passive snacking into engaging food adventures while subtly encouraging broader taste exploration. Laminate the cards for reuse and offer small rewards (stickers, privileges) for completing challenges!
Healthy Balance Strategies

Create boards that delight both children and health-conscious parents by incorporating smart nutrition strategies that don’t sacrifice fun or appeal! These practical approaches balance enjoyment with wholesome eating:
Nutritional Distribution Blueprint:
Create well-balanced offerings through intentional planning:
- Protein Prominence: Ensure protein options comprise 25-30% of your board’s offerings
- Fruit Proportions: Dedicate approximately 25% to fresh, colorful fruit selections
- Vegetable Representation: Aim for vegetables to occupy 25-30% of the display
- Grain Moderation: Limit grain-based items (crackers, breads) to 15-20% of the board
- Treat Containment: Restrict sweet treats to no more than 5-10% of the total offering
Creative Vegetable Incorporation:
Make vegetables impossible to resist with these presentation strategies:
- Shape Transformation: Cut vegetables into stars, hearts, or other appealing shapes
- Character Creation: Arrange vegetables to form simple faces or creatures
- Color Excitement: Select naturally vibrant vegetables for maximum visual appeal
- Dip Integration: Position vegetables directly beside favorite dips
- Familiar Pairing: Place vegetables adjacent to well-loved items for association transfer
- Texture Variation: Offer vegetables in multiple forms—raw, roasted, different cuts
Protein-to-Carb Ratio Techniques:
Maintain substantial nutrition with these balancing approaches:
- Visual Dominance: Make protein sections visually larger than carbohydrate areas
- Pairing Strategy: Pre-pair proteins with carbs in suggested combinations favoring protein
- Substantial Centerpiece: Use protein-rich foods as the central focal point of your design
- Strategic Positioning: Place proteins at the board’s entry points where selection begins
- Size Manipulation: Cut proteins into larger pieces than accompanying carbohydrates
Natural vs. Processed Food Balance:
Create wholesome boards without eliminating kid appeal:
- Whole Food Focus: Emphasize minimally processed options in each category
- Strategic Substitution: Replace highly processed items with similar but more natural alternatives
- Visual Enhancement: Make whole foods visually spectacular through creative cutting and arrangement
- Ingredient Education: Briefly explain unique or unfamiliar whole foods to build interest
- Gradual Approach: Include mostly whole foods with small amounts of more processed favorites
Portion Control Through Visual Presentation:
Guide appropriate serving sizes through design techniques:
- Pre-Portioning Method: Cut items into appropriate single-serving pieces
- Container Control: Use small cups or dividers that naturally limit portion size
- Visual Boundaries: Create clear sections that suggest serving limitations
- Pick Presentation: Place small picks in items to suggest appropriate serving size
- Refreshable Design: Plan for refreshing smaller amounts frequently rather than overwhelming quantity
Pro tip: Create a “Rainbow Challenge” to naturally increase nutritional variety! Design your board with distinct sections of different colored foods, then encourage children to “eat a rainbow” by selecting at least one item from each color section. This simple game leverages kids’ love of colors while ensuring they receive a wider spectrum of nutrients, as different colored fruits and vegetables typically contain different vitamin and mineral profiles. Offer a small prize or recognition for those who complete their rainbow selection!
Themed Board Inspiration

Elevate ordinary snacking into magical themed experiences by adapting your board to special occasions! These creative concepts demonstrate how versatile charcuterie boards can become for children’s events:
Birthday Celebration Boards:
Transform your board into the perfect party centerpiece:
- Number Shapes: Arrange foods to form the child’s new age number
- Color Theme Coordination: Match board colors to party decorations
- Favorite Character Integration: Design arrangements resembling beloved characters
- Candle Incorporation: Add small candles for wish-making moments
- Individual Celebration Cups: Create pre-portioned birthday cups for easy serving
Holiday-Specific Arrangements:
Seasonal celebrations inspire these festive creations:
- Christmas: Arrange foods in tree shapes with star cheese toppers and cranberry “ornaments”
- Halloween: Create monster faces with strategically placed foods or spider web designs
- Easter: Form bunny shapes with fruit outlines and vegetable features
- Valentine’s Day: Design heart-shaped arrangements using red and pink foods
- Thanksgiving: Arrange items to form turkey shapes with fruit and vegetable “feathers”
Movie Night Themes:
Pair screen time with perfectly matched refreshments:
- Animation Inspiration: Recreate simplified character faces from favorite cartoons
- Color Schemes: Match food colors to movie themes (blue/white for frozen movies, etc.)
- Iconic Symbol Recreation: Form recognizable symbols from popular franchises
- Viewing Vessels: Use small popcorn containers for individual selections
- Cinema Classics: Include traditional movie snacks in healthier, board-friendly versions
Seasonal Outdoor Picnic Versions:
Take your creations beyond the kitchen with portable designs:
- Summer Beach Themes: Sand-colored crackers, blue fruit “water,” and umbrella picks
- Fall Harvest Boards: Autumn colored vegetables, apple varieties, and leaf shapes
- Spring Garden Designs: Flower-shaped arrangements with vegetable “stems”
- Winter Wonderland Concepts: Snowman shapes, blue/white color schemes, and warm dips
- Transportation Considerations: Individual containers for maintaining design during travel
After-School Snack Boards:
Create weekday boards that balance efficiency with fun:
- Homework Helper Design: Brain-boosting foods arranged in study-friendly sections
- Energy Level Consideration: Include protein-rich options for after-school fatigue
- Quick Assembly Format: Simplified designs that come together in minutes
- Refrigerator-Ready Components: Pre-cut items that assemble instantly after school
- Lunchbox Leftover Integration: Creative repurposing of lunch remainders
Slumber Party Grazing Stations:
Evening gatherings call for these specially designed displays:
- Late-Night Accessibility: Create boards that maintain safety during extended serving
- Activity Integration: Design sections corresponding to different party activities
- Group Participation: Include assembly stations where multiple children can create together
- Pajama Party Themes: Arrange foods in moon shapes, stars, or “dream” themes
- Illumination Consideration: Incorporate safe lighting elements for nighttime serving
Pro tip: Create a “Theme Transformation Kit” that allows you to quickly adapt basic boards to different occasions! Stock a special container with themed cookie cutters, decorative picks, and non-perishable decorative elements organized by holiday or event type. This ready-to-go collection lets you transform even last-minute boards into special themed creations by simply applying the right decorative elements to your standard food selections. Add seasonal items to this kit throughout the year as you spot them on sale!
Practical Tips for Success


Master the practical aspects of board creation with these essential strategies that ensure success beyond just visual appeal! These behind-the-scenes techniques create stress-free execution while maintaining food safety and freshness:
Preparation Timeline and Make-Ahead Components:
Strategic advance work creates smooth assembly experiences:
- 3-5 Days Before: Plan design, create shopping lists, order special items
- 2 Days Before: Shop for non-perishable items, prepare any items that freeze well
- Day Before: Shop for perishables, wash and dry produce, cut stable ingredients (hard cheeses, cured meats)
- Morning Of: Cut remaining fruits and vegetables, prepare dips, pre-portion individual servings
- 1 Hour Before: Begin board assembly with non-perishable base items
- Last 30 Minutes: Add temperature-sensitive items, final decoration, and photography
Food Safety Considerations:
Protect young eaters with these important precautions:
- Temperature Monitoring: Keep perishable items properly refrigerated until final assembly
- Two-Hour Rule: Follow the standard safety guideline of two hours maximum at room temperature
- Serving Tools: Provide appropriate utensils for each section to prevent cross-contamination
- Hand Hygiene: Position hand sanitizer or wipes nearby for pre-selection cleaning
- Allergen Protection: Use separate boards or distinct sections for common allergens
- Replacement Schedule: Plan for refreshing perishable items during extended serving periods
Freshness Maintenance Techniques:
Keep your display looking and tasting its best:
- Strategic Timing: Assemble as close to serving time as possible
- Lemon Juice Application: Brush cut apples, pears, and bananas with lemon juice to prevent browning
- Moisture Management: Pat washed produce completely dry before placing on board
- Proper Layering: Place dry items beneath those that might release moisture
- Refrigeration Gaps: Don’t place board directly from refrigerator to room temperature (causes condensation)
- Staged Introduction: Hold back some items to refresh the board as needed
Easy Cleanup Strategies:
Simplify the post-board experience with these smart approaches:
- Liner Implementation: Place parchment paper beneath your arrangement for easy cleanup
- Container Planning: Use dishwasher-safe small containers for messy items
- Crumb Management: Select a board with juice grooves or raised edges
- Serving Station Organization: Position trash/compost receptacles nearby for immediate disposal
- Leftover Plan: Have storage containers ready for packing excess items
- Efficient Reset: Prepare a simple cleaning kit nearby for quick touch-ups during serving
Budget-Friendly Approaches:
Create impressive boards without overspending:
- Sale Shopping: Plan boards around seasonal sales and weekly specials
- Bulk Breaking: Purchase larger quantities and divide into portions for multiple boards
- Focus Investment: Splurge on one or two special items while keeping others simple
- Homemade Elements: Create special components like dips rather than buying premade
- Reusable Investment: Purchase quality serving pieces that can be used repeatedly
- Seasonal Selection: Feature produce during its peak season when prices are lowest
Pro tip: Create a reusable “Board Building Checklist” laminated for repeated use! Design a simple one-page guide that walks through your personal process from planning through cleanup, with checkboxes for each step. Include your go-to quantities for different guest counts, standard shopping list items, assembly sequence reminders, and cleanup procedures. This personalized tool prevents missed steps during busy preparation while building consistent habits that streamline your process with each new creation!
Troubleshooting Common Challenges

Navigate potential pitfalls with confidence using these expert solutions to common kid charcuterie board challenges! These practical troubleshooting strategies help you handle unexpected situations with ease:
Preventing Board “Destruction”:
Maintain your beautiful design despite enthusiastic little hands:
- Strategic Sturdiness: Place more robust items in high-traffic areas of your board
- Section Refreshment: Prepare extra portions of popular items for quick replenishment
- Service Pattern Guidance: Create subtle visual cues that guide orderly selection
- Serving Tool Provision: Position age-appropriate utensils to encourage proper selection
- Photography Timing: Capture your masterpiece before children begin serving
- Restoration Plan: Have a quick fix strategy for rearranging disturbed sections
Managing Different Age Groups:
Accommodate various development levels at the same board:
- Height Accommodation: Position a step stool for smaller children to view and select comfortably
- Age-Appropriate Sections: Create designated areas with foods suited to different age groups
- Mixed Accessibility: Ensure everyone can reach some appropriate options
- Supervision Zoning: Position items requiring more oversight where adults can easily monitor
- Service Staging: Consider inviting different age groups to approach in sequenced waves
- Safety-First Design: Place choking hazards only in sections designated for older children
Temperature Management for Extended Serving:
Keep foods safe and appealing during longer events:
- Ice Pack Foundation: Place frozen ice packs beneath sections requiring refrigeration
- Rotation Schedule: Plan for replacing temperature-sensitive items at timed intervals
- Staged Introduction: Hold back portions of perishable foods in refrigeration for later display
- Container Selection: Use insulated serving vessels for items needing temperature control
- Environmental Consideration: Position board away from heat sources (sun, heating vents)
- Monitoring System: Use a simple timer to track how long perishable items have been served
Handling Food Allergies at Shared Boards:
Create safe experiences for all participants:
- Clear Labeling System: Develop obvious but attractive identification for allergen-containing foods
- Physical Separation: Use distinct sections with ample space between allergen zones
- Duplicate Tools: Provide separate serving utensils for each allergenic item
- Service Order: Invite allergic children to select first to prevent cross-contamination
- Adult Supervision: Ensure informed supervision near allergen-containing sections
- Emergency Preparedness: Keep allergy information and any necessary medications accessible
Adjusting for Unexpected Guest Numbers:
Adapt your board when attendance surprises you:
- Expansion Strategy: Know which elements can be easily spread out or supplemented
- Portion Adjustment: Quickly modify individual portions for larger-than-expected crowds
- Supplemental Solutions: Keep simple additional items on hand for quick additions
- Staged Replacement: Hold back portions for refreshing heavily trafficked sections
- Container Additions: Incorporate small vessels to make limited quantities appear more substantial
- Focus Maintenance: Ensure your centerpiece and focal points remain intact regardless of crowd size
Pro tip: Create a “Quick Recovery Kit” stored near your serving area for immediate issue resolution! Stock a small container with board-saving supplies like extra serving tools, food picks, small refill containers of popular items, decorative elements for covering empty spots, and cleaning tools for quick spill management. This emergency kit allows you to quickly address unexpected situations without leaving the serving area, maintaining your board’s appeal even when challenges arise!

Teaching Moments and Social Skills


Transform snack time into valuable learning opportunities by incorporating these educational and social skill development elements! The communal nature of charcuterie boards creates perfect teaching moments:
Introducing Good Manners:
Reinforce etiquette naturally through shared food experiences:
- Serving Demonstrations: Model proper use of serving utensils and appropriate portion taking
- Verbal Courtesy: Practice “please,” “thank you,” and “may I?” when requesting board access
- Waiting Skills: Establish taking turns rather than reaching across others
- Personal Space: Respect others’ selections without touching or commenting negatively
- Mess Management: Demonstrate napkin use and proper handling of dropped items
Taking Turns and Sharing:
Develop cooperative skills through communal dining:
- Sequential Selection: Create natural turns by inviting children to select one item at a time
- Group Awareness: Encourage noticing if someone hasn’t had access to a particular section
- Portioning Guidance: Discuss taking appropriate amounts so everyone gets some
- Offering Behavior: Practice offering to pass items to others before serving oneself
- Language Development: Use phrases like “Would you like some?” and “Who would like this next?”
Trying New Foods:
Create low-pressure opportunities for expanding palates:
- Curiosity Questions: Ask “What does that look like?” or “I wonder what that tastes like?” rather than pressuring
- Tiny Taste Approach: Encourage “just trying one small bite” without requiring consumption
- Positive Modeling: Have adults and adventurous eaters visibly enjoy unfamiliar items
- Experience Description: Focus on describing rather than judging the experience (“It’s crunchy!” versus “I don’t like it”)
- No-Pressure Policy: Allow polite declining without negative consequences
Food Education Opportunities:
Build knowledge naturally through casual conversation:
- Origin Discussions: Talk about where different foods come from (plants, animals, geography)
- Color Exploration: Discuss why fruits and vegetables have different colors and what that means nutritionally
- Sensory Vocabulary: Develop language for describing tastes, textures, and appearance
- Nutrition Basics: Introduce simple concepts about food groups and their body benefits
- Cultural Connections: Share stories about traditional foods from different backgrounds
Appreciation Development:
Foster gratitude and awareness through thoughtful practices:
- Preparation Recognition: Acknowledge the work that went into creating the board
- Source Appreciation: Discuss farmers, food workers, and others who helped provide the food
- Gratitude Expression: Practice saying thank you for particularly enjoyed items
- Waste Awareness: Discuss taking only what will be eaten and appreciate food’s value
- Sharing Joy: Notice and comment on the pleasure of sharing meal experiences together
Pro tip: Create “Conversation Starter Cards” placed strategically around your board to naturally facilitate learning moments! Design simple question or prompt cards like “Where do you think this fruit grows?” or “What’s your favorite red food and why?” These thoughtful talking points spark educational discussions without feeling like formal lessons. The cards create natural opportunities for children to share observations, ask questions, and develop both food knowledge and conversational skills in a relaxed, enjoyable setting!
Conclusion

You’re now equipped with everything needed to create engaging, nutritious, and visually spectacular food displays that children will enthusiastically enjoy! These kid-friendly charcuterie boards transform ordinary snacking into memorable food experiences that nourish both body and developing minds.
The beauty of these versatile creations lies in their adaptability to your specific needs. Whether crafting an after-school snack board for just your children, planning a birthday party centerpiece, or creating a holiday gathering display, the core principles remain the same—thoughtful selection, appealing arrangement, and interactive elements that engage young eaters.
The most successful kid charcuterie boards find that perfect balance between nutritional value and genuine appeal. By incorporating appropriate proportions of protein, fruits, vegetables, and grains alongside strategic placement of treat elements, you create experiences that satisfy both children’s desires and parents’ nutritional goals. This “best of both worlds” approach makes these boards uniquely valuable in today’s food landscape.
Remember that perfection isn’t the goal—connection is. While Instagram-worthy arrangements are wonderful when they happen, the true value comes from creating positive food experiences that build healthy relationships with eating. The conversations sparked, the trying of new foods, the practice of sharing and manners—these elements create lasting impact far beyond the visual appeal of your creation.
Start with simpler boards featuring familiar favorites, then gradually expand both your presentation techniques and food offerings as you gain confidence. Document what works well for your specific children or group, noting favorite arrangements, successful combinations, and popular interactive elements. This personalized knowledge becomes your best resource for future creations.
We’d love to see your kid-friendly charcuterie masterpieces! Tag us @CelebrationSHE with photos of your creative boards and let us know which elements became instant favorites with your young diners. Happy arranging, and even happier munching!
Key Takeaways:
- Kid-friendly charcuterie boards offer an engaging way to present varied, nutritious foods in visually appealing formats
- Successful boards balance familiar favorites with gentle introductions to new options
- Age-appropriate selections and presentations ensure safety and appeal for specific developmental stages
- Interactive elements transform passive eating into engaging food exploration
- Thoughtful design and organization create Instagram-worthy presentations that still function practically for real children
- These versatile displays adapt easily to different themes, occasions, and dietary needs
- The communal nature of boards creates natural opportunities for teaching important social skills
- Advance preparation and strategic assembly ensure stress-free execution
- The ultimate goal extends beyond appearance to creating positive, memorable food experiences